Table of Contents
- Getting Started
- Agent-Based Monitoring
- Data Providers
- Directory Services
- Auditing
- Hosts
- Templates
- Template Properties
- Batch Update Templates
- Log Management Templates
- File and Directory Monitor Templates
- Windows Monitor Templates
- Account Lockout Monitor Template
- Logon Monitor Template
- CPU Monitor Template
- Memory Monitor Template
- Disk Space Monitor Template
- SMART Monitor Template
- Windows Update Template
- Process Monitor Template
- Service Monitor Template
- Performance Counter Monitor Template
- PowerShell Template
- Registry Value Monitor Template
- Active Directory User Monitor Template
- Active Directory User Integrity Monitor Template
- Task Scheduler Template
- Clock Synchronization Template
- Defragment NTFS Disks Template
- Network and Application Monitor Templates
- Database Monitor Template
- Directory Service Monitor Template
- DNS Blacklist Monitor Template
- DNS Monitor Template
- Domain Expiration Monitor Template
- Network Speed Monitor Template
- Ping Monitor Template
- Database Table Reseed
- SQL Server Shrink and Backup Template
- SSH Shell
- TCP Port Scan Monitor Template
- Website Monitor Template
- SSL Certificate Monitor Templates
- Email Monitor Templates
- SNMP Monitor Templates
- Monitors
- Reports
- Auto-Configurators
- Filters
- Actions
- Desktop Actions
- Email Actions
- Event Log Actions
- Executable Actions
- File Actions
- IIS IP Address Restriction Actions
- Microsoft Teams Actions
- PowerShell Actions
- Report Actions
- Service Actions
- SMS Actions
- SNMP Trap Actions
- Syslog Actions
- Template Actions
- IIS IP Address Restriction Actions
- Action Variables
- Schedules
- Environment Variables
- Options
- Account Lockout Monitoring and Reporting
- Merging Logs
- SNMP
- SSH Shell
- Syslog
- Exporting and Importing Configuration Objects
- Shared Views
- Auto-Config Host Assignment Properties
- General Executable Properties
- Assign Actions
- Assign Directories
- Assign Disks
- Assign Shares
- Assign Files
- Assign Consolidated Logs
- Assign Event Logs
- Assign Azure Audit Logs
- Target Files and Sub-Directories
- Define Log Entry Columns
- Define Log Entry Columns with Regular Expressions
- Define CSV and W3C Log Entry Columns
- Active Directory User and Group Filters
- Explicitly Assigned Logs
- File Explorer
- Report Columns
- Report Date/Time Ranges
- Report Security Event Log Filters
- Select Folder or File
- Executable Timeline
- Command Line Interface
- Troubleshooting
- Terminology
Corner Bowl Server Manager
SIEM, IPS, Server Monitoring, Uptime Monitoring and Compliance Software
Email Settings
The Email Settings view enables you to configure the email connection settings. Server Manager enables you to configure both a Primary and Backup SMTP and Graph API Email servers. The Backup Email Server is used in the event the Primary Email Server cannot be reached or is throwing a fatal error.
In this Topic
How to configure Email
- From the Explorer view, choose Options, then select Email Settings. The Email Settings view displays.
-
Use the System administrator email address text box to enter one or more email addresses.

Separate multiple email addresses by commas. Note: The administrator email is used to send license error notifications. For example, this email address is used when the system MAC address changes causing the software to lose its licensing. -
Use the Type drop-down to specify the email API and connection method. The following options are available:
Option Description Plain Text Sends plaintext and unsecure email messages using SMTP. Only use this method when sending messages over a secure internal network.
Uses port 25 by default.STARTTLS Sends email messages securely using SMTP. This method is the industry standard and should be used when ever possible. Use this option when sending SMTP messages from Microsoft Office 365 accounts.
Uses port 587 by default.SSL Sends email messages securely using SMTP over a Secure Sockets Layer (SSL) channel. This option is provided for legacy email server implementations.
Uses port 465 by default.Microsoft Graph Sends email securely from a Microsoft Office 365 account using Microsoft's Graph API.
SMTP Email
- Use the Server text box to specify your email server.
-
Use the Port text box to specify your email server port.
Port Description 25 Default 587 TLS 465 SSL -
Use the Username text box to enter the username to access the mail server.
To send anonymous email leave the Password field blank. If you leave the Username blank, the email server's spam engine will likely flag the messages as spam. - Use the Password text box to enter the password to access the email server.
-
Use the From name text box to enter the friendly From name listed in the email (e.g. Corner Bowl Server Manager).
When using a service provider, such as Amazon Simple Email Service, that requires users to first authenticate with a non-email username and password, use this field to specify both your from name and from email. For example: Corner Bowl Server Manager <cbsm@yourdomain.com>
Microsoft Graph API Email
Setting up the Microsoft Graph API requires multiple steps. First, you need to setup your Azure environment so an external application can send email through Graph, then, you need to configure Server Manager to use the Graph API.
Configuring Azure
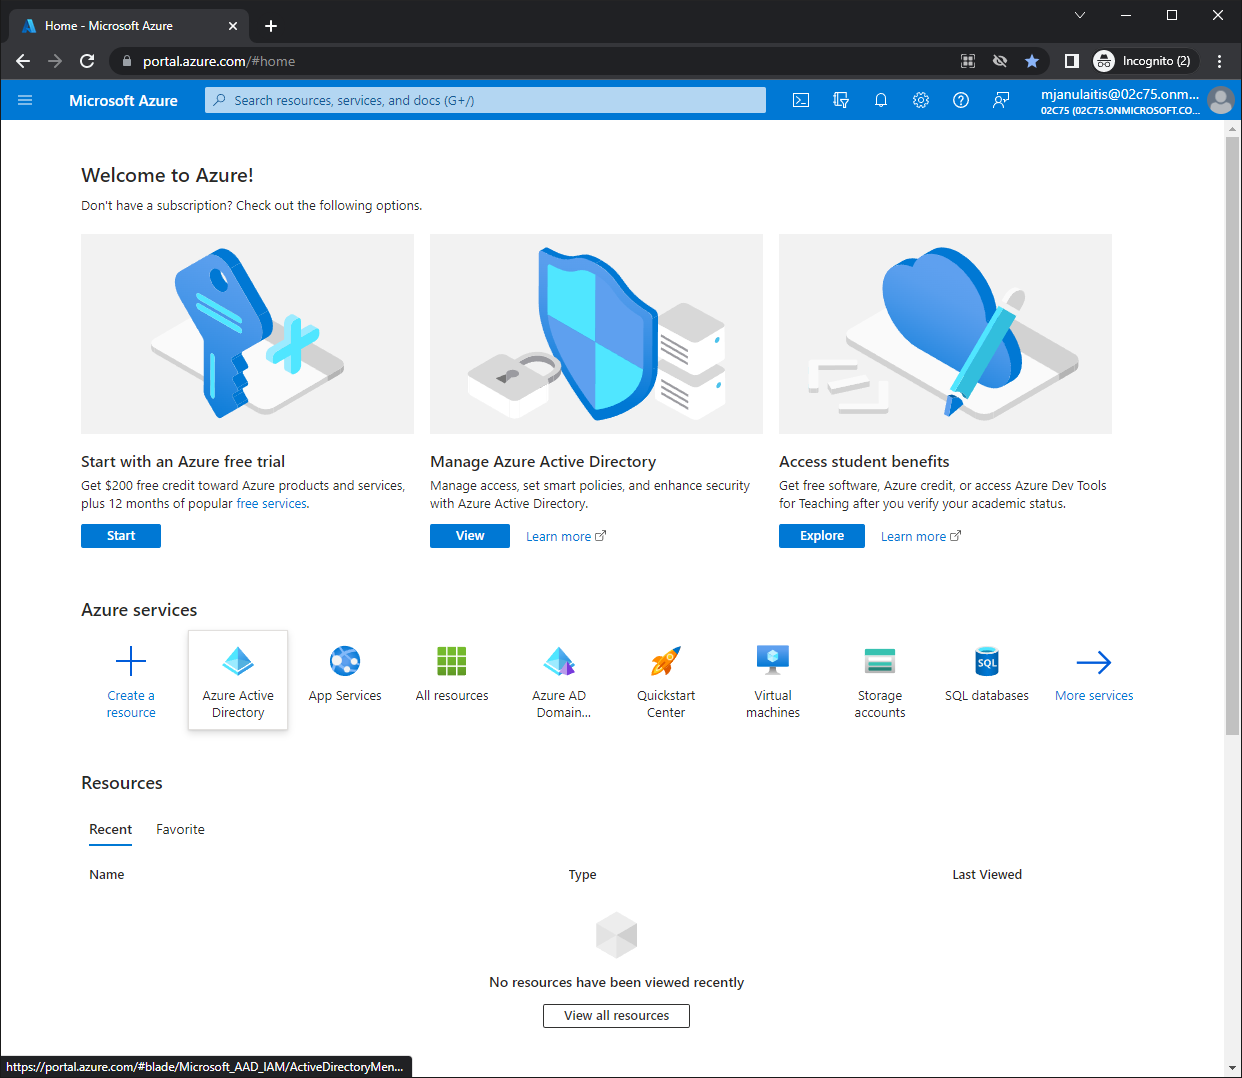
- Go to https://portal.azure.com/ then login.
- Once logged in, select Azure Active Directory.
![Select Azure Active Directory]() Select Azure Active Directory
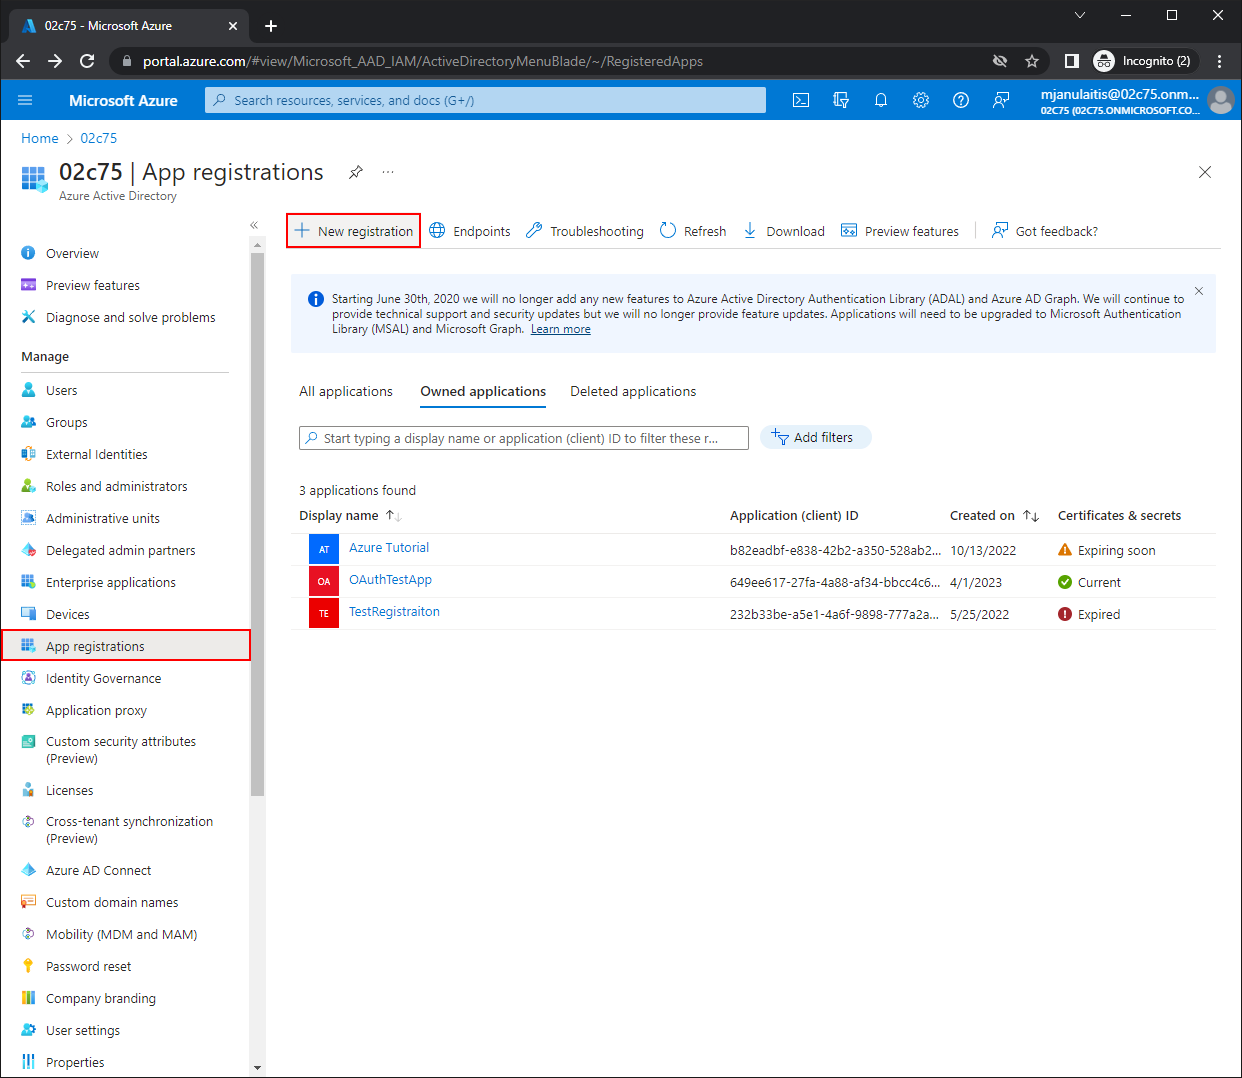
Select Azure Active Directory - Select App Registrations then New Registration.
![Select New Registration]() Select New Registration
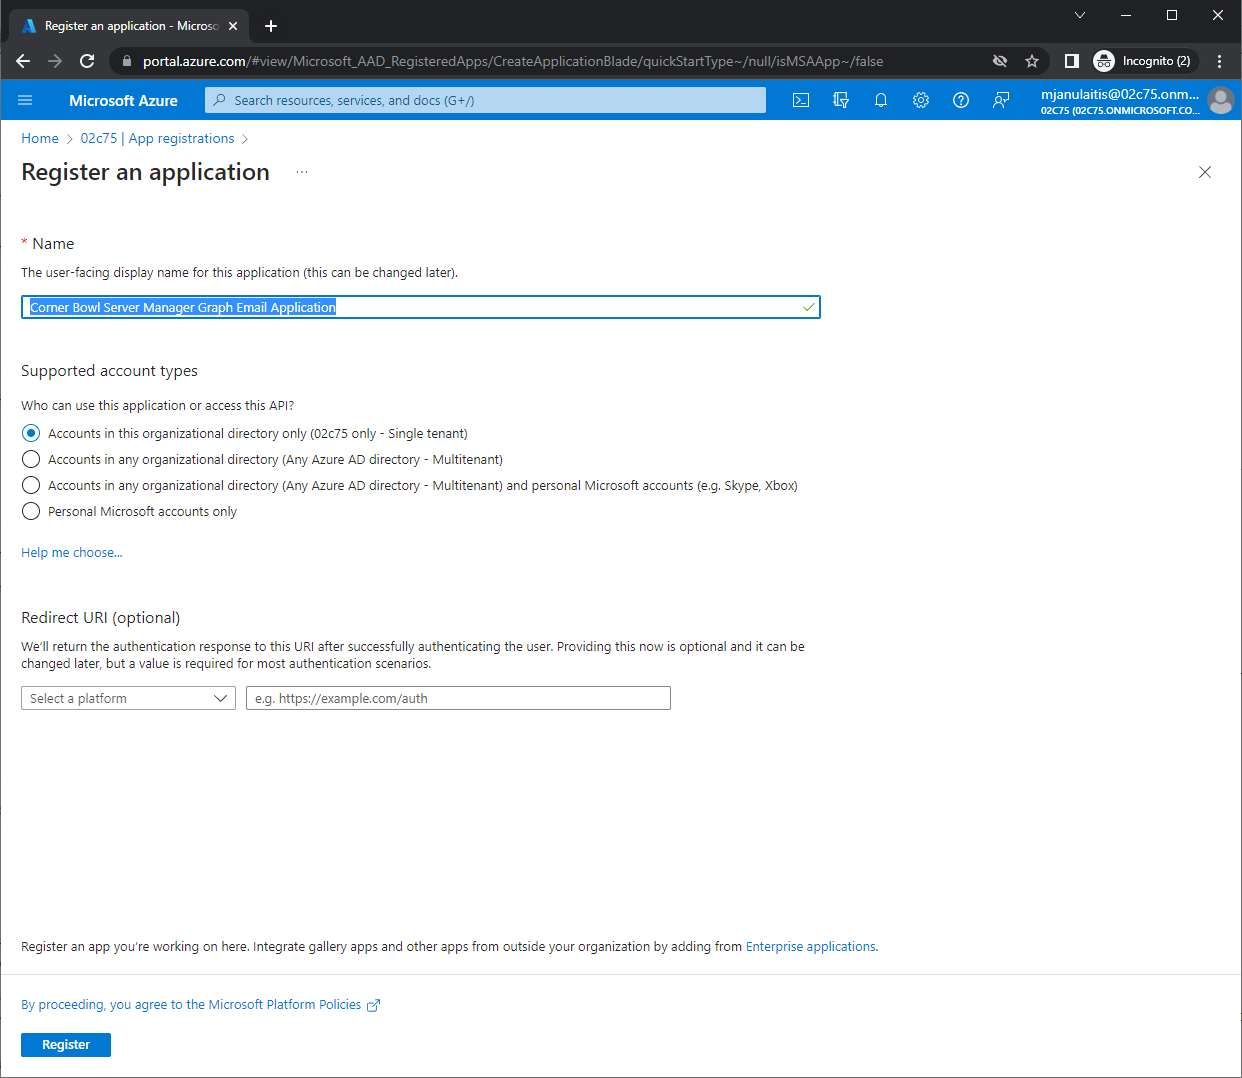
Select New Registration - Use the Name text box to specify a friendly name then click Register.
![New Registration name]() New Registration name
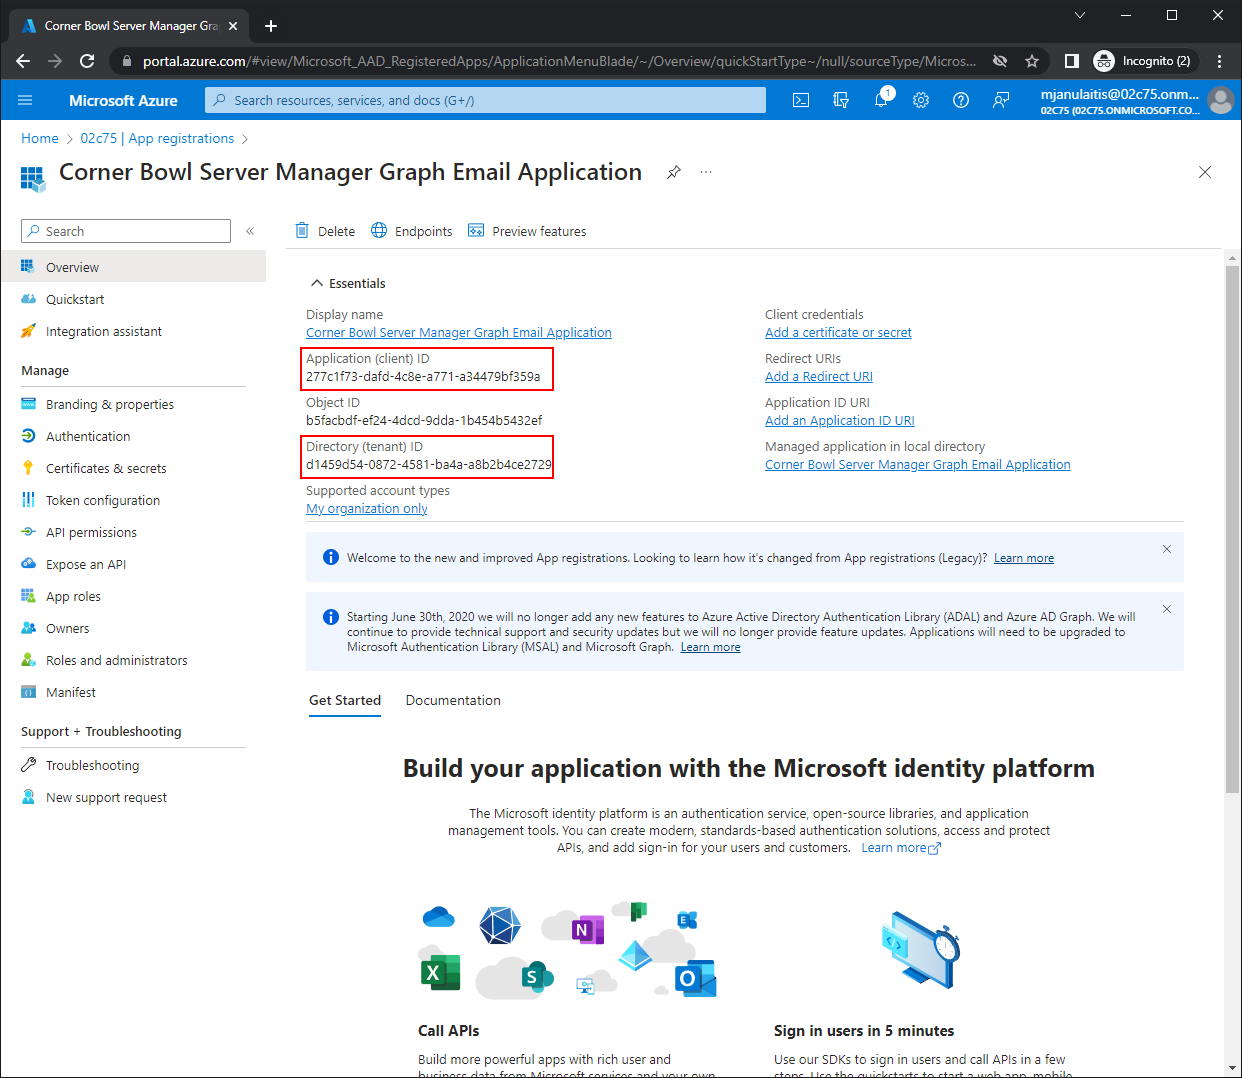
New Registration name - Once the application is created, take note of the Application (client) ID and the Directory (tenant) ID. These values will be used later in Corner Bowl Server Manager.
![Azure Application Registration]() Application Registration
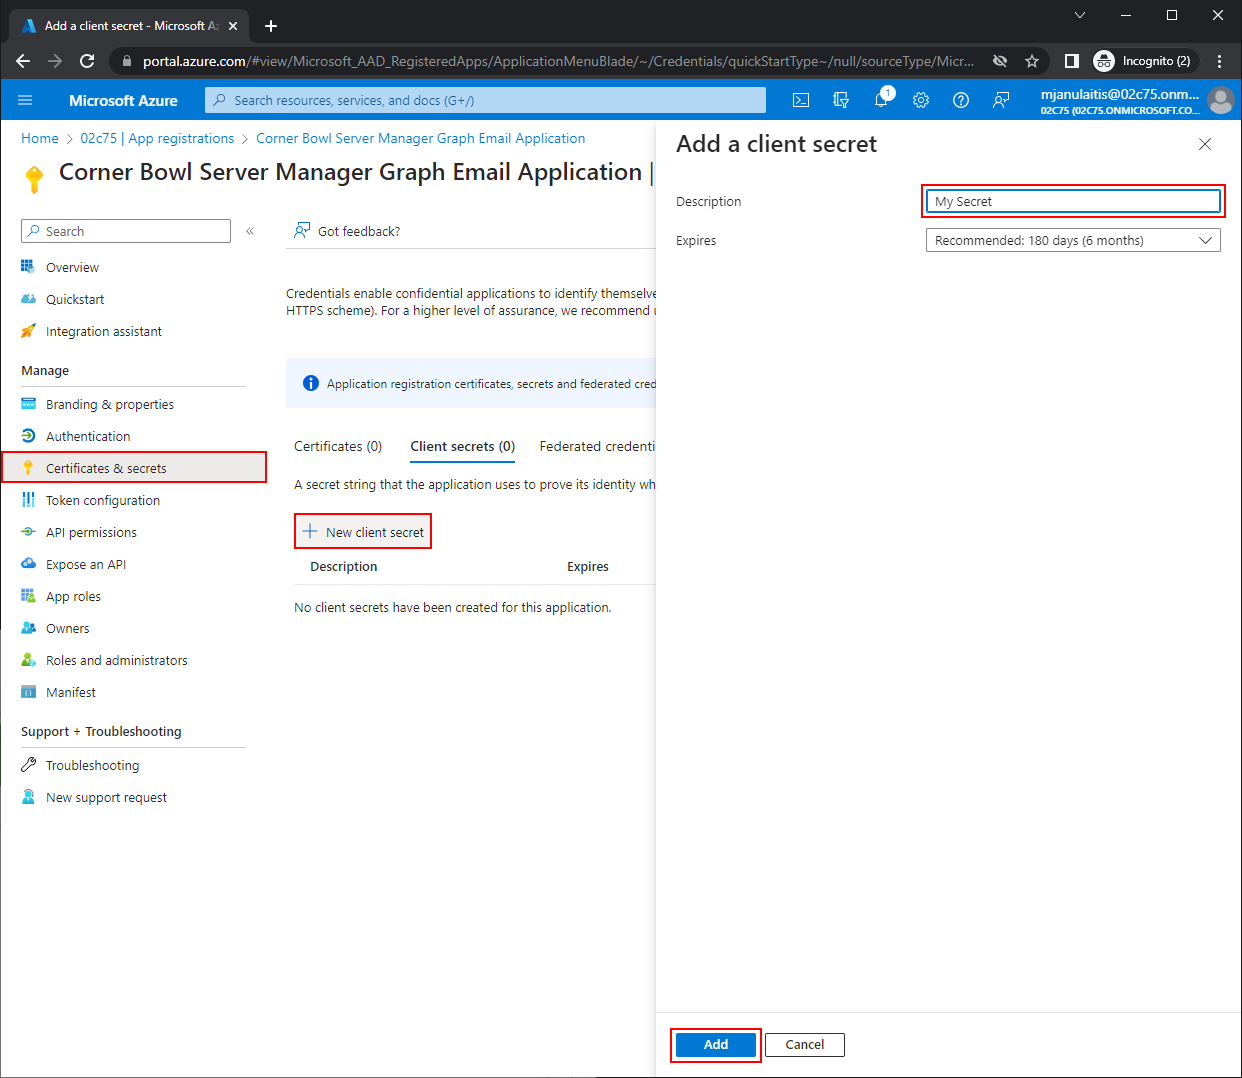
Application Registration - Select Certificates and secrets, New client secret, then use the Description text box to specify a friendly name. Lastly, click Add.
![Add a new client secret]() Add a new client secret
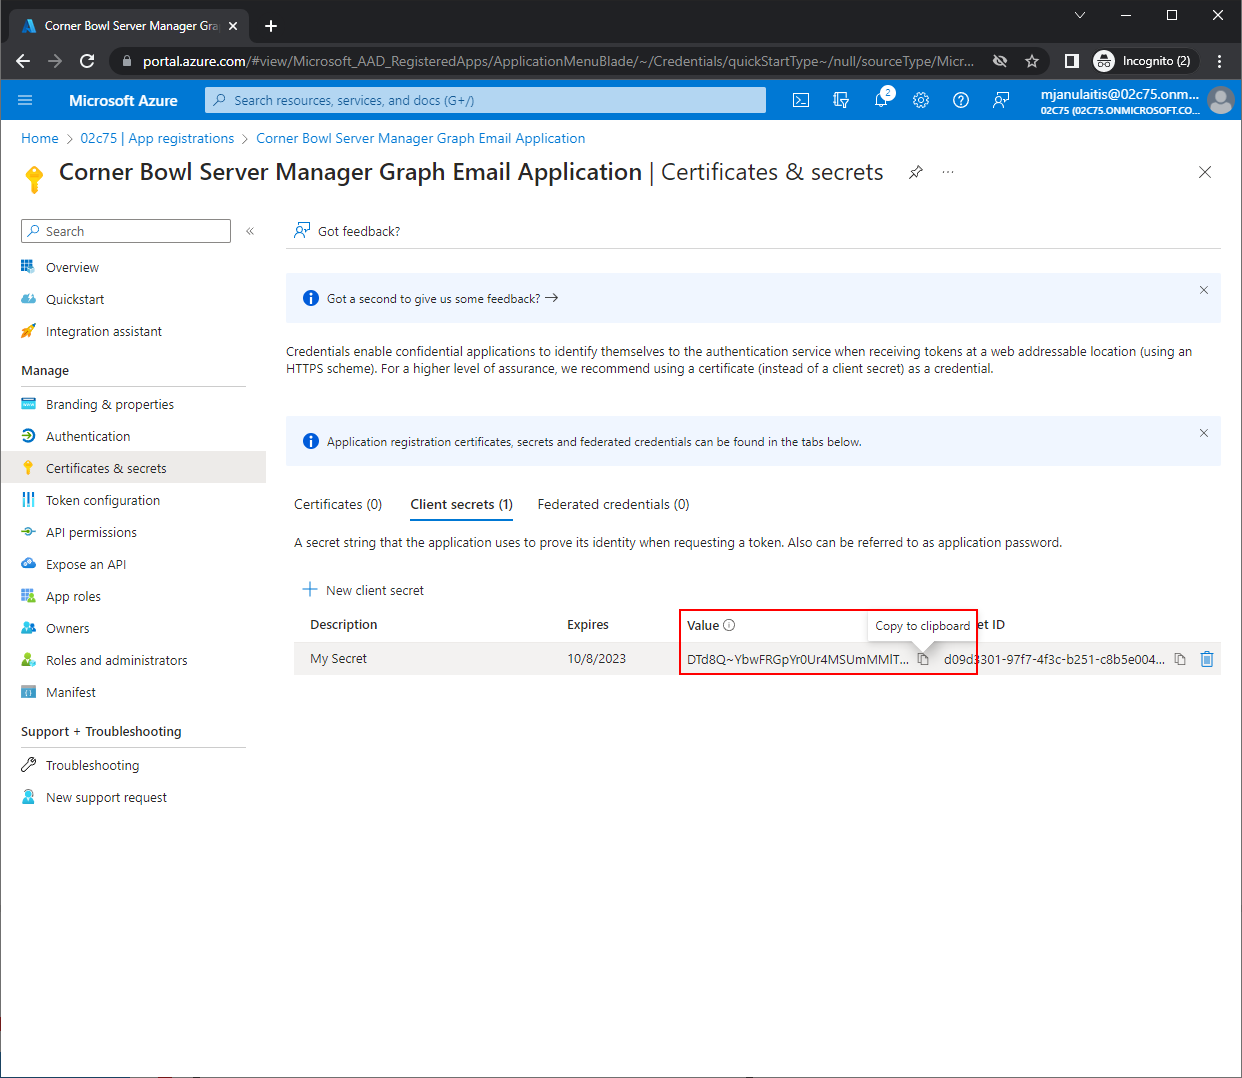
Add a new client secret - Once added, immediately copy the client secret to a text editor for later use in Corner Bowl Server Manager. Once you leave this screen you will no longer be able to access the client secret.
![Copy the client secret]() Copy the client secret
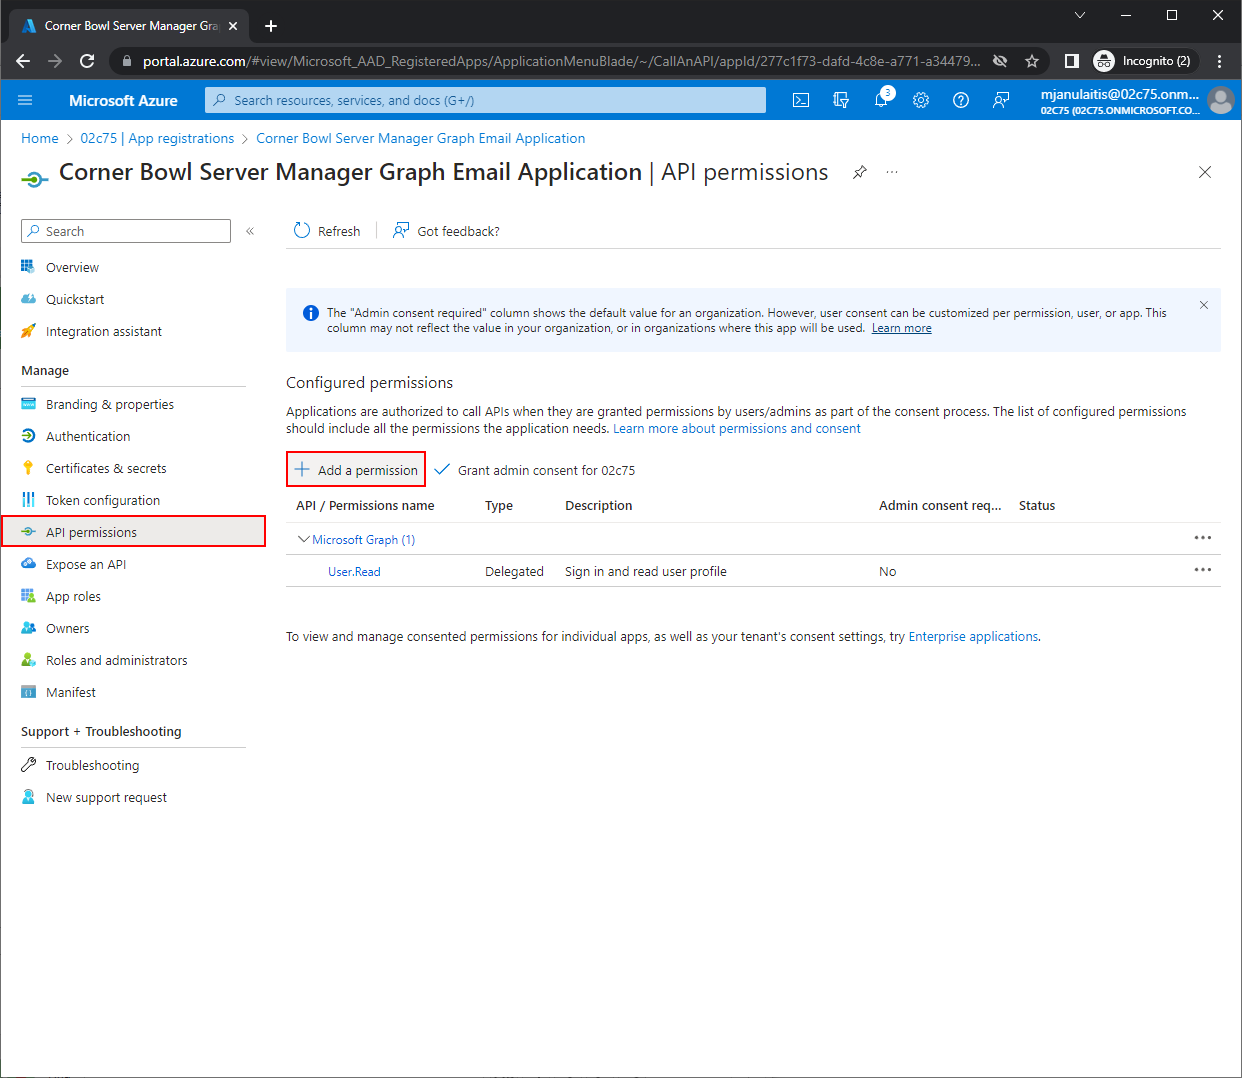
Copy the client secret - Select API Permissions, then Add a permission. The Request API permissions blade displays.
![Select add a permission]() Select add a permission
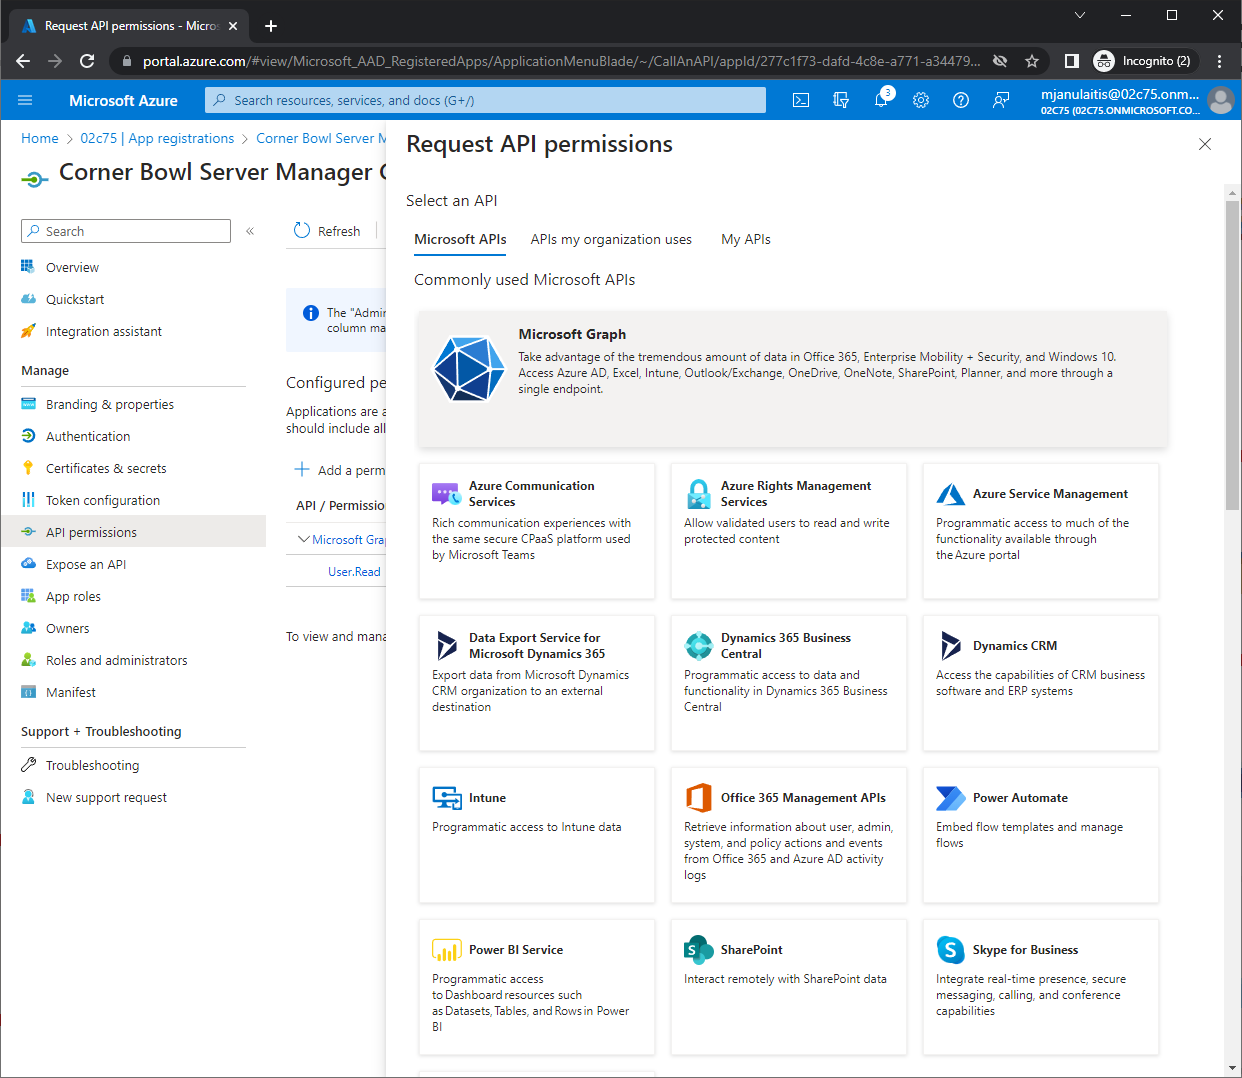
Select add a permission - From the Request API permissions blade, select Microsoft Graph.
![Select the Graph API]() Select the Graph API
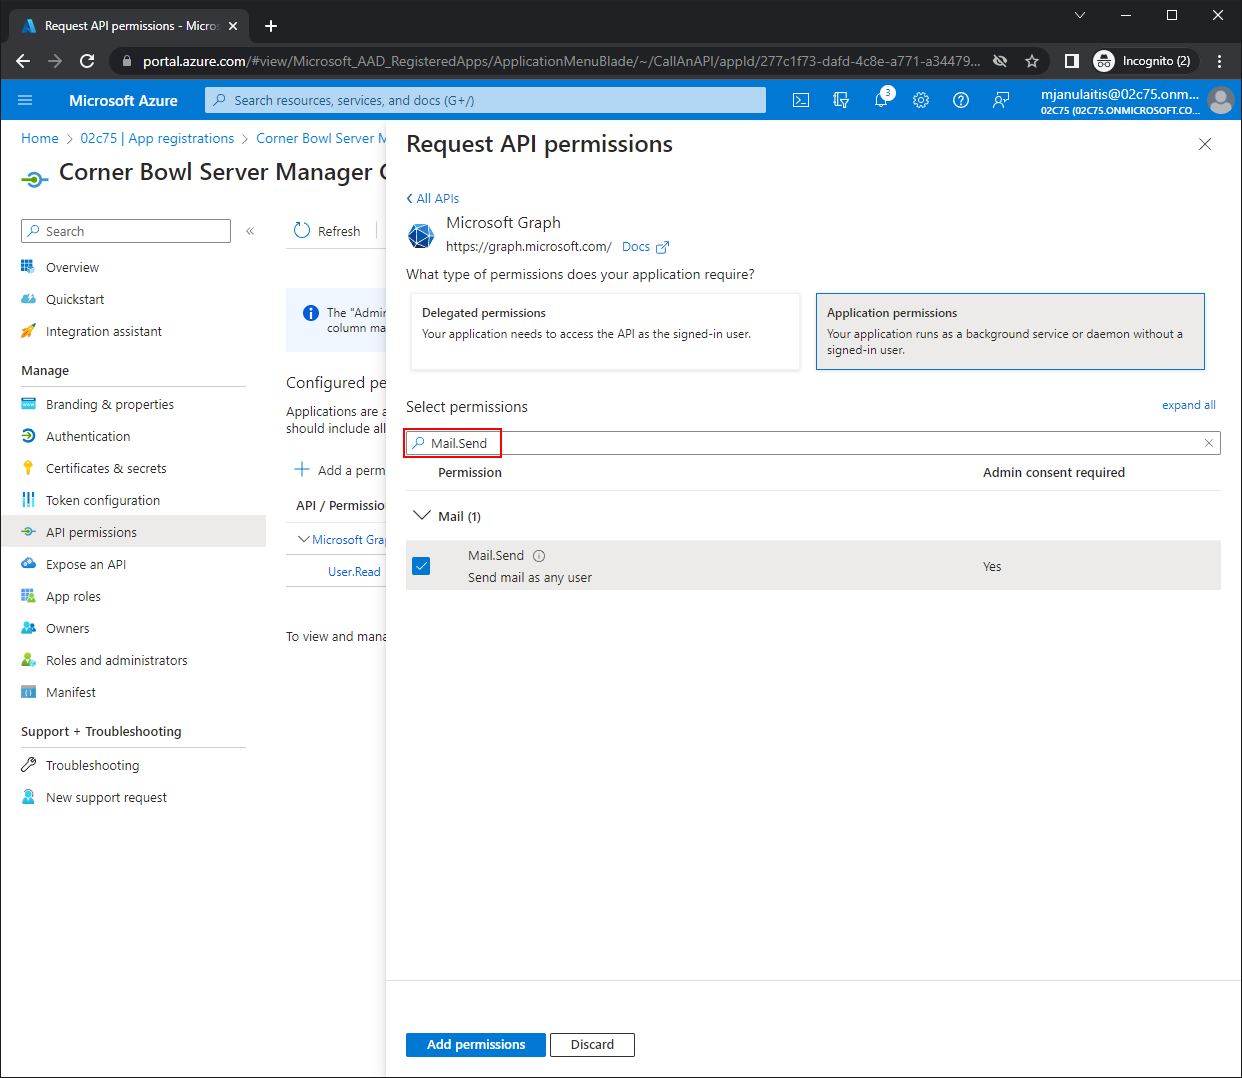
Select the Graph API - Select Application permissions, then from the Select permissions text box type Mail.Send, expand Mail, check Mail.Send. Lastly, click Add permissions.
![Add Mail.Send permission]() Add Mail.Send permission
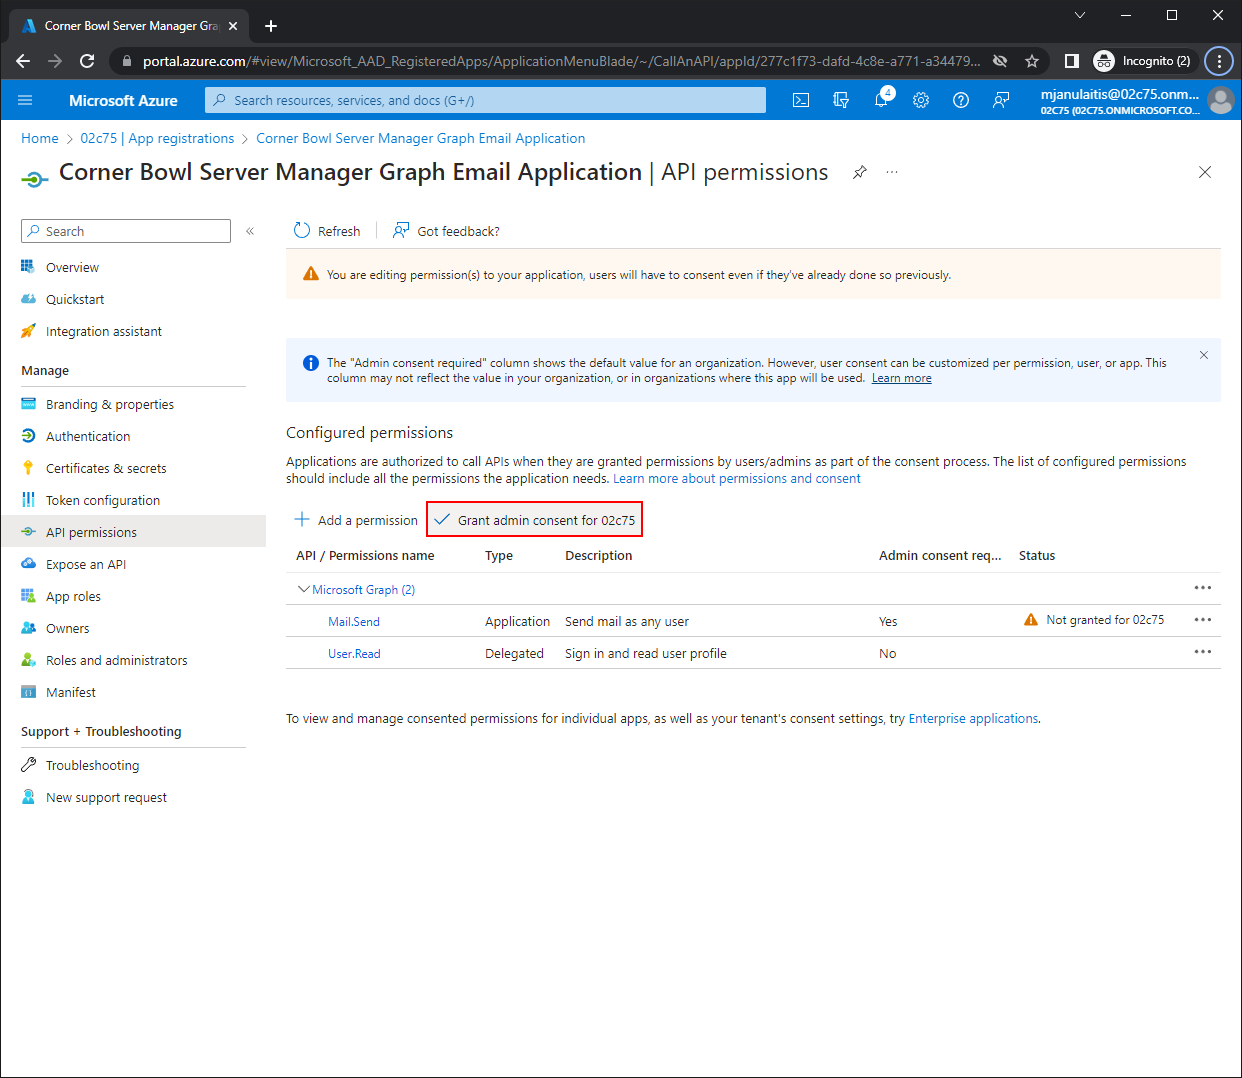
Add Mail.Send permission - Once the permission has been added, click Grant admin consent. When prompted, confirm the consent.
![Grant administrator consent]() Grant administrator consent
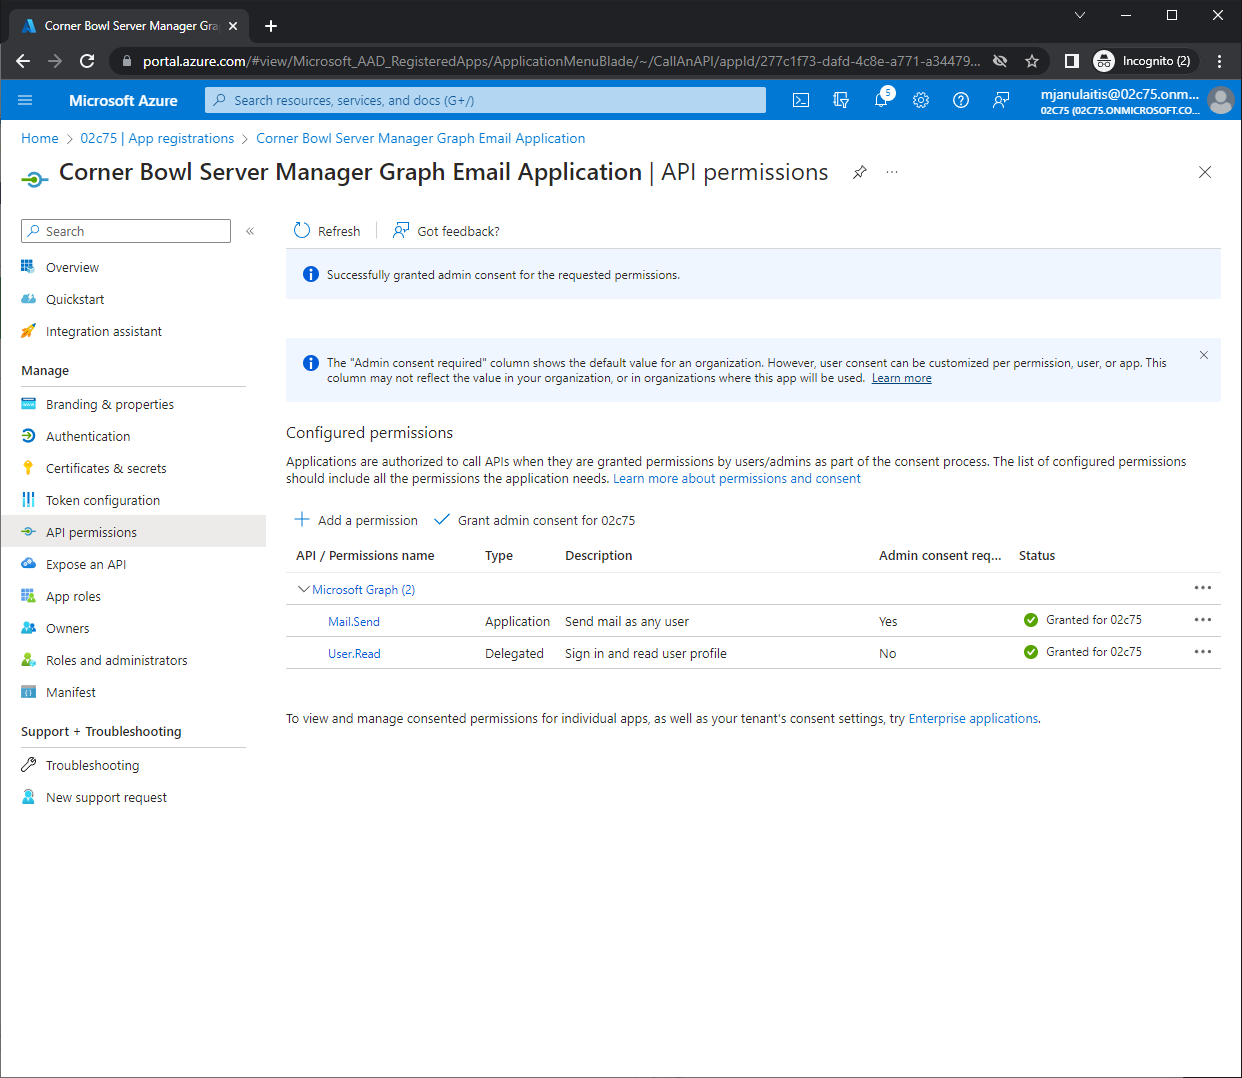
Grant administrator consent![The required Azure app permissions]() The required Azure app permissions
The required Azure app permissions
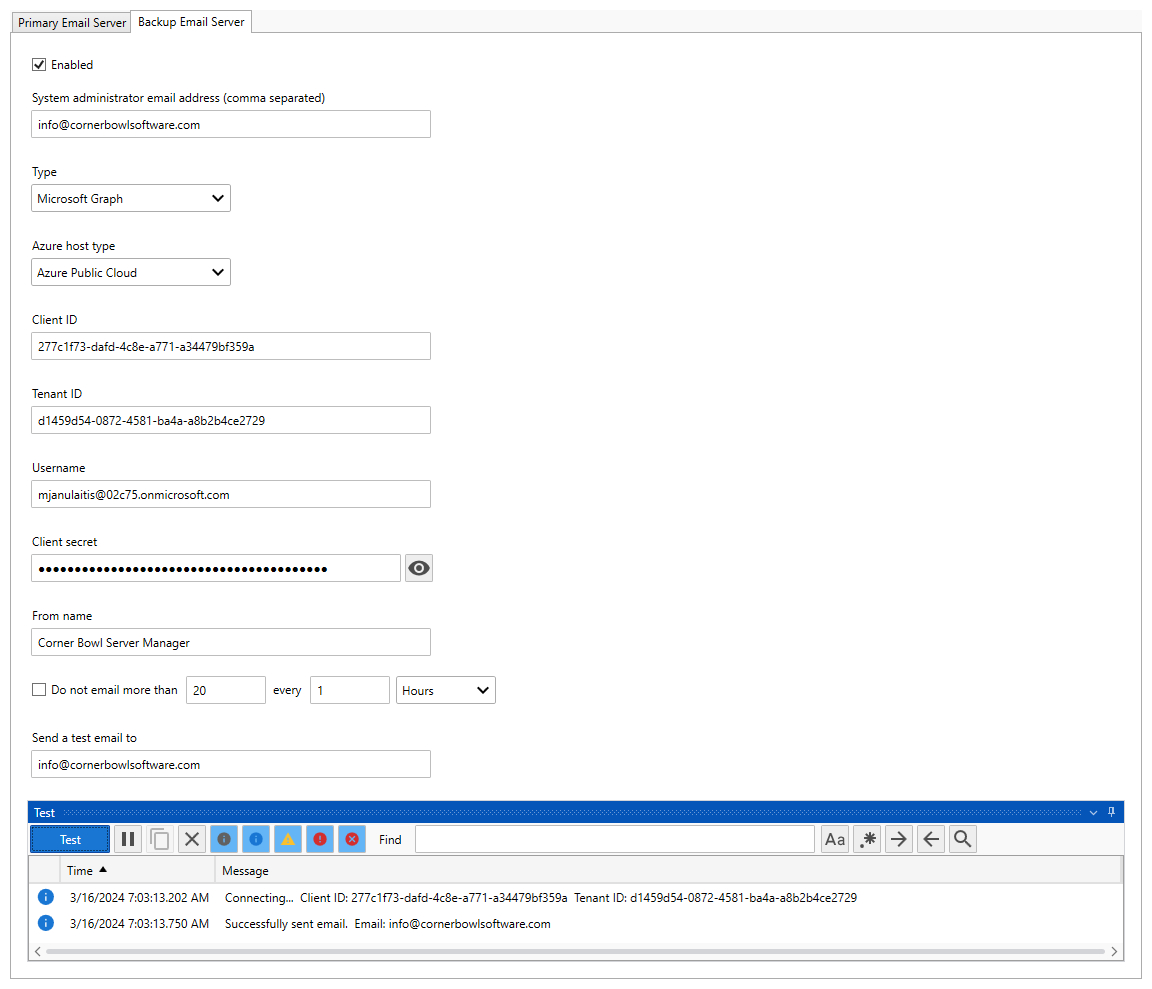
Configure Corner Bowl Server Manager
- From the Explorer View, select Options | Email Settings.
- From the Type drop-down, select Microsoft Graph.
- Use the Client ID text box to paste your Azure application client ID.
- Use the Tenant ID text box to paste your Azure application tenant ID.
- Use the Username text box to paste your Office 365 email account address.
- Use the Client secret text box to paste the client secret you previously created.
- Use the From name text box so specify the friendly from name (e.g. Corner Bowl Server Manager).
![Azure/Office 365 Graph API email settings]() Azure/Office 365 Graph API email settings
Azure/Office 365 Graph API email settings
Throttling Email
- Use the Do not email more than checkbox to limit the number of emails sent over an interval (e.g. 20 emails every 1 hour).
Testing
- Use the Send a test email to text box to specify an email address to send a test email then click the Test button.
- When using SMTP, the application layer protocol conversation is printed out to the verbose output. The Graph API does not offer verbose output.