Auditing Air Gapped Machines for JSIG, CMMC and NIST Compliance
In this article I am going to show you how to use Corner Bowl Server Manager to audit a single stand-alone air gapped machine on-demand for JSIG, CMMC and NIST compliance.
Since compliance regulations such as JSIG, CMMC and NIST require System and Security Event Logs be backed up to remote location, we must take a backup of the corresponding EVTX log files that reside on the machine to an attached device such as a USB drive.
Next, for auditors to run compliance reports directly on a machine, we also need to retain the EVTX log file backups on the machine itself.
Lastly, we need to configure the compliance reports we want to view. One of our latest features of Corner Bowl Server Manager is the ability to run Security Event Log reports such as Successful Logons, Failed Logons, Logon Sessions, Account Management and custom defined reports against EVTX log file backups which enables auditors to review logs directly on stand-alone air gapped machines.
Table of Contents
- Getting Started with the Event Log File Backup (Air-Gapped Single Machine) Template
- Backing up the Event Log Files to a USB Device
- Viewing Security Event Log Audit Reports
Getting Started with the Event Log File Backup (Air-Gapped Single Machine) Template
I'm going to start with a fresh installation. The first time the software opens we are prompted with a wizard. Since we won't be remotely pulling Event Logs, consolidating Event Logs to a database or the local file system or sending email alerts we can simply close the Wizard.
If you're not familiar with Corner Bowl Software, Templates, which contain instructions such as the backup schedule and output location, are assigned to one or many hosts. Once assigned the result is a monitor that executes at the frequency defined in the template. Server Manager includes a sample template called, Event Log File Backup (Air-Gapped Single Machine). With a little modification, this is the template we are going to use.
To find the template:
- From the Explorer View, expand Templates | Sample Templates then Log Consolidation.
- Right click on the Event Log File Backup (Air-Gapped Single Machine) node then select Template Properties. The Template Properties View displays.
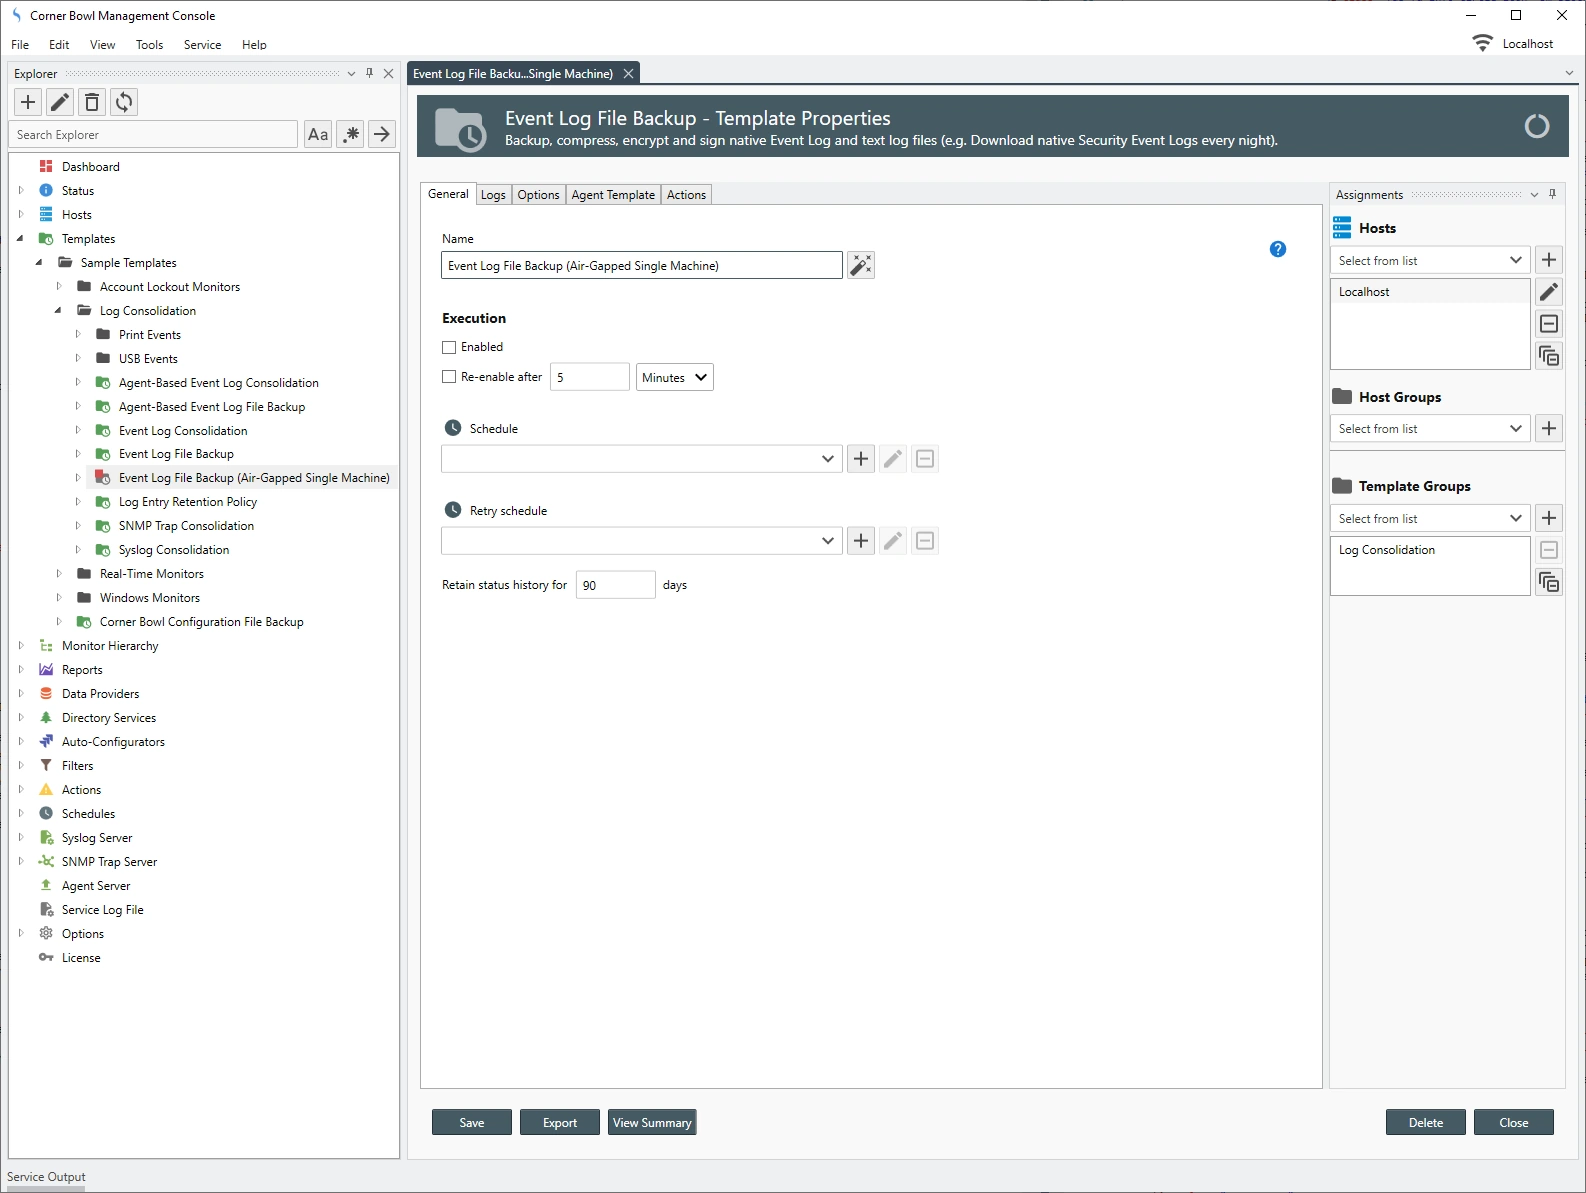
The General Tab:
The General tab enables you to set the backup schedule. Notice a schedule is not defined and if you try to save the template you are prompted to fix the validation errors. In order to save changes to this template you need to disable the template or assign a schedule. Disable the automatic execution. Once disabled, in the Explorer View, we can see a red box overlayed on the template icon. This signifies the template is not scheduled for execution.
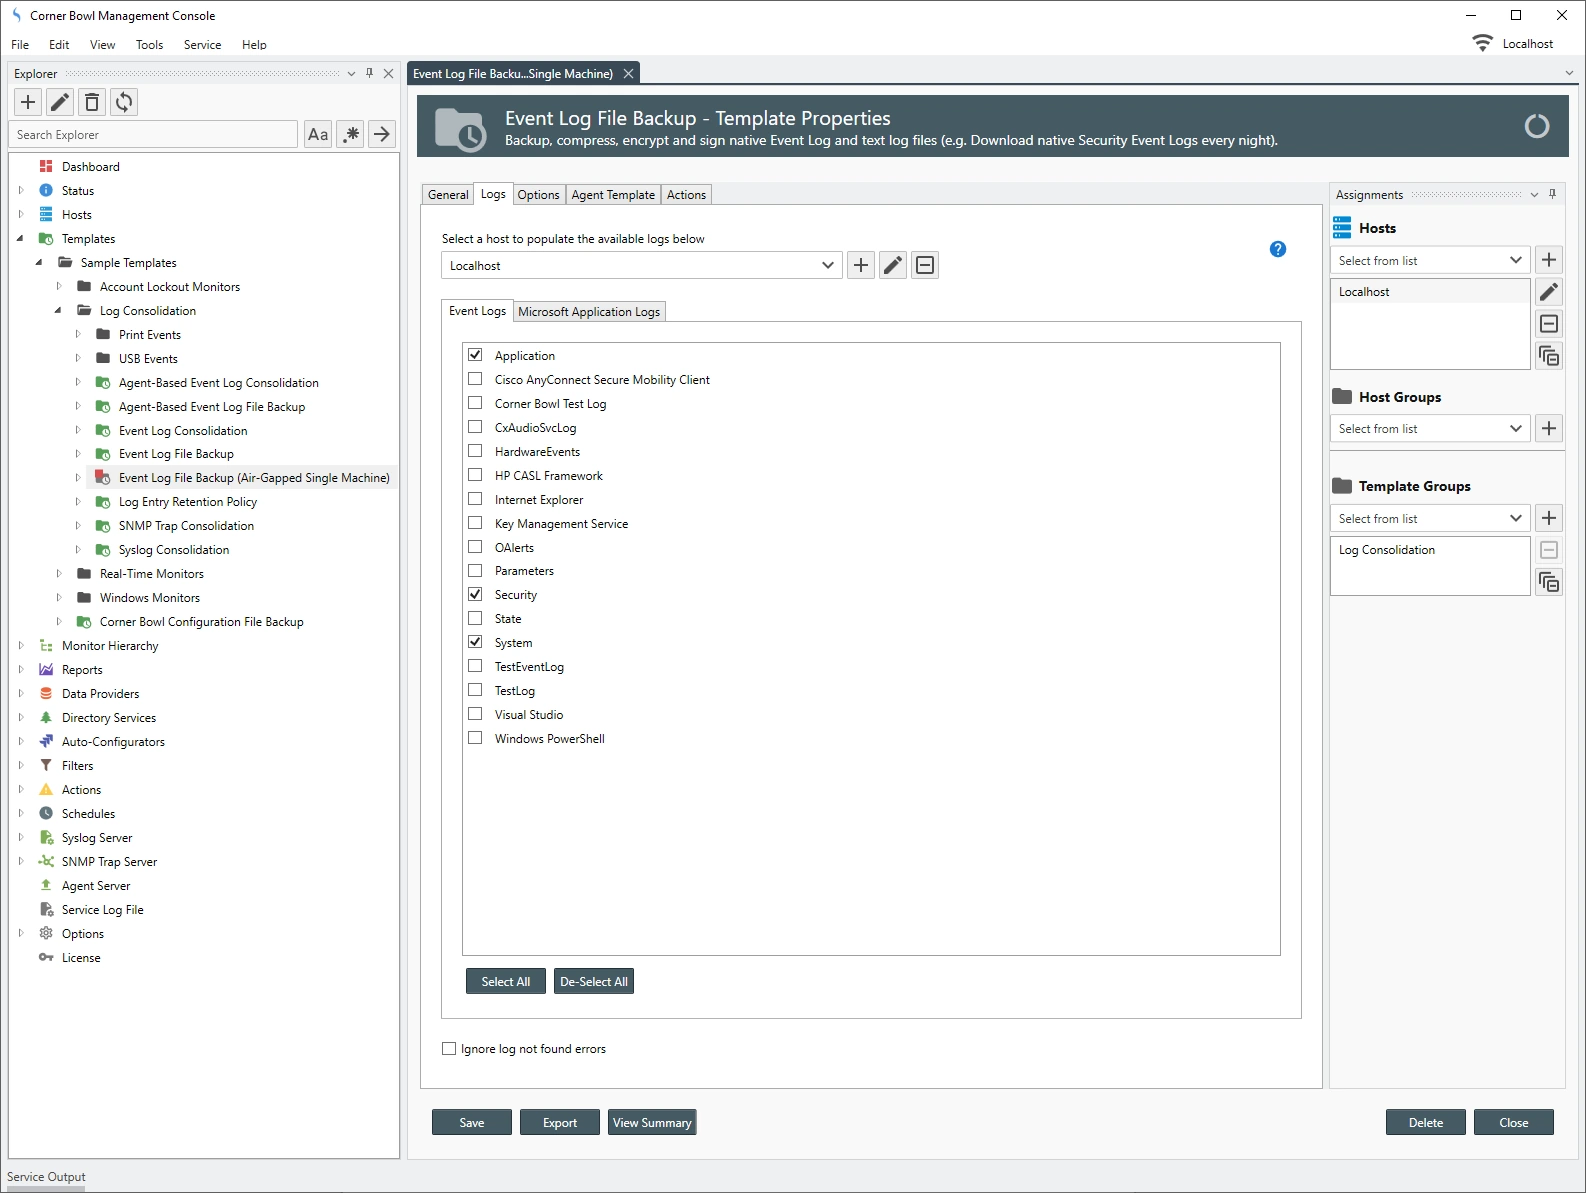
The Logs Tab:
The Logs Tab enables you to select the Event Log files to backup. By default, the Application, Security and System log files are selected, however, if there are other logs such as Microsoft-Windows-DriverFrameworks-UserMode/Operational which provides USB auditing you can select those as well.
The Options Tab:
The Options Tab enables you to set the location to backup the Event Log files.
Optionally, encrypt and password protect backed up Event Log Files using FIPS compliant AES encryption.

The Agent Template Tab:
The Agent Template tab enables you to flag this template as an Agent-Based template. Since we are only monitoring the localhost we can ignore this tab.
The Actions Tab:
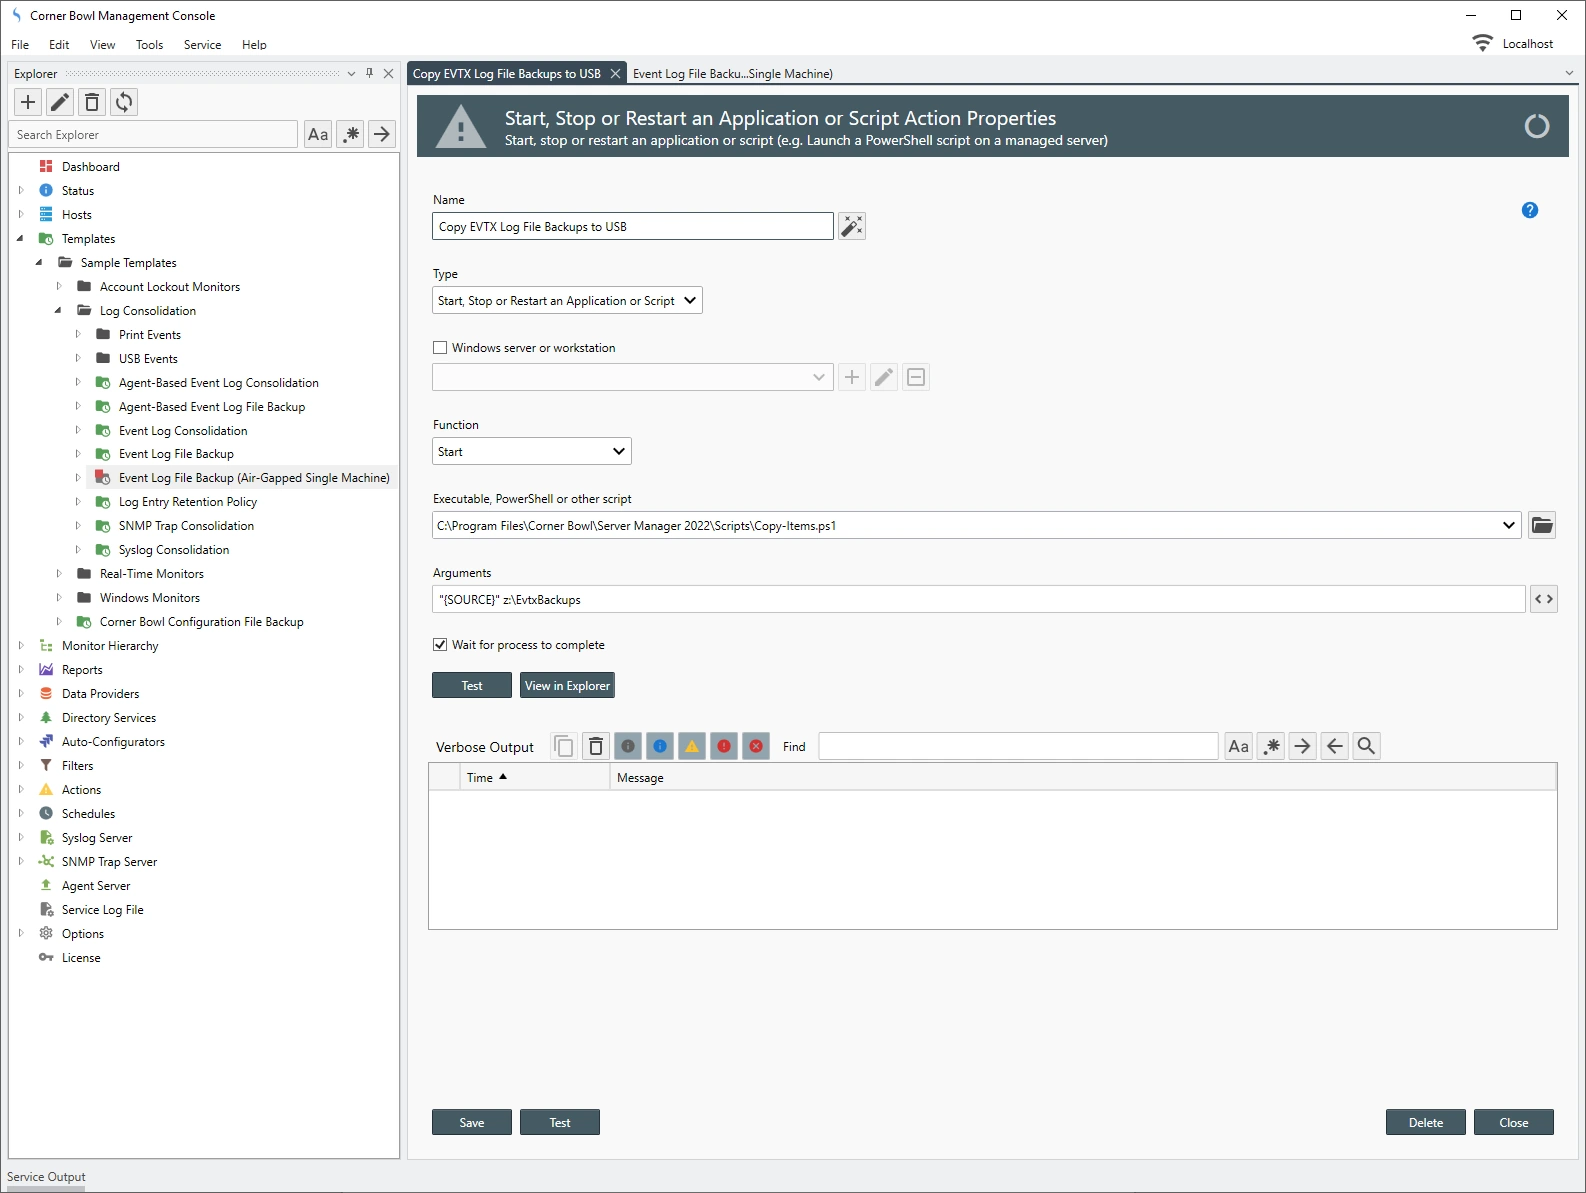
The Actions tab enables you to specify actions when complete. If you remember earlier, for compliance, I said the Event Log files need to be backed up to a remote location. To backup the Event Log files to a local folder as well as a USB drive, this template has an action that is executed after the Event Log file backup is complete that copies the backed-up Event Log files to your USB device. The action is called Copy EVTX Log File Backups to USB and can be found listed under the On Completed drop-down. Any actions listed in the On Completed drop-down are executed once the local backup is complete. This is how the software copies the files to the USB device.
Double-click on the Action to display the Action Properties Dialog. We can see this Action starts a script. The path to the script is:
The arguments are:
The {SOURCE} variable tag is replaced with the full path to the directory the Event Log files are backed up. The second parameter z:\EvtxBackups must be replaced with the actual path you want to save the Event Log files on your USB device. Replace z: with the actual USB drive letter. Server Manager will automatically create the specified path if it does not already exist on the device.
Assigning the Template to the Localhost:
The last template configuration steps are assigning this template to the localhost then removing the default Event Log Backup template already assigned to the localhost.
To assign the localhost to the Template:
-
From the Assignments View, use the Hosts drop-down to select the localhost from the list.
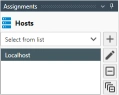 Assign the Localhost to the Event Log Backup Template
 - Click Close then when prompted save your changes.

To un-assign the localhost from the default Event Log File Backup Template:
- From the Explorer view, expand the root Hosts node then the localhost.
- Notice we see several reports, the purple nodes, and several template nodes, the green nodes. Also, Notice there are two Event Log Backup templates assigned. Simply right-click on the Event Log Backup Template then select Unassign. The Template is unassigned leaving just the Event Log File Backup (Air-Gapped Single Machine) template we just modified.
Backing up the Event Log Files to a USB Device
Next, we need to run the template to backup the EVTX log files and copy them to the USB device.
- From the Explorer View, expand the Hosts node then expand the localhost.
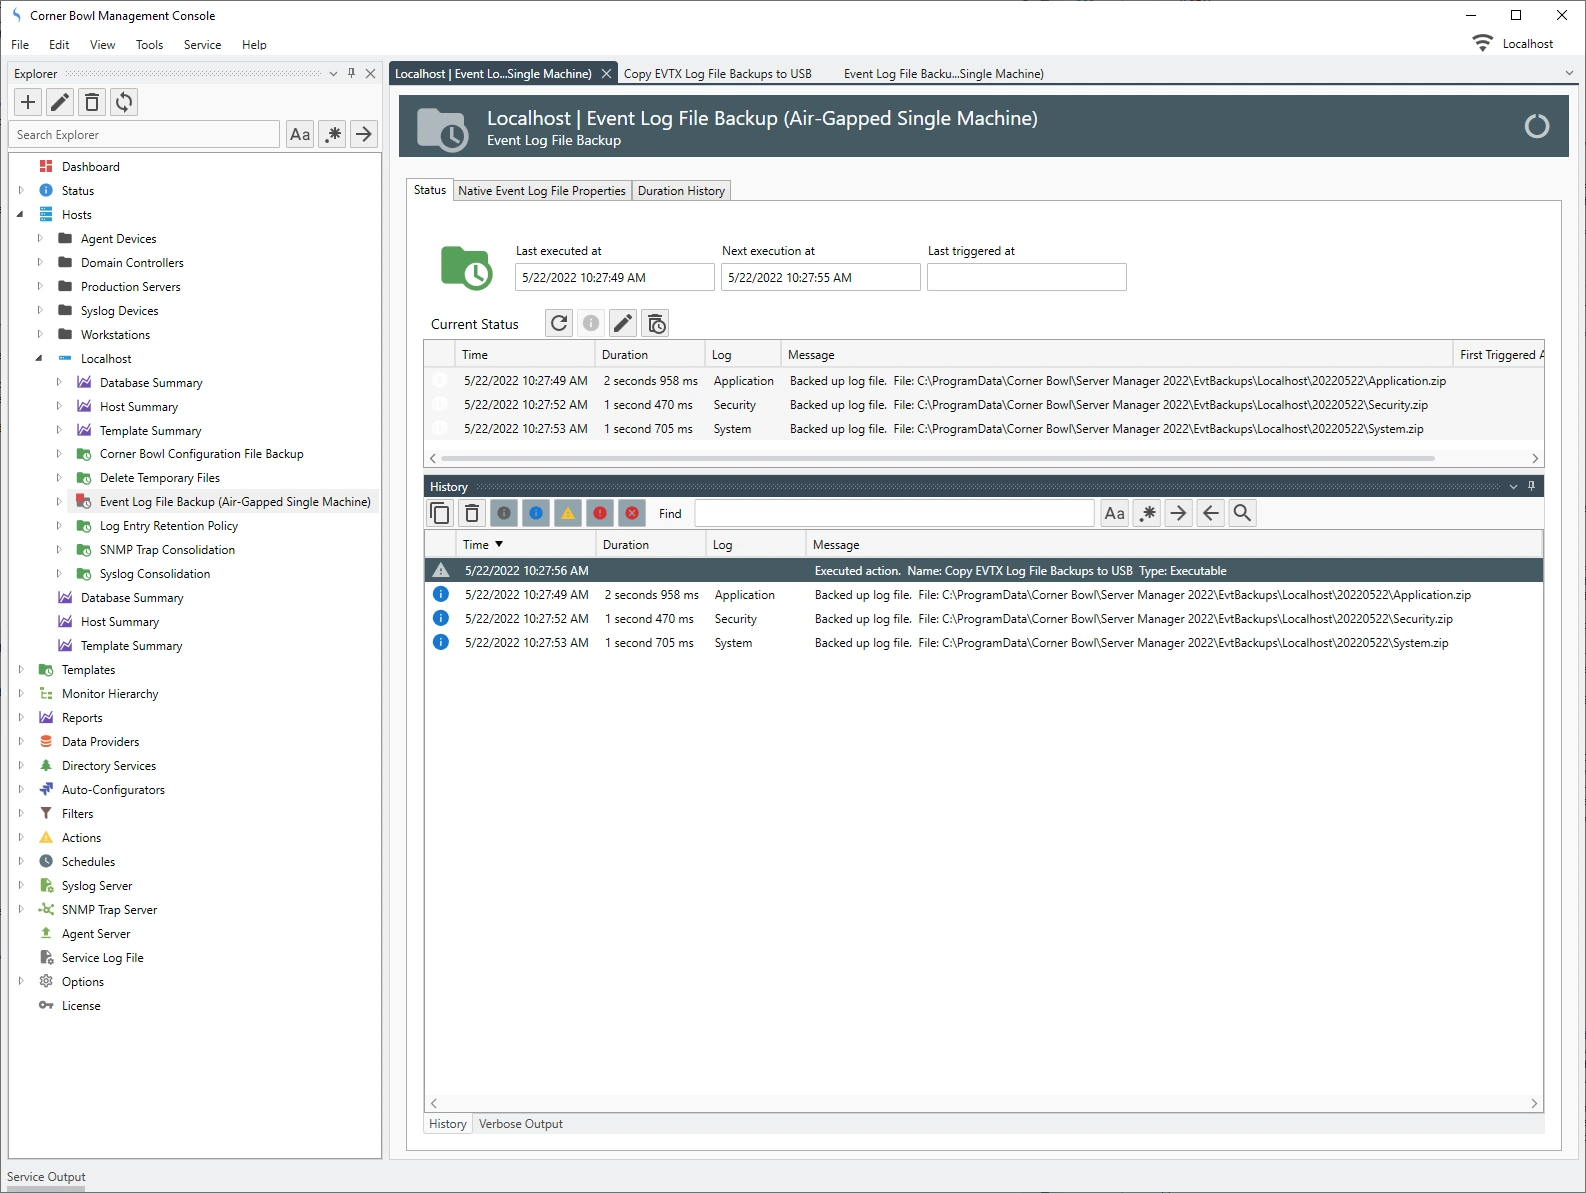
- Right click on the new template then select Execute Verbose. The Monitor Detail View displays.
- From the Monitor Detail View, once complete, the status shows the location of the backed up Event Log Files and the assigned Copy EVTX Log File Backups to USB action executed.
Viewing Security Event Log Audit Reports
The last configuration step is assigning the EVTX file backups to the target reports. I am going to show you how this works by modifying the Logon Sessions report.
- From the Explorer View, expand the root Reports node then expand Sample Reports | Event Logs | Security Reports | Logon.
- Right click on the Security Event Log Logon Sessions Report then select Properties. The Report Properties View displays.
The General Tab:
The General Tab enables you to set the execution schedule. Notice a schedule is not defined and if you try to save the report you are prompted to fix the validation errors. In order to save changes to this report you need to disable the report or assign a schedule. I am going to disable the automatic execution. Once disabled, in the Explorer View, we can see a red box overlayed on the report icon. This signifies the report is not scheduled for execution.
The Explicitly Assigned Logs Tab:
The Explicitly Assigned Logs Tab enables you to assign archived Event Log entries, which we can ignore, and EVTX file backups which we need to assign.
-
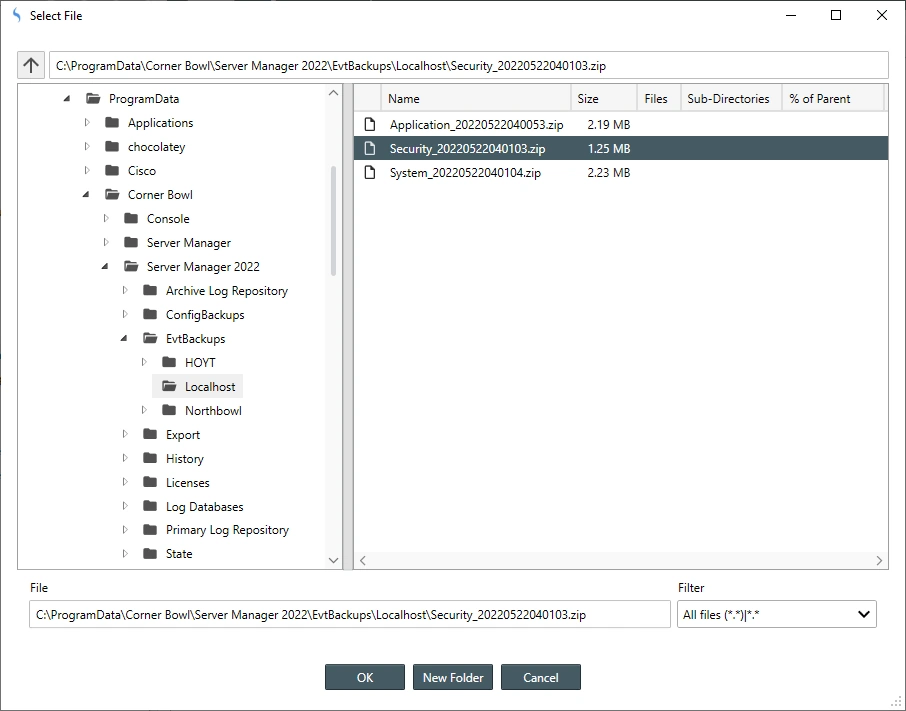
From the Explicitly assigned Event Log file backups control, click the Plus button. The Select File Dialog displays.
NoteWhen selecting the file, the Select File dialog returns the file system content relative to the server the service is running rather than relative to the file system the Management Console is running.
-
From then Select File Dialog, navigate to the location on the local disk
the Event Log File Backup (Air-Gapped Single Machine) template saved the logs
too then select the Security Event Log file backup.
ImportantIf you configure the template to zip, encrypt and password protect the backed up Security Event Log file, you must first open the file directly in the Management Console or use a product such as 7-zip to decrypt the file before proceeding. If the file is not encrypted, the report automatically expands the backed up Security Event Log file.
-
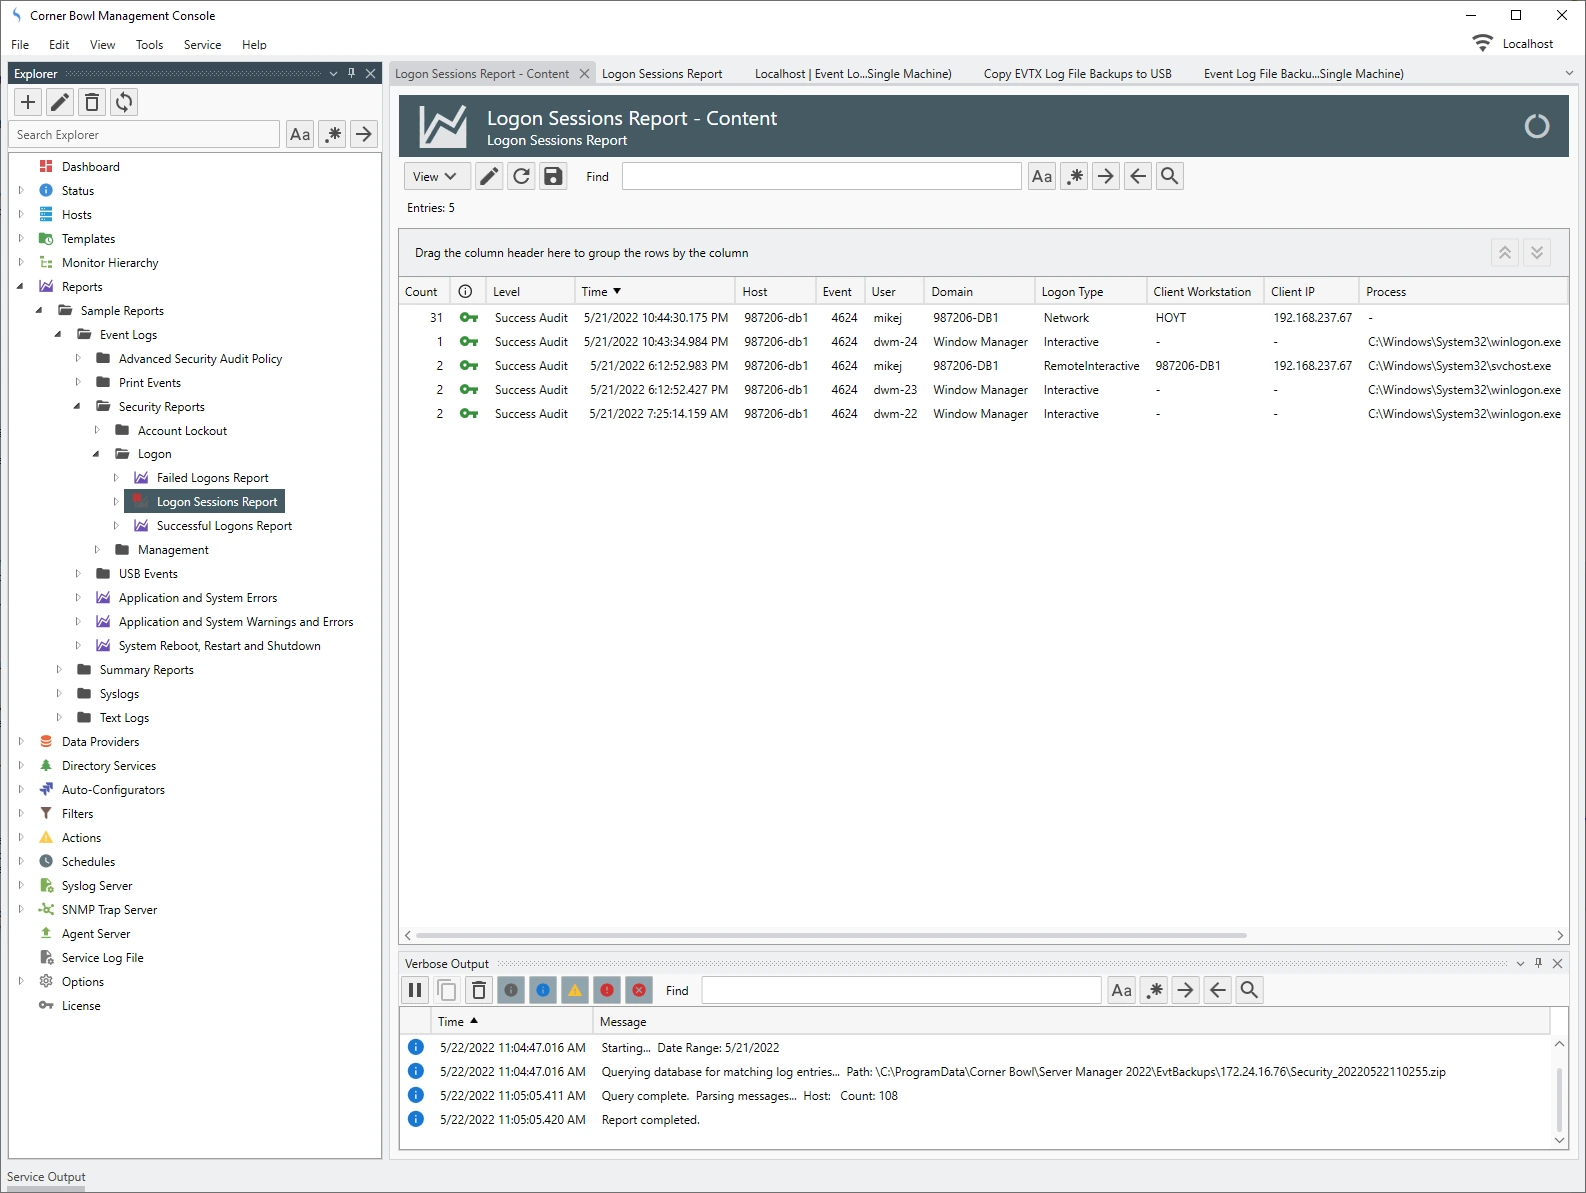
click Save to save your changes then click View Report. The Report View displays.
NoteParsing EVTX file is a slow process so please be patient while the report runs.
Last Updated: March, 3rd 2024