Real-Time Success Logon Monitoring and Reporting with Server Manager
In this article I am going to show you:
- How to receive real-time notifications when administrator accounts log into a domain member server.
- How to filter out specific administrator accounts.
- How to generate daily successful logon reports.
Table of Contents
- How to Add Domain Controllers and Stand-Alone Servers
- How to Configure the Success Logon Monitor Template
- How to Assign Servers to the Template
- Real-Time Monitoring
- How to Configure and View the Success Logon Report
How to Add Domain Controllers and Stand-Alone Servers
The first step in this process is to add your domain controllers and stand-alone servers to the software.
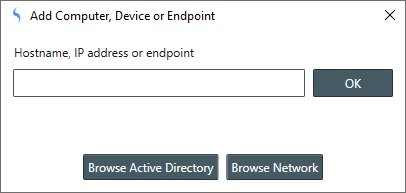
- From the menu-bar select File | New. The Create New Object View displays.
-
Next, select Computers, Devices and Endpoints. The Add Computers, Devices and Endpoints Dialog displays.
 Add Computers, Devices and Endpoints Dialog
 - Either enter the server name directly or click Browse Active Directory.
-
If we click Browse Active Directory, the Browse Active Directory Dialog displays.
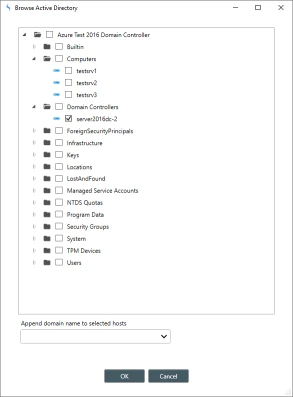 Browse Active Directory Dialog
 - Use this view to select the group of domain controllers or individual servers then click OK.
-
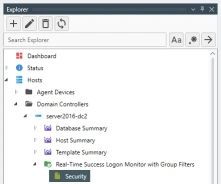
Once added, from the Explorer View, expand Hosts. We now see the servers in a new group with the label of the parent Organizational Unit name. For example, Domain Controllers.
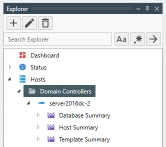 Explorer View with New Server Added

How to Configure the Success Logon Template
Once you have added your domain controllers to the software, we need to create a Success Logon Monitor Template then assign it to the target domain controllers or stand-alone servers. If your not familiar with Corner Bowl Software, Templates define instructions such as which Event Logs to monitor and the frequency to monitor the event log entries. Once created, you assign the Template to the hosts which you would like to monitor.
- Server Manager comes pre-configured with several Real-Time Success Logon Monitor Templates. The templates can be found in the Explorer View. Find the root Templates node, then expand Sample Templates | Real-Time Monitors | Success Logons.
-
Here you will find 6 different Real-Time Success Logon Monitor Templates.
The first five templates are generic Event Log Monitor templates that employ the use of locale specific filters to parse the Security Event Log Entries.
The last template, Real-Time Success Logon Monitor with Group Filters, is a one off template that includes the option to validate and filter accounts in Active Directory.
This is the template we are going to use.
Template Description Real-Time Success Logon Monitor Monitors English Windows. Real-Time Success Logon Monitor (de) Monitors German Windows. Real-Time Success Logon Monitor (es) Monitors Spanish Windows. Real-Time Success Logon Monitor (fr) Monitors French Windows. Real-Time Success Logon Monitor (it) Monitors Italian Windows. Real-Time Success Logon Monitor with Group Filters Monitors any Windows OS running on any language and optionally validates and filters users in Active Directory. - Right click on the Real-Time Success Logon Monitor with Group Filters template, then select Template Properties. The Logon Monitor Template Properties View displays.
-
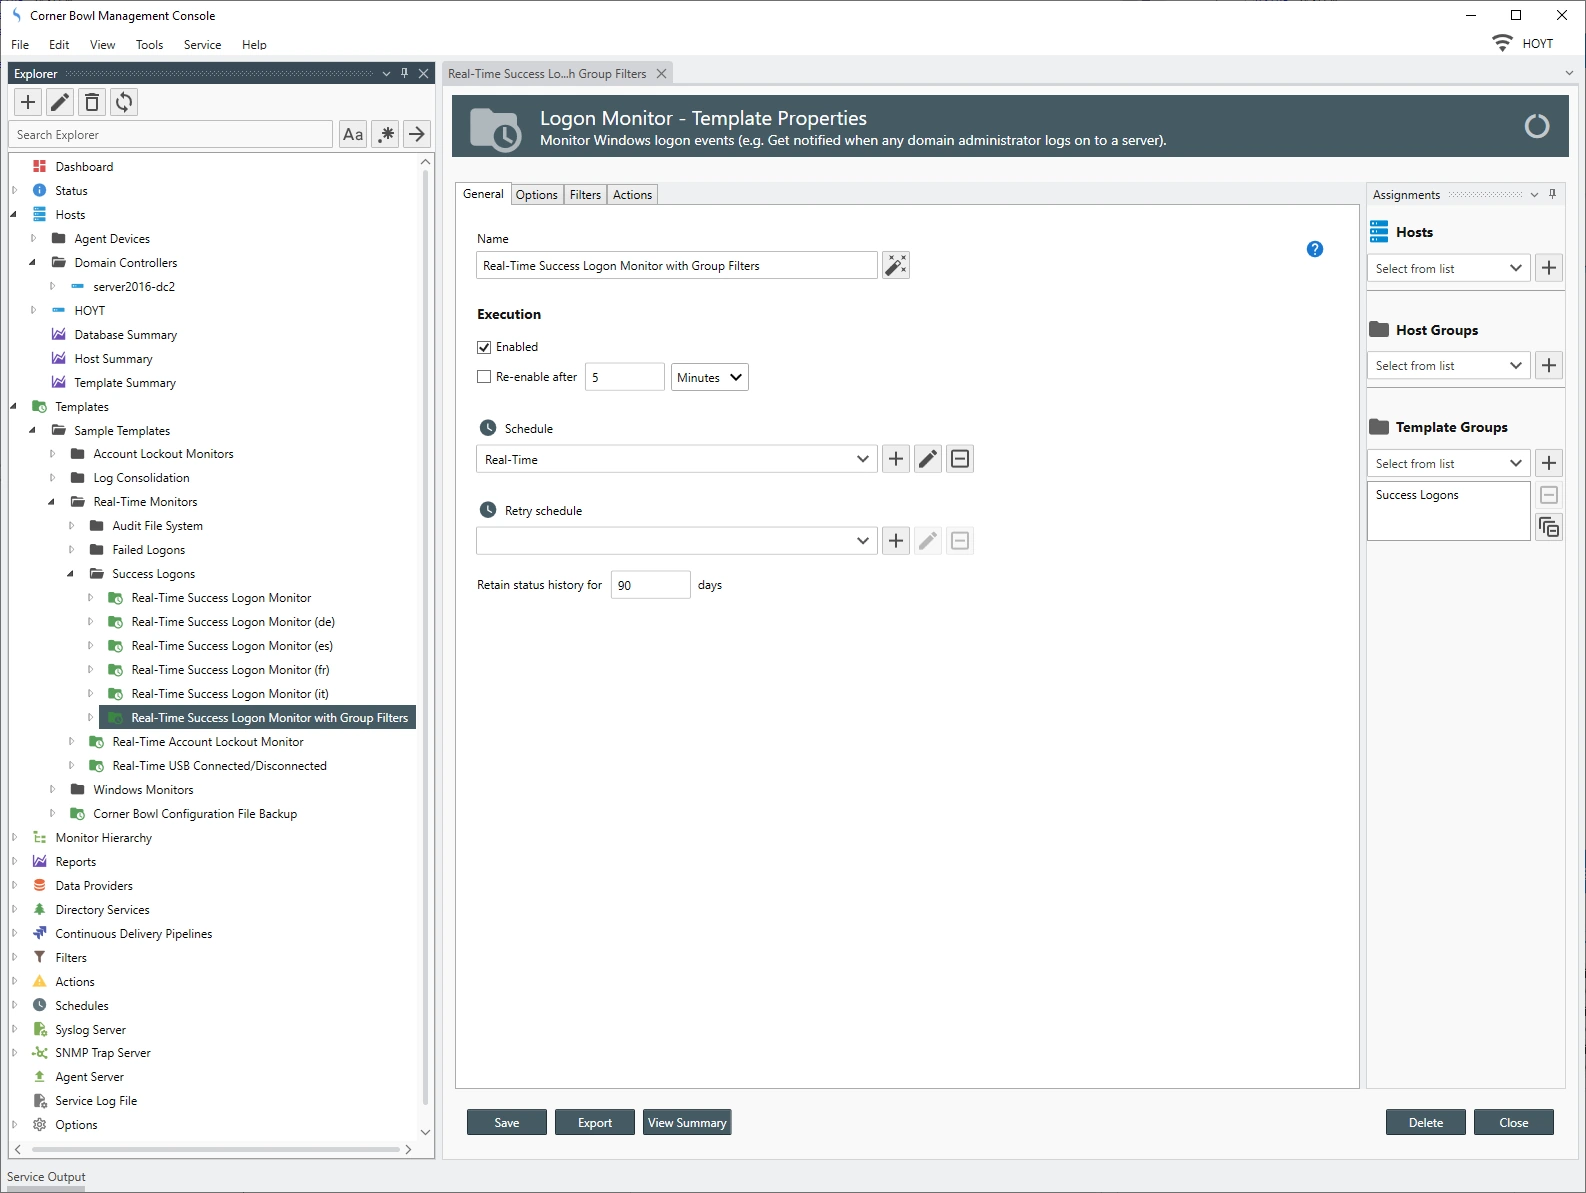
The General Tab enables you to schedule the monitor. Since this is a
real-time monitor we can see the Real-Time schedule is already applied.
- If you prefer to be notified in batches you can set the schedule to fixed schedule instead, for example once an hour.
-
Also, if you want to send notifications to different network administrators during different hours, you can create multiple templates for each time range then create and assign a real-time schedule that only runs during specific times of the day.
 Success Logon Monitor General Properties View
-
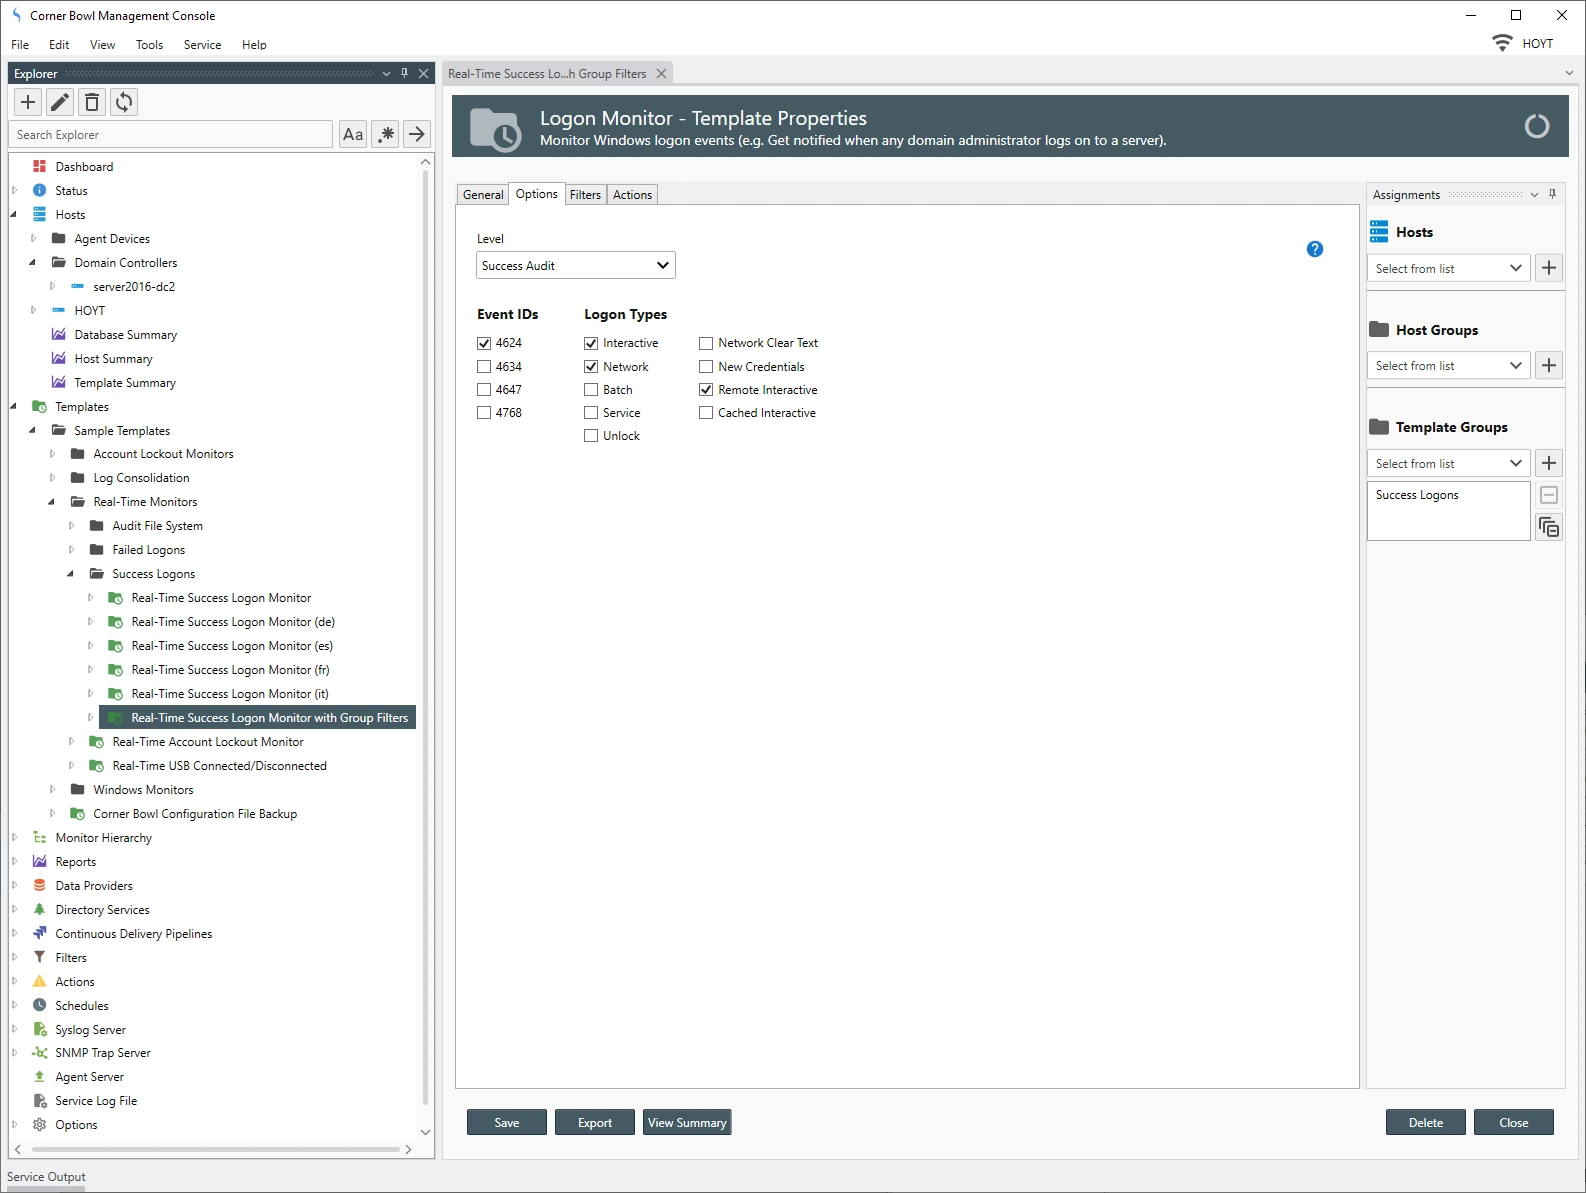
The Options Tab enables you to select the type of monitor, either Success Audit or Failure Audit,
the Event IDs to monitor, then finally, the Logon Types.
 Success Logon Monitor Options View
 - The Filters Tab enables you to filter the accounts to monitor as well as provide any standard log entry filters you would like to apply.
- To filter out accounts that do not exist in Active Directory, check the Limit results to valid Active Directory accounts check-box.
- To limit results to domain administrators, dselect Domain Admins from the Limit to the following groups and users drop-down.
-
To exclude specific administrators, select the administrator accounts you would like to ignore from the Filter out the following groups and users drop-down.
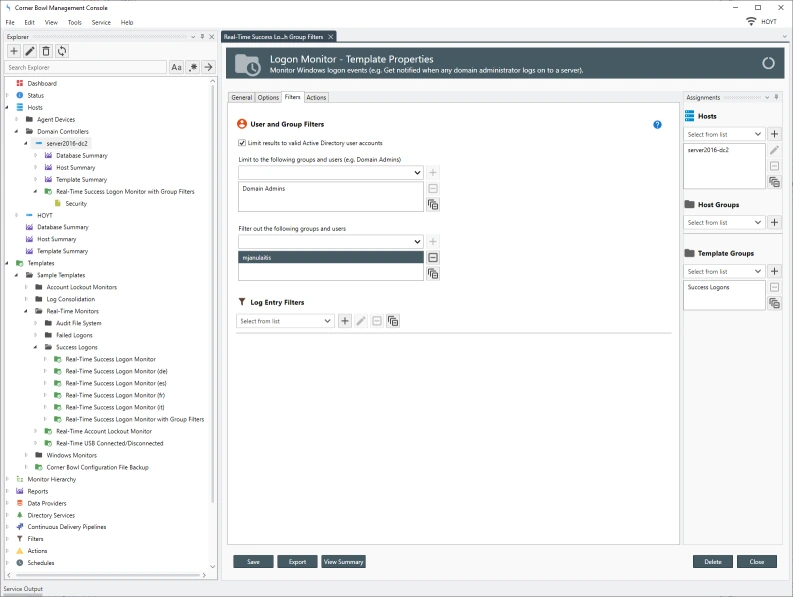 Success Logon Monitor Filters View
 -
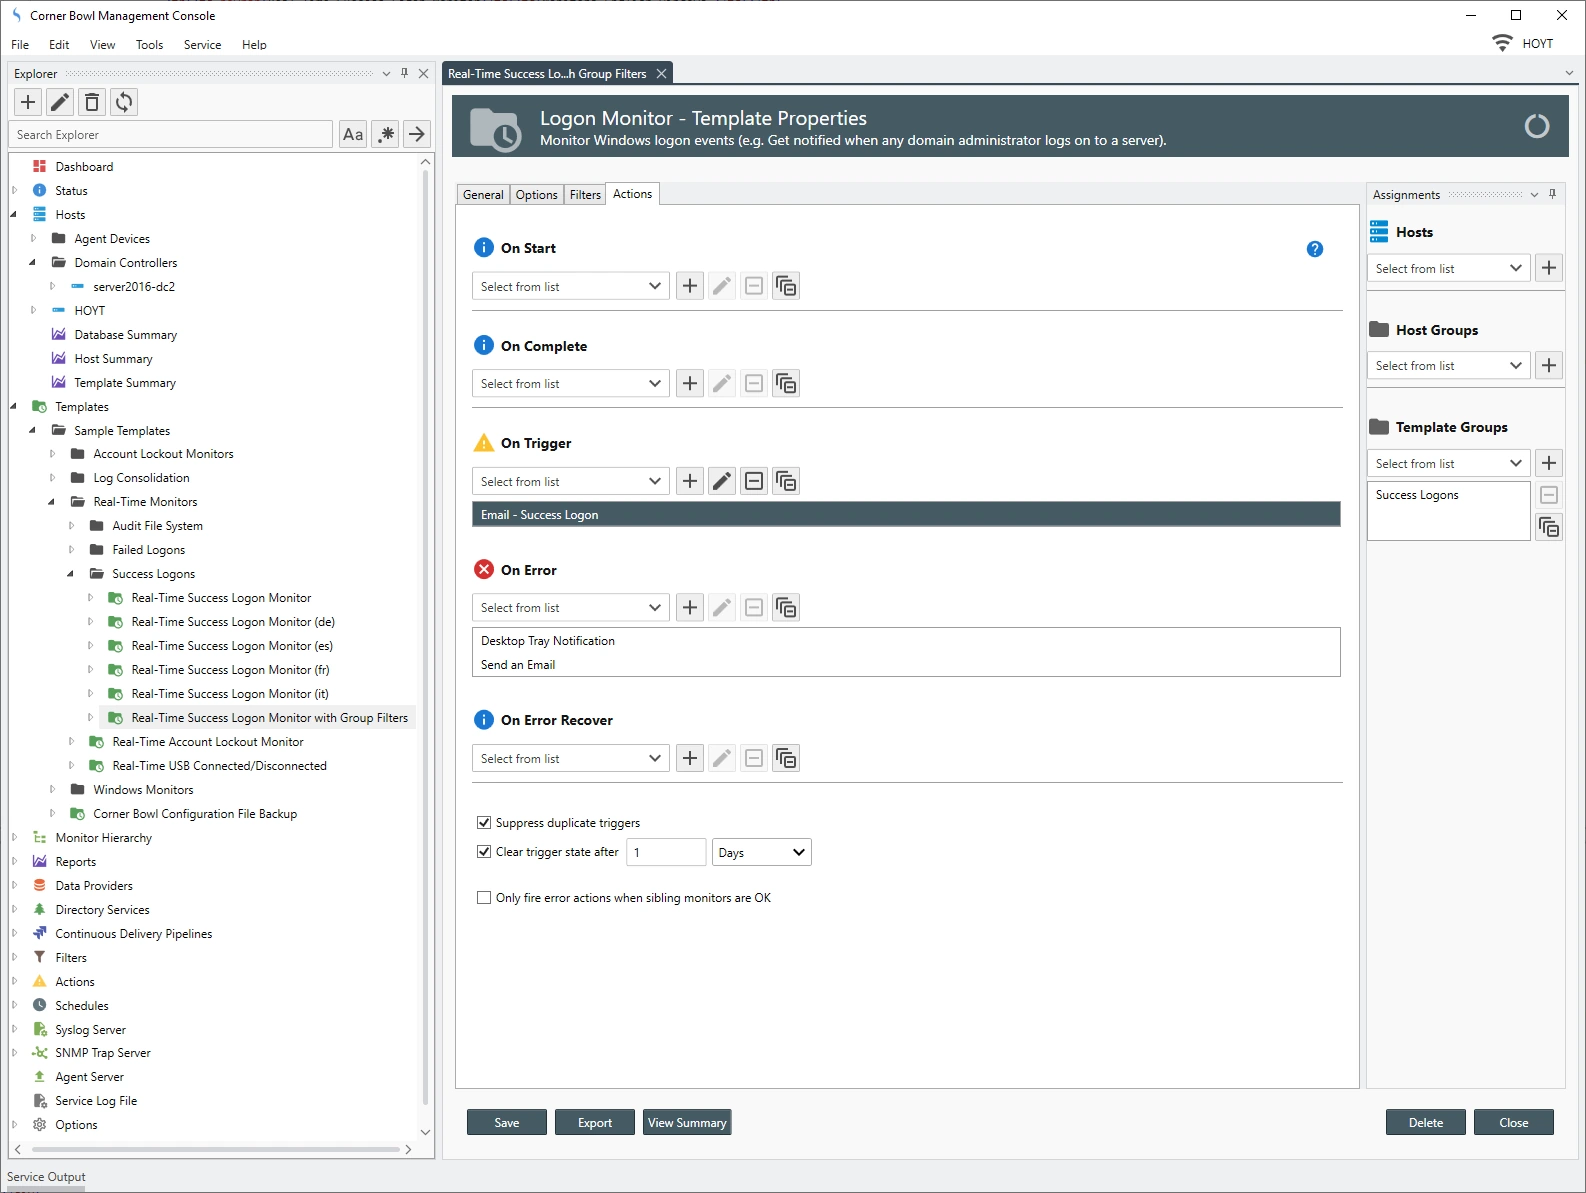
The Actions Tab enables you to assign the actions to fire when the monitor state changes.
Use the On Trigger Drop-Down to assign actions to fire when a user or service logs in.
Notice the Email - Success Logon action is pre-assigned.
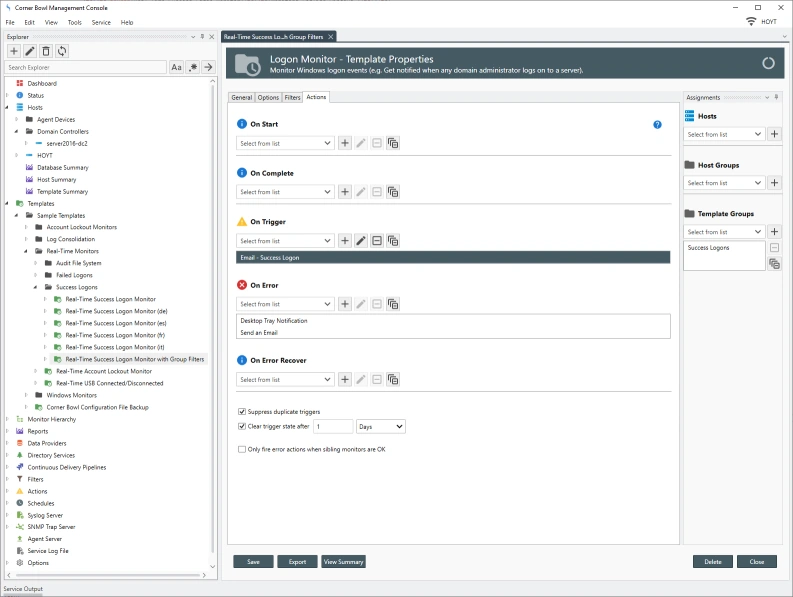 Success Logon Actions View
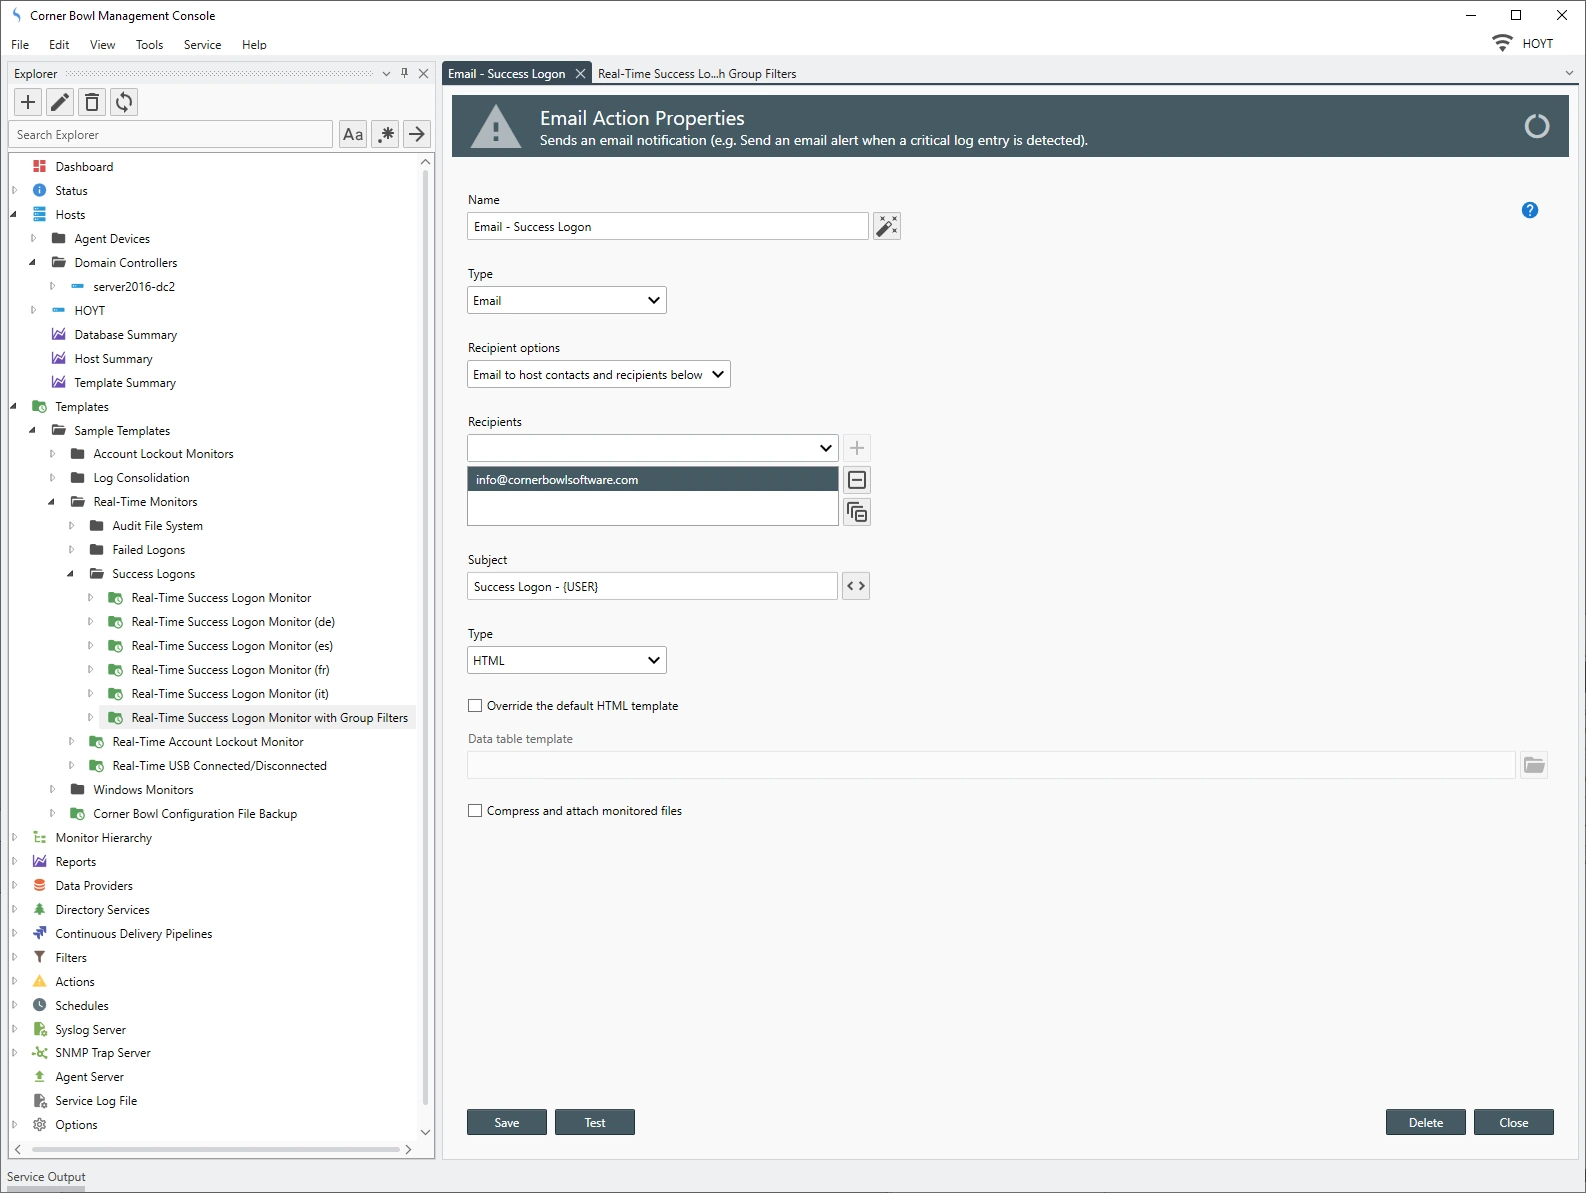
 - Double-click the action to display the Action Properties View.
- Use the Recipients Drop-Down to select an email address from the list or type in a new email address not yet configured within this software.
-
Use the Subject Text Box to specify the email subject. Notice the value includes a {USER} replacement variable. When executed, this replacement variable is replaced with the name of the account that logged in.
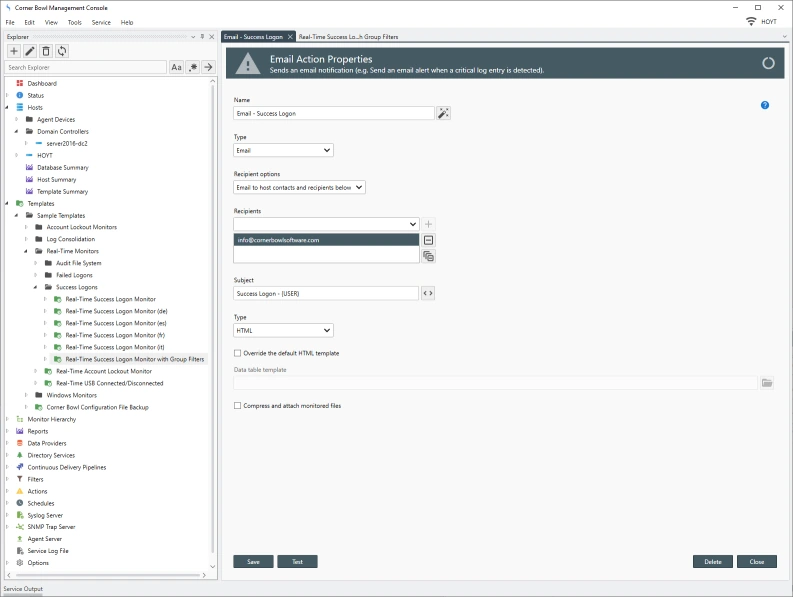 Success Logon Email Notification Properties View
 - Click Close then when prompted save your changes..

How to Assign Servers to the Template
Ok the last step is assigning your Domain Controllers or stand-alone servers to the template.
-
From the Assignments View, use the Hosts Drop-Down to assign specific servers.
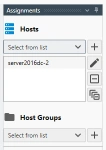 Assign Individual Servers
 -
Use the Host Groups Drop-Down to assign an entire group, for example Domain Controllers.
 Assign Domain Controllers Group
 - Click Close, then when prompted, save your changes.


Putting it All Together
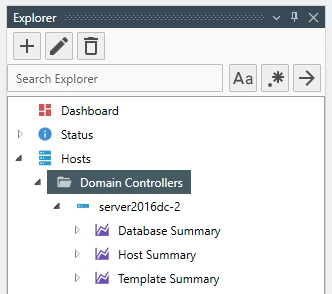
- Now, back in the Explorer View, if we expand one of the domain controllers in the Domain Controllers group we can see the Real-Time Success Logon Monitor Template assigned to each domain controller.
- Let's see this in action.
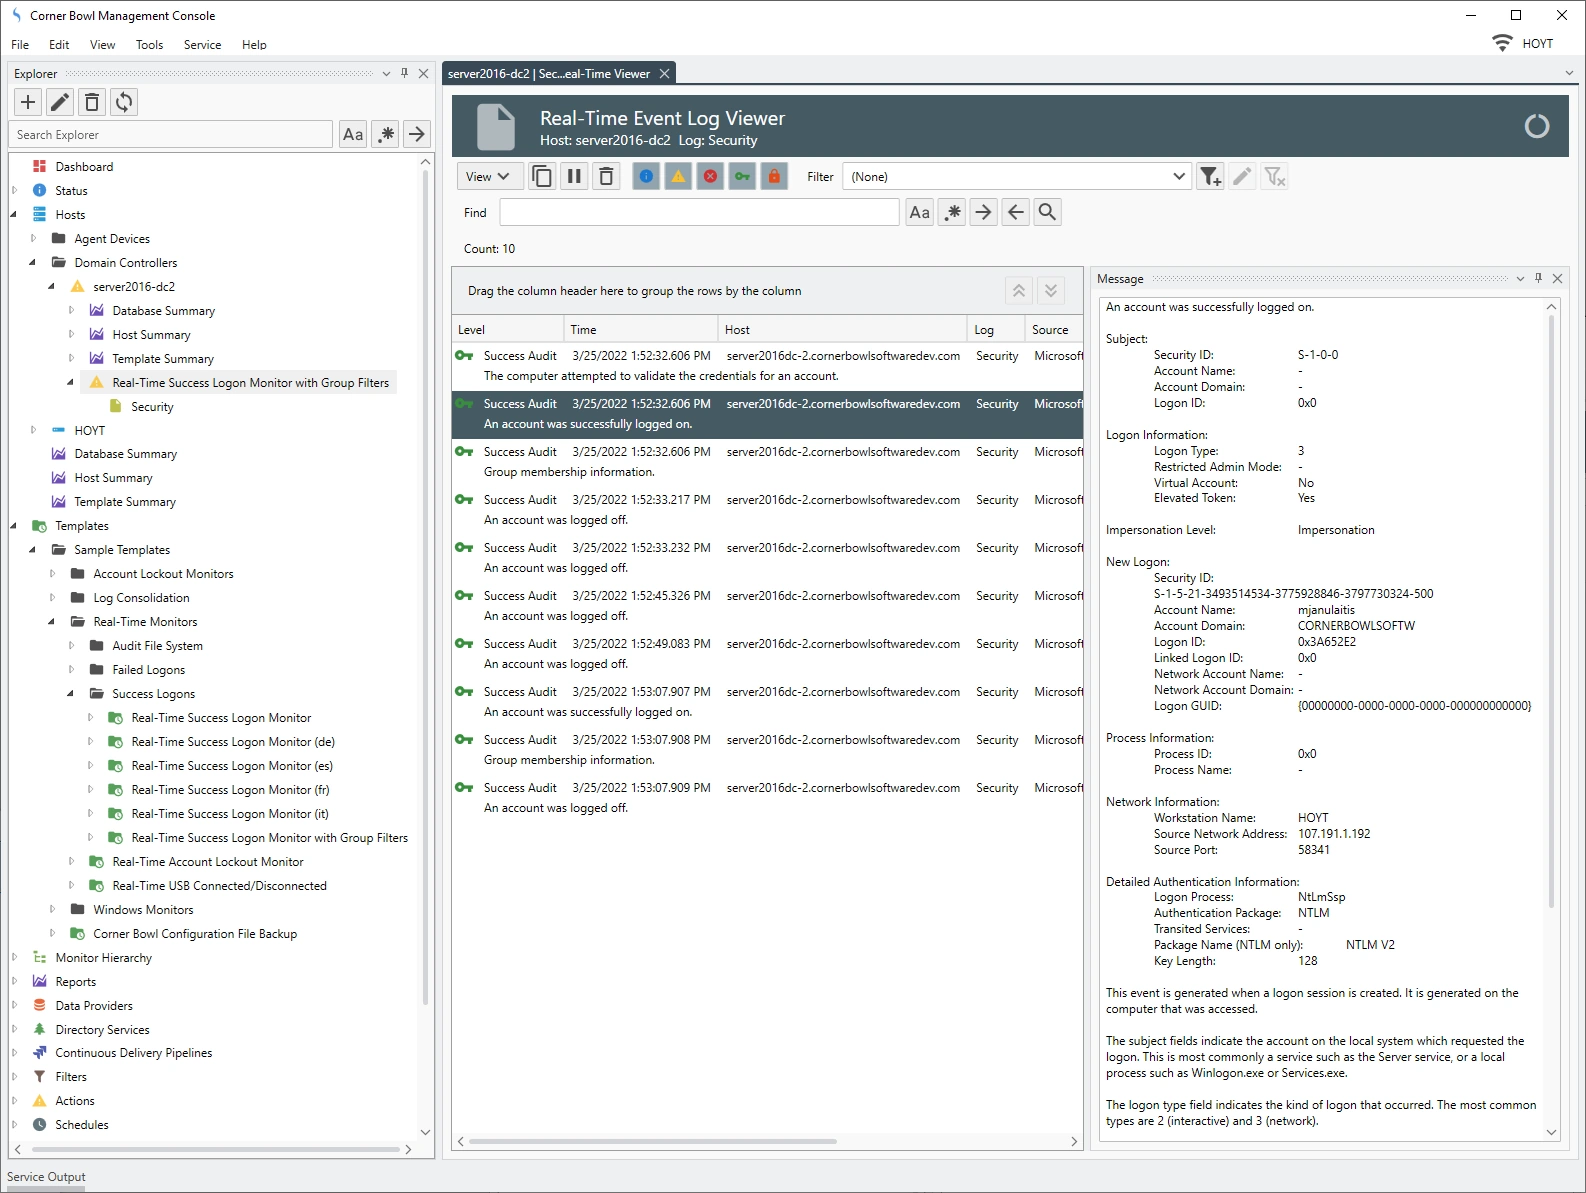
- First, let's open a Real-Time Security Event Log Viewer so we can watch all the entries pass though the software.
-
Notice, if we expand the template we see the Security Event Log listed.
Right click on the Security Event Log and select Watch. The Real-Time Event Log Viewer displays.
 Explorer View
 Real-Time Success Logon Viewer
 - Next, trigger the Success Logon by logging into any server on your network.
-
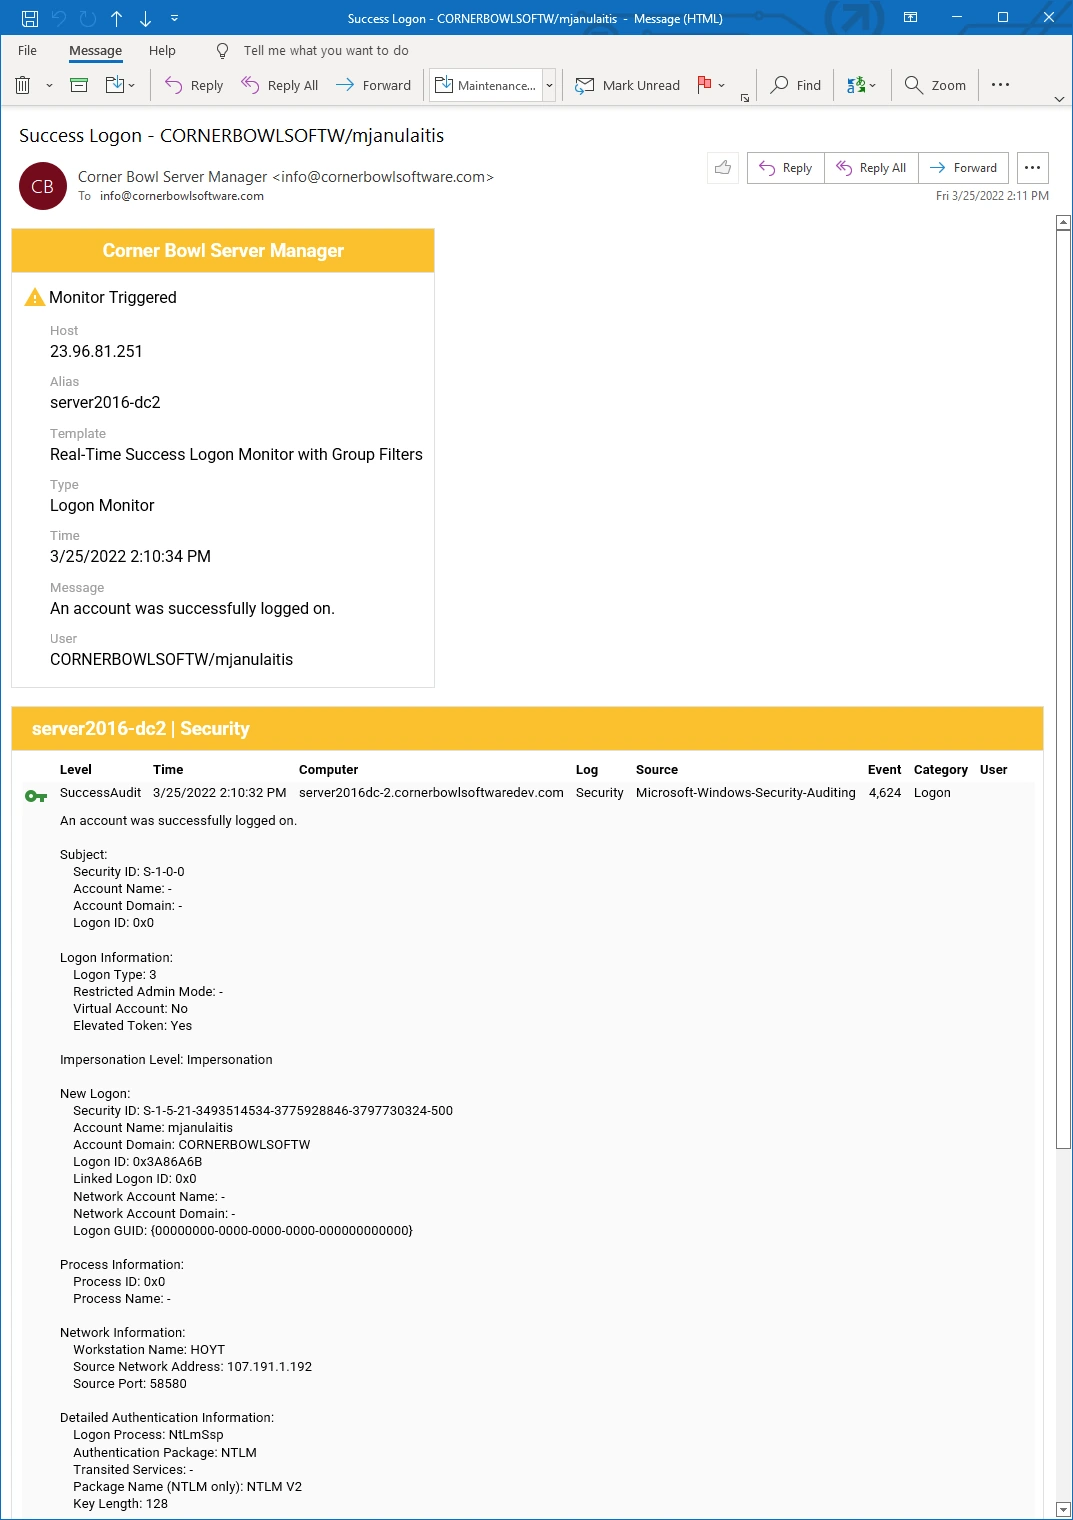
Once logged in, you should see your email notification which includes the name of the account you used to log into the server in the subject.
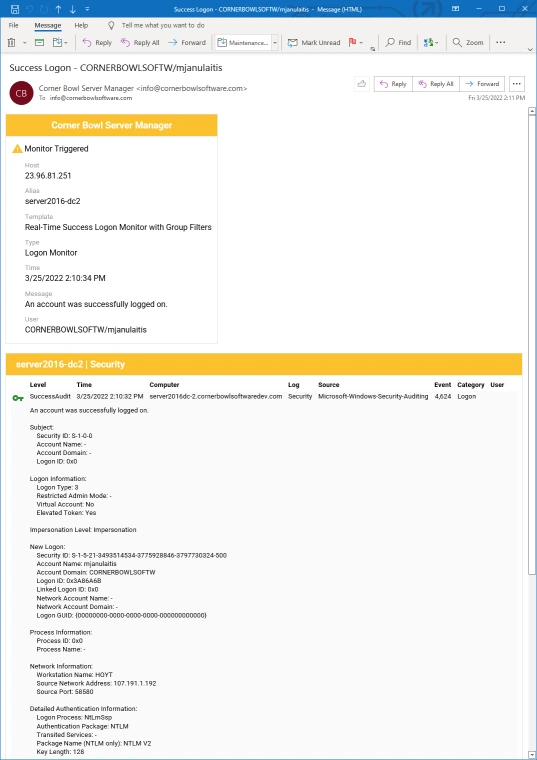 Success Logon Email Notification with Account Name in Subject
 - Also notice the template under the Domain Controller has triggered.
- Right click on the template and select Explore. The Monitor Status View displays.
- Notice the last locked out account is listed in the status and the history view includes all of the recently locked out accounts.

How to Configure and View the Success Logon Report
Once we have configured Event Log Consolidation and the template has either been manually or automatically executed, we need to create a Success Logon Monitor Report then assign the target domain controllers or stand-alone servers to the report. If your not familiar with Corner Bowl Software, Reports define instructions such as which Event Logs to report on, filters to apply and the frequency to run the report. Once created, you assign Hosts to the report.
- Server Manager comes pre-configured with a Security Event Log Successful Logons Report. The report can be found in the Explorer View. Find the root Reports node then expand Sample Reports | Event Logs | Security Reports | Logon.
-
Here you will find 3 different reports.
Report Description Security Event Log Failed Logons Report Reports on failed logon attempts. Security Event Log Logon Sessions Report Reports on logon sessions. Security Event Log Successful Logons Report Reports on successful logons. - Right click on the Security Event Log Successful Logons Report, then select Properties. The Security Event Log Successful Logons Report Properties View displays.
- Use the General Tab to schedule the report.
-
Use the Explicitly Assigned Logs Tab to assign archived and auxiliary consolidated logs as well as native EVTX log file backups.
NoteLeave these lists blank when you only want to include entries from the Primary Log Repository.
-
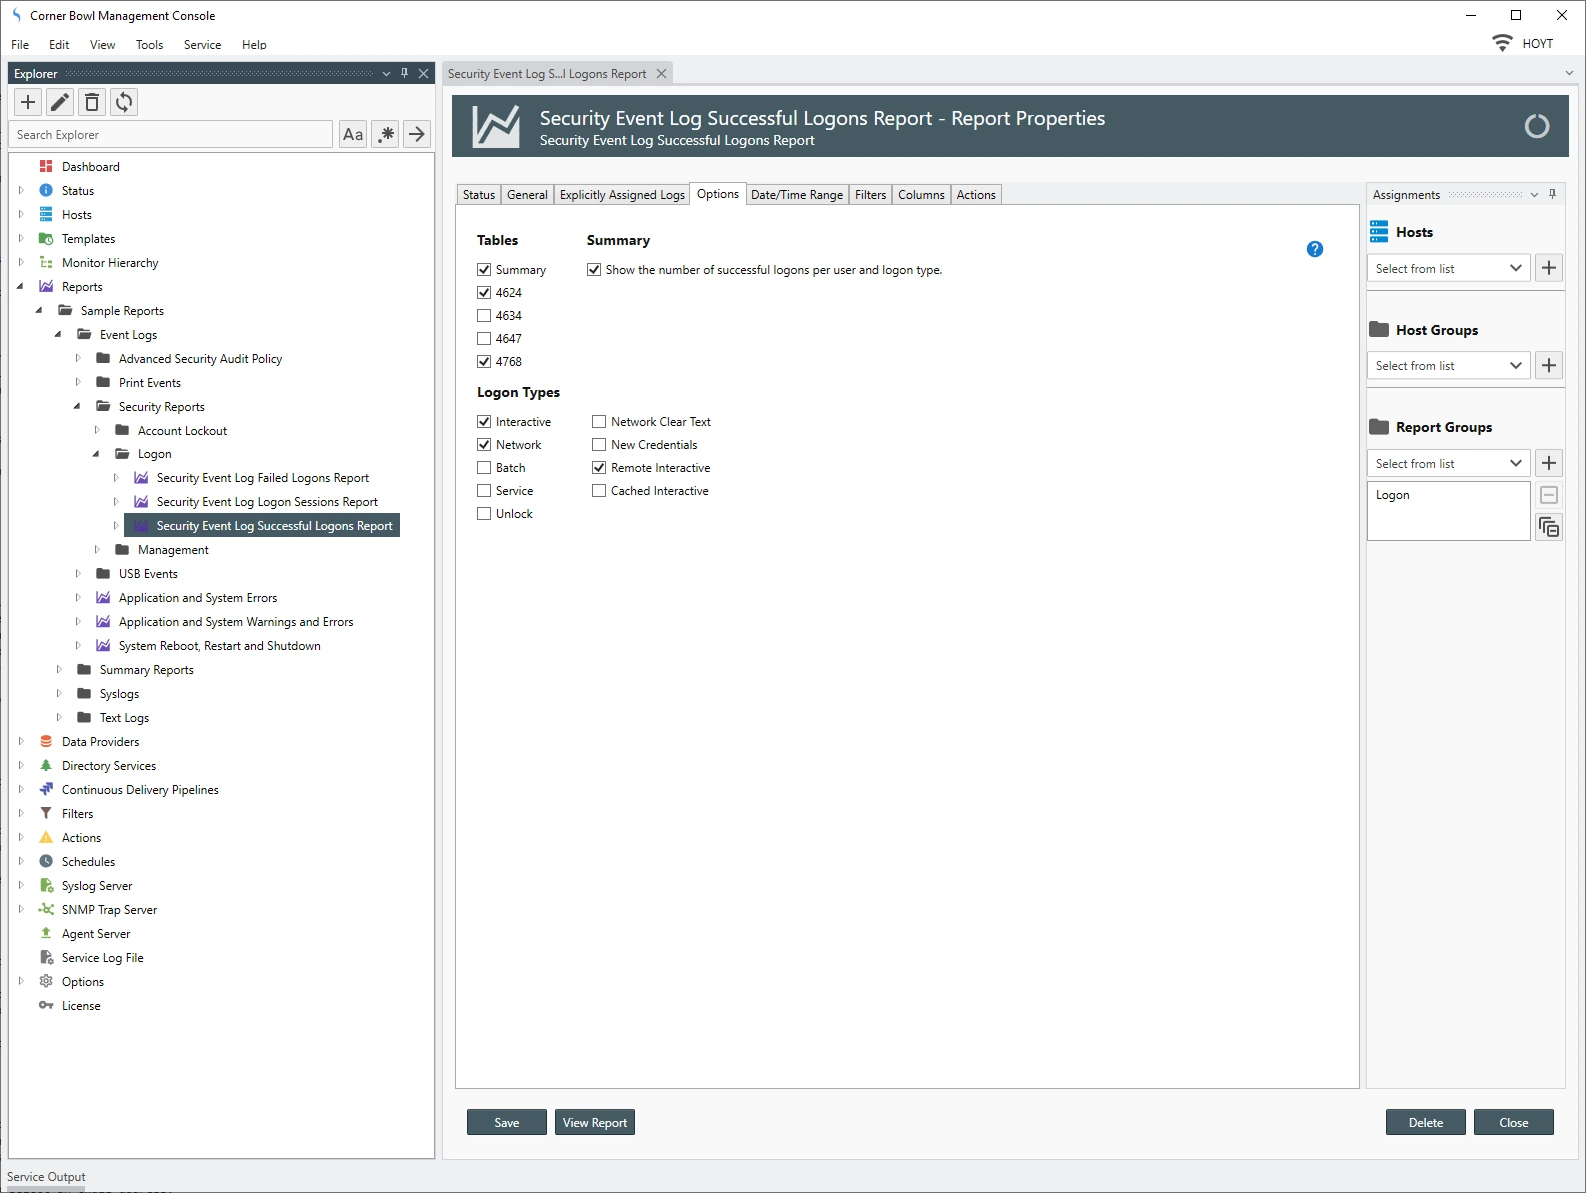
Use the Options Tab to select the Event Log IDs and Logon Types to include.
You also have the option of including a Summary Table as well as collapsing the results to show a unique list of logons and logon types.
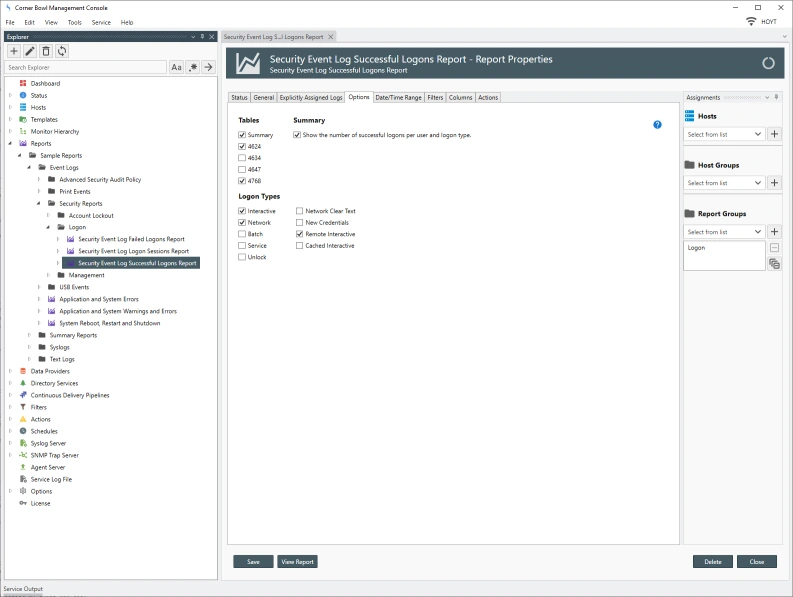 Success Logon Monitor Options View
 - Use the Date/Time Range Tab to specify the date range to include in the report.
- Use the Filters Tab to filter the accounts to monitor as well as provide any standard Event Log Entry Filters you would like to apply.
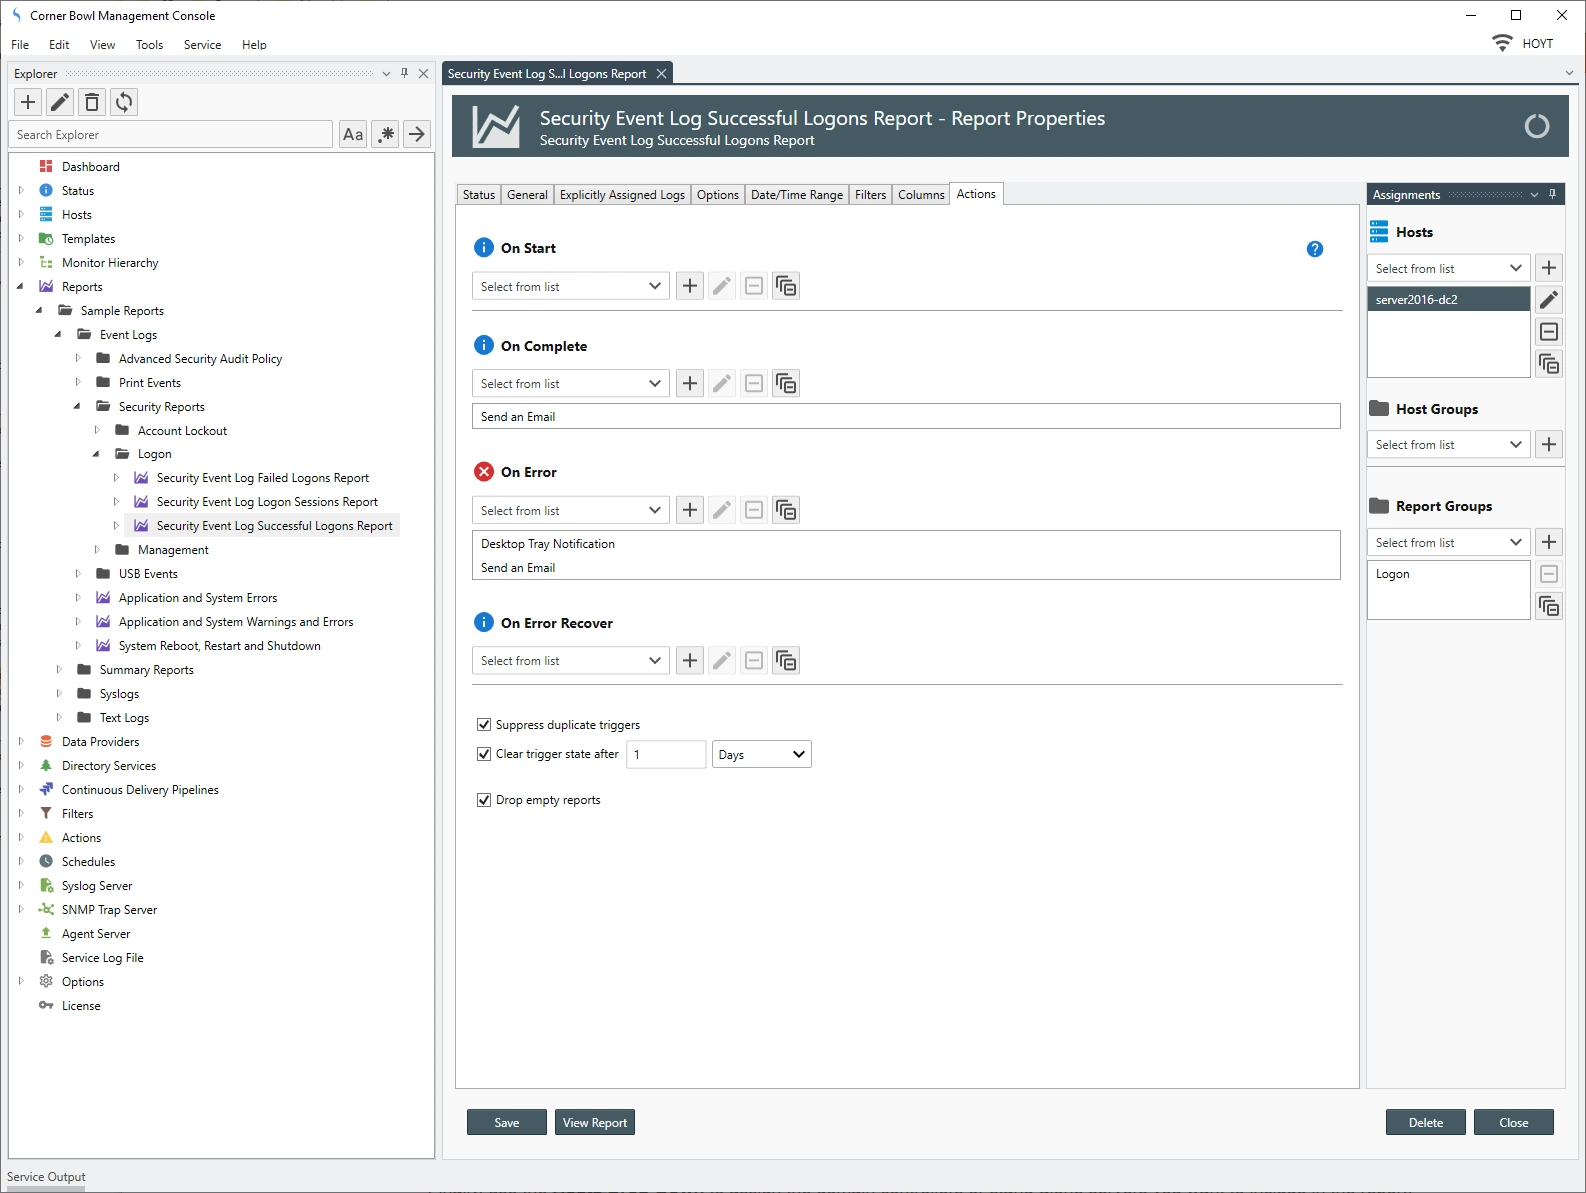
- The Actions Tab enables you to assign the actions when the report state changes. Use the On Complete Drop-Down to assign actions to fire when the report is complete. Notice the Send an Email action is pre-assigned. Double-clicking on the action displays the Action Properties View.
- Use the Recipients Drop-Down to select an email address then click Close and save your changes when prompted.
-
Finally, use the Hosts Drop-Down to assign the domain controllers or stand-alone servers you want to include in the report.
 Success Logon Report Properties Complete
 -
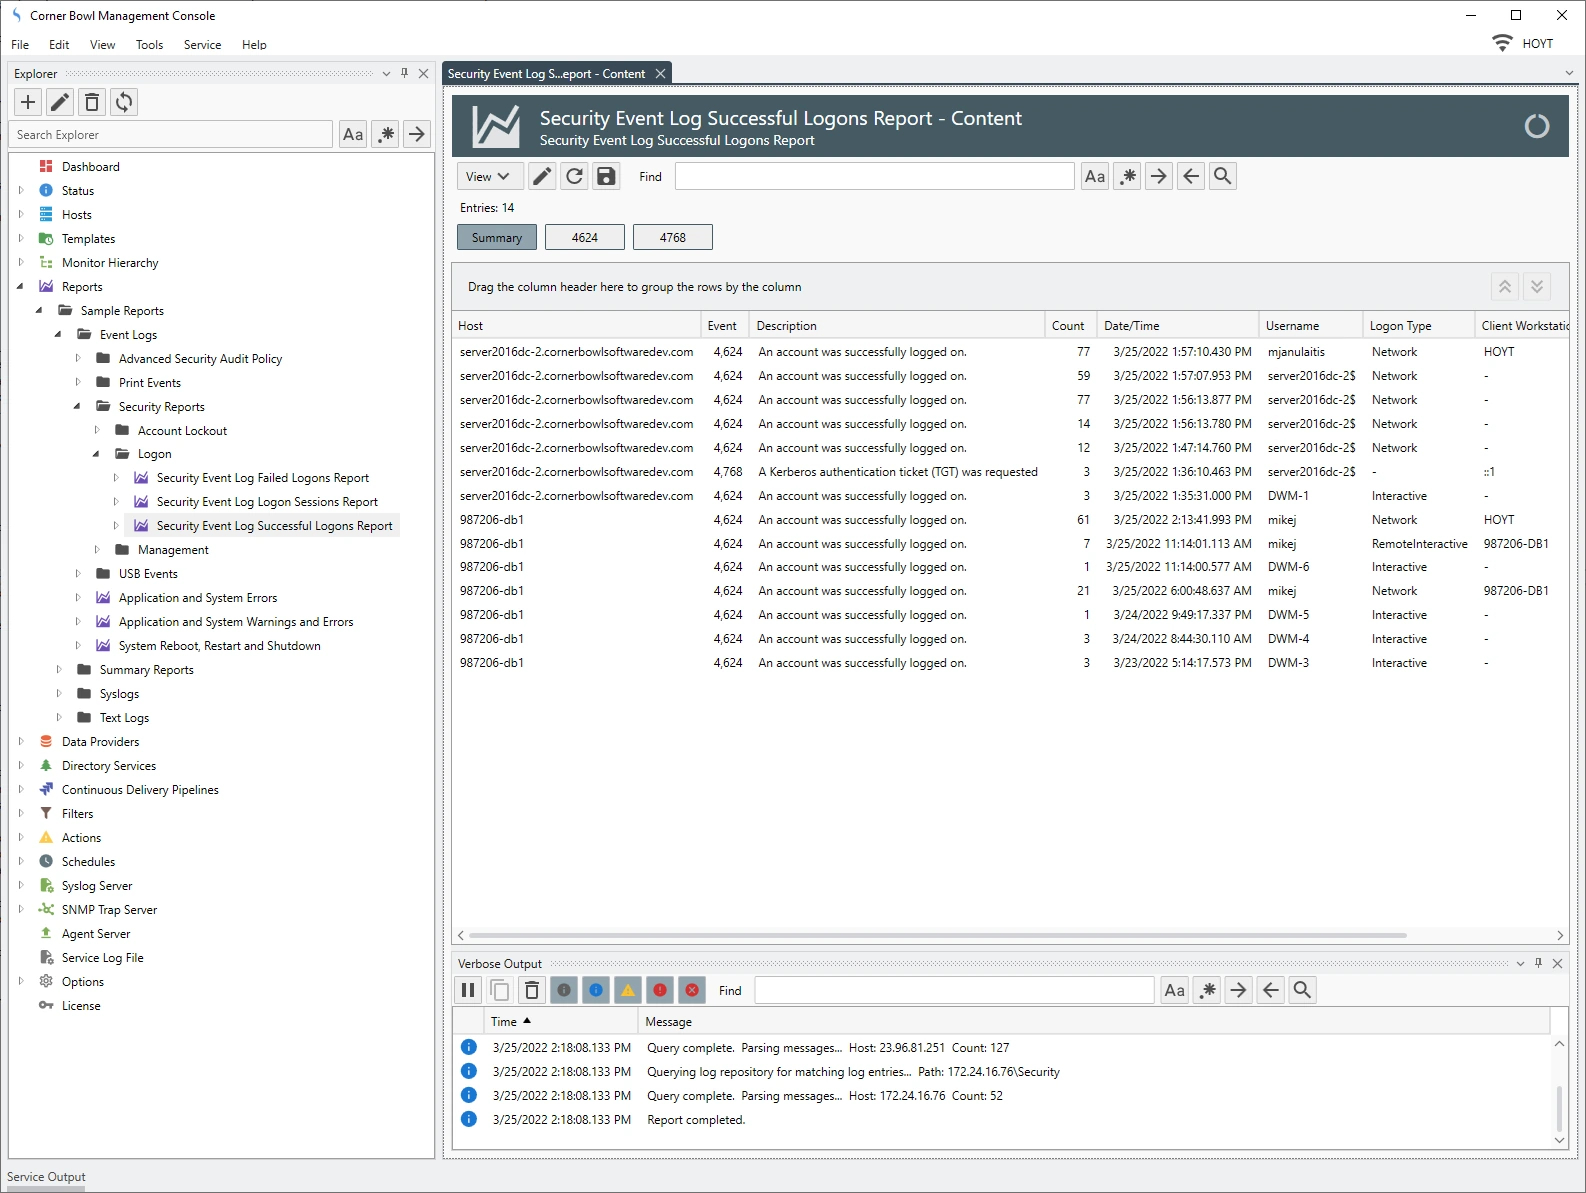
Once assigned, click Save to save your changes then click View Report to view the report directly in the Management Console.
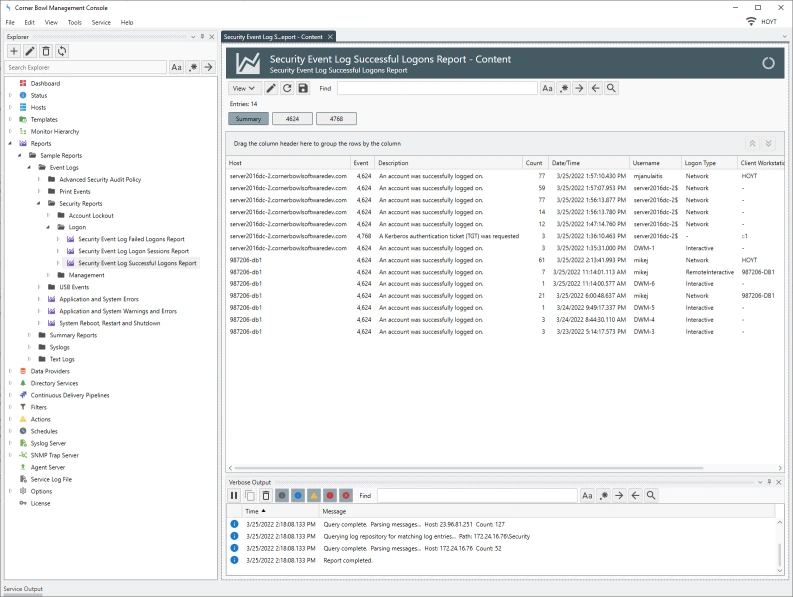 Success Logon Report
 - That's real-time success logon monitoring and scheduled reporting with Corner Bowl Server Manager.
Last Updated: March, 3rd 2024