Red Hat Enterprise Linux (RHEL) Audit Log Consolidation
February 5th, 2023
This is part 1 of a 2 part article set in which I will show you how to download, parse and save a Red Hat Enterprise Linux (RHEL) Audit Log File to a Corner Bowl Server Manager 2023 Log Database.
- In part 2 I will show you how to create a single SIEM report that displays a horizontal bar chart of successful logons on both a RHEL server and a Windows domain and then lists all successful logon entries from both environments for the last 24 hours.
Table of Contents
How to Gain Access to the RHEL Audit Log?
- First, Server Manager uses an automated SSH shell connection to copy the audit log file to a temporary directory which a non-root account can gain access too.
- Second, Server Manager uses an SFTP/SSH connection to read the contents of the temporary file, parse the entries then save the parsed entries to the log database.
- Finally, Server Manager uses another automated SSH shell connection to delete the temporary file.
Ok so let's show you how this is accomplished but first a note about RHEL, Linux and other Unix based flavors.
Important |
Just about every RHEL installation is unique in it's configuration. My installation of RHEL is no different. Corner Bowl Server Manager includes 3 sample templates that support the default RHEL image Microsoft offers on Azure. Regardless of your environment, you will likely need to modify each of these templates to implement the audit log consolidation and backup in your environment. |
How to Add a RHEL server?
- From the menu-bar select File | New. The Create New Object View displays.
-
Next, select Computers, Devices and Endpoints. The Add Computers, Devices and Endpoints Dialog displays.
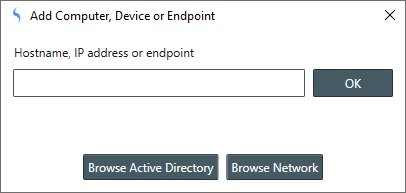
 Add Computers, Devices and Endpoints Dialog
 - From the Add Computer Device or Endpoint Dialog, specify the IP address or host name of your RHEL server then click OK.
- The host is added to the software then the Host Properties View displays.
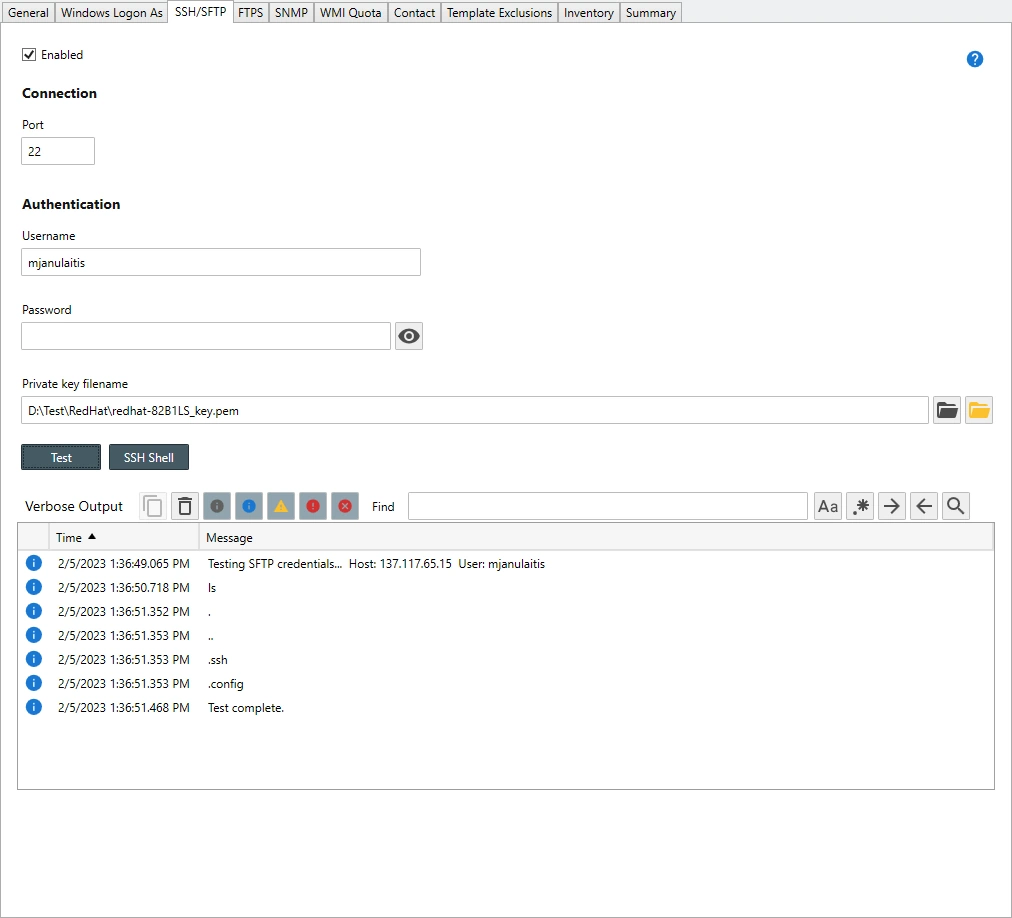
- From the Host Properties view, select the SSH/SFTP tab.
-
Next, specify your login credentials. When I created my Azure RHEL VM, I chose to use a private key file. To specify my credentials I need to specify my username, no password then select my private key file. Once you have entered our credentials click the Test button.
Note
Note: The test function uses SFTP to test the connection. To test the SSH Shell, click the SSH Shell button. 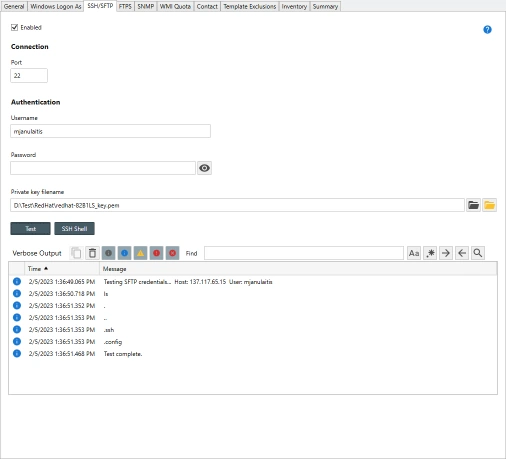 RHEL SSH/SFTP Properties
How to Configure the Audit Log Copy and Delete Templates?
-
From the Explorer View, expand Templates | Sample Templates then Red Hat. Notice there are 6 templates listed:
- Audit.Log (Create Tmp File)
- Audit.Log (Delete Tmp File)
- CPU (Red Hat)
- Disk Space (Red Hat)
- Memory (Red Hat)
- Red Hat Audit Log Consolidation
- Right click on the Audit.Log (Create Tmp File) template, then select Template Properties. The Template Properties View displays.
-
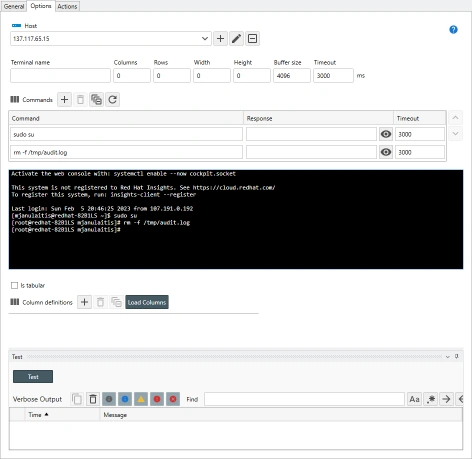
Select the Options Tab. we can see the SSH commands required to copy the audit.log file to a temporary directory for consumption through SFTP. They are:
sudo su
\cp /var/log/audit/audit.log /tmp/audit.log
chmod +r /tmp/audit.log
NoteNote: Use the response field to insert any required passwords. The value is masked in the viewer and saved using FIPS compliant AES encryption. -
To test the template, select the target host then click Execute Now
 button. The results are displayed in the Shell Viewer.
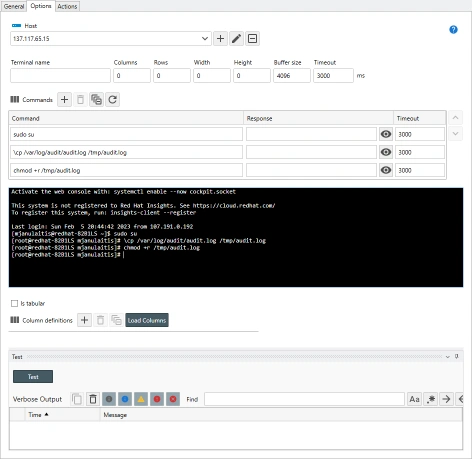 Copy RHEL Audit.Log Template Properties
 - Next, right click on the Audit.Log (Delete Tmp File) template, then select Template Properties. The Template Properties View displays.
-
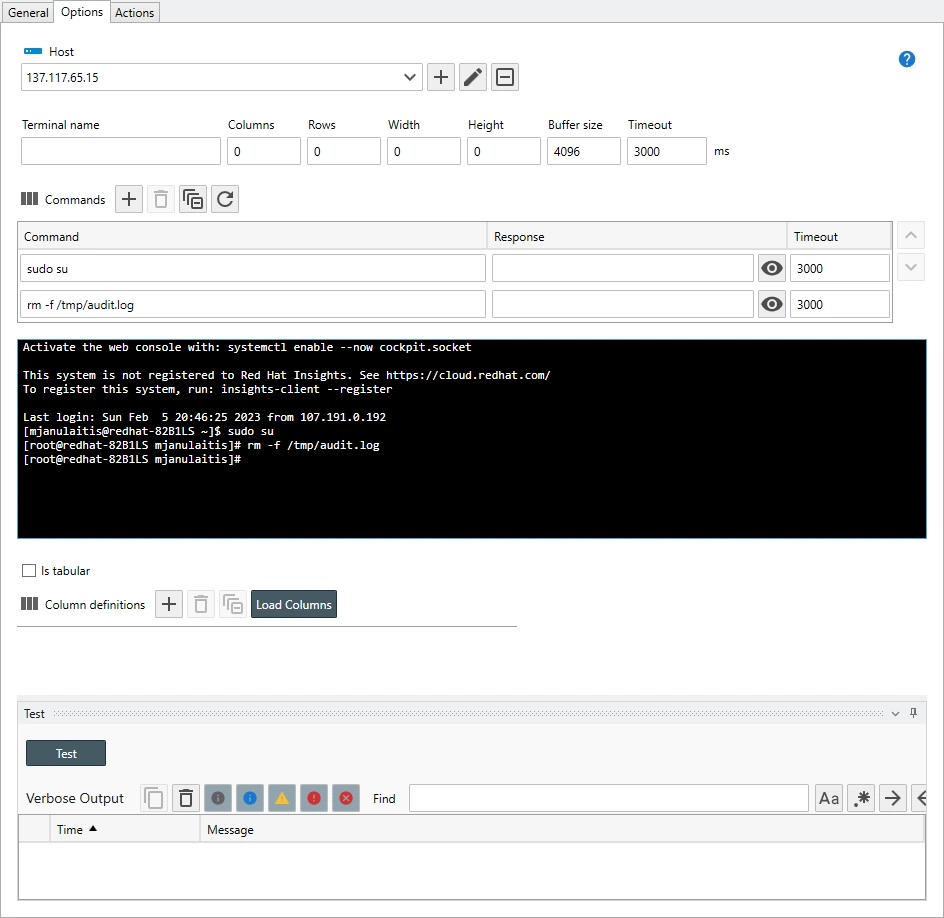
Select the Options Tab. we can see the SSH commands required to delete the temporary audit.log file. They are:
sudo su
rm -f /tmp/audit.log
-
To test the template, select the target host then click Execute Now button. The results are displayed in the Shell Viewer.
 Delete RHEL Audit.Log Template Properties

How to Configure the RHEL Audit Log Consolidation Template?
- From the Explorer View, expand Templates | Sample Templates then Red Hat.
- Right click on the Red Hat Audit Log Consolidation template, then select Template Properties. The Template Properties View displays.
- From the General Tab, use the Schedule drop-down to select the frequency to download the audit.log entries. For example once a minute.
-
Select the Files Tab. Notice the ./../../tmp/audit.log file is pre-populated. The Audit.Log (Create Tmp File) template moves the file to this location which is where we are going to look for the file.
To specify another location, select your target RHEL server, then navigate to the location you would like use download the log from.
Important
Note: When rolling files the best implementation saves current log entries to a dated filename. For a proper implementation, take a look at how Microsoft saves IIS logs files then reproduce the configuration on your RHEL server. Once implemented, use the date and time search criteria tags, for example: audit_<yyyyMMdd>.log. In this scenario, Server Manager reads the previous day's file after each file is rolled prior to reading the current file eliminating any possibility of lost entries. - Next, Select the Read Options Tab. Notice the Read method is set to Beginning of File. This options configures Server Manager to read the entire file the first time it is read then subsequent reads start from the location last read. If the file has been truncated, Server Manager searches for the last read entry then once found reads from that location. If the file was rolled, the new file is read from the beginning of the file.
- Next, select the Options Tab. Use the Log entry retention policy drop-down to select the log entry retention policy.
-
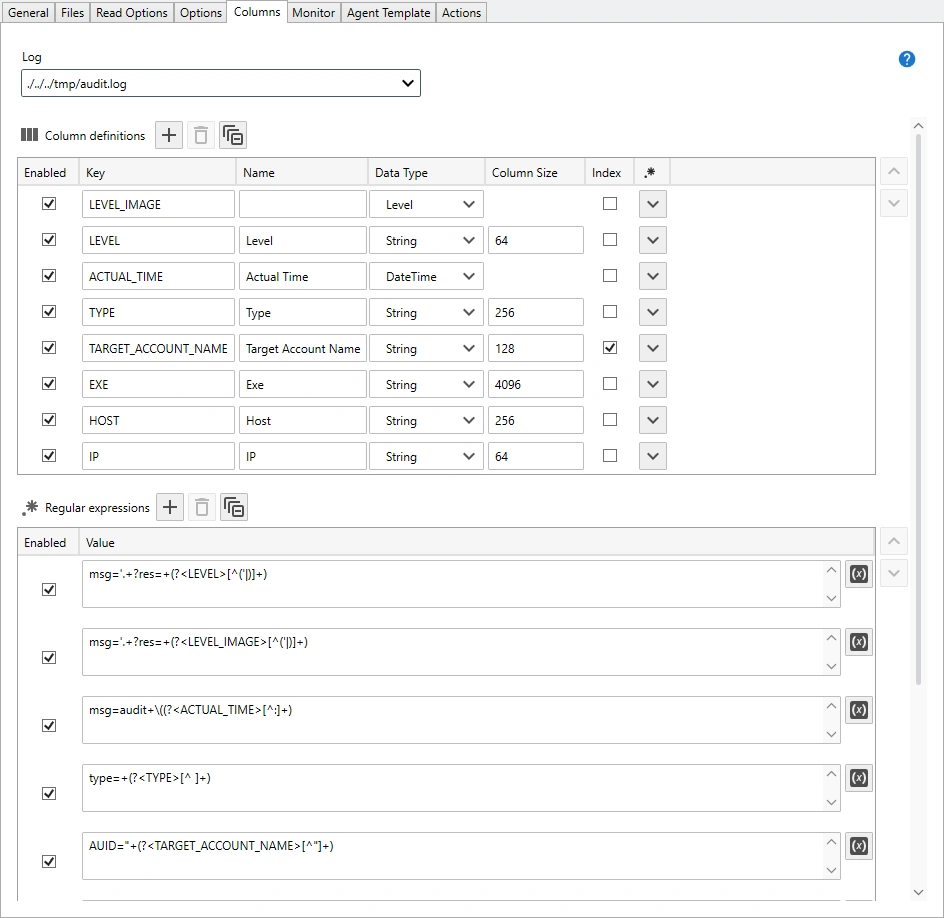
Next, select the Columns Tab.
This is where the real lifting happens.
Server Manager uses regular expressions to extract attribute value pairs prior to saving each entry to the log database.
You have the option to save the entries without regular expressions, however this format enables you to easily create filters for specific attribute value pairs.
Important
Note: Each RHEL audit.log file is likely configured differently so your regular expressions may need to be altered. This is just a sample and this article is not a tutorial on regular expressions so I'm going to skip past explanations of each regular expression. 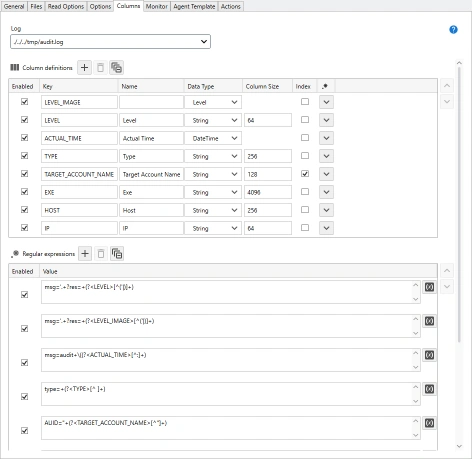 RHEL Audit.Log Column Definition Properties
 - Next, select the Monitor Tab. Use this view to configure any real-time monitoring you would like to execute, for example to get notified when a particular administrator logs into the server.
- Since this is an RHEL server, skip past the Agent Template Tab.
- Finally, select the Actions tab. Notice the Execute Audit.Log (Create Tmp File) action is assigned to the On Start action list and the Execute Audit.Log (Delete Tmp File) action is assigned to the On Compete action list. If I double-click on either of these actions we can see the action is configured to run the referenced template that either copies or deletes the audit log.
- Finally, use the Assignments View to assign this template to the RHEL server.
-
Click Close, then when prompted, save your changes.
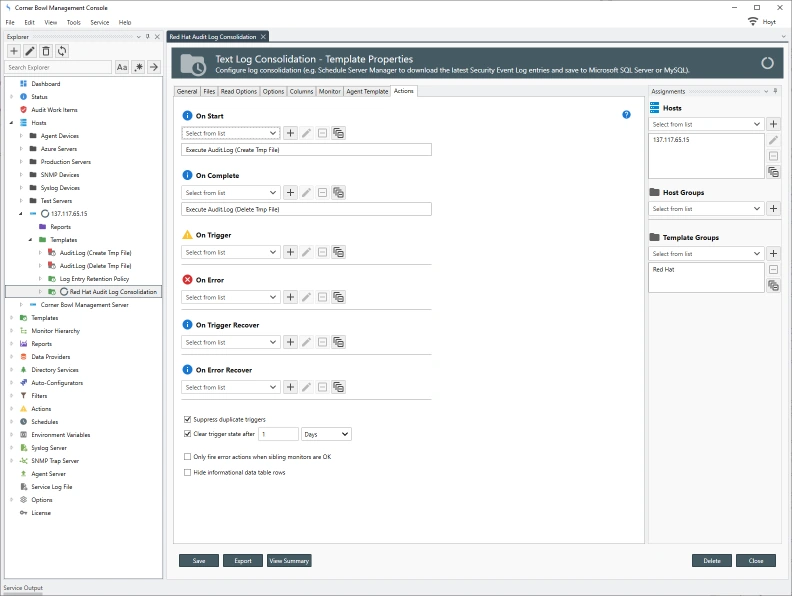 RHEL Audit Log Consolidation Properties

Putting it All Together?
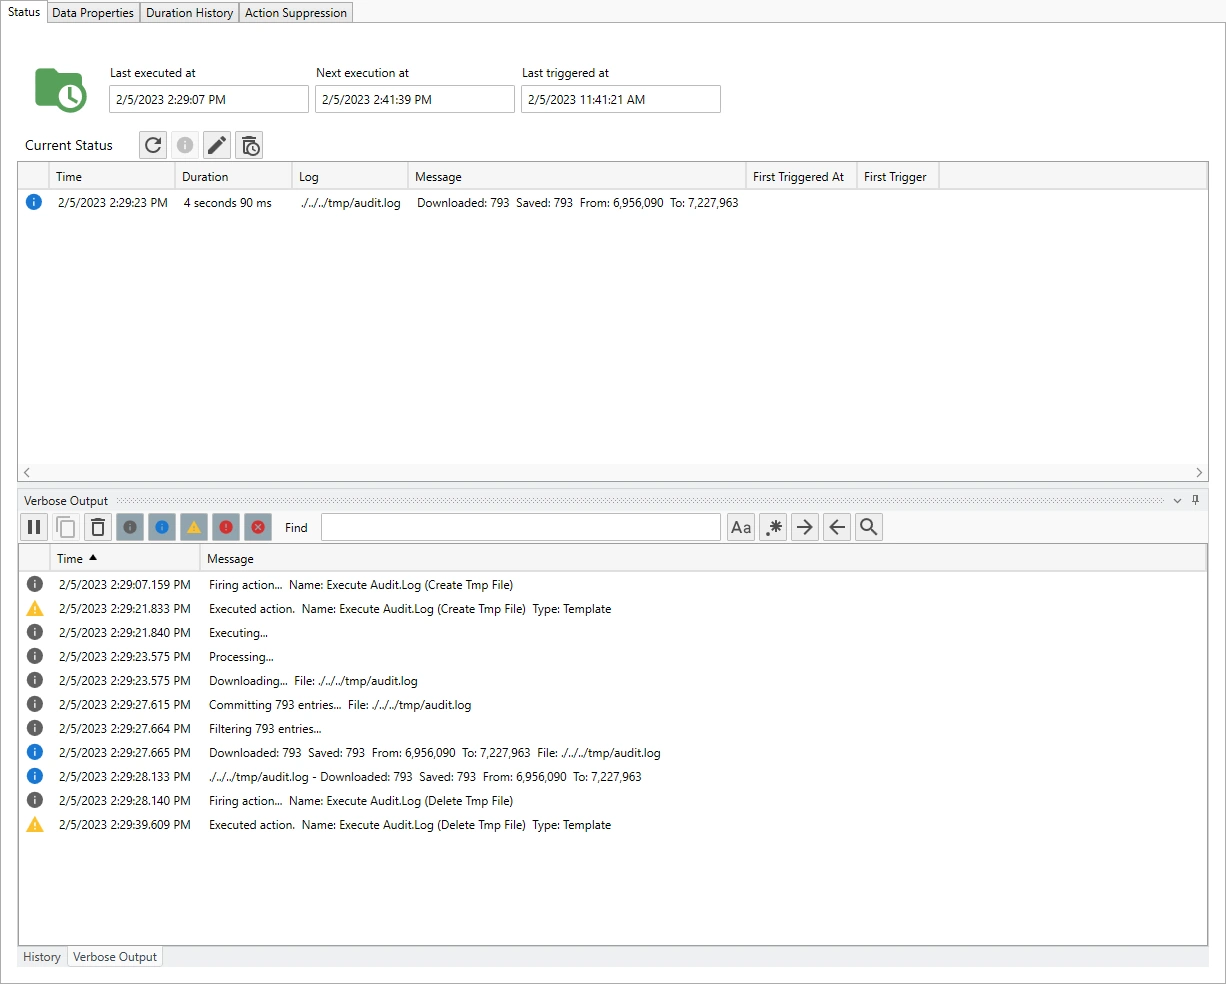
- To see this in action, find your RHEL server, expand, find the assigned Red Hat Log Consolidation template then right click and select Execute Verbose. The Monitor Status View displays.
- From the Monitor Status View, select the Verbose Tab. Notice the verbose output.
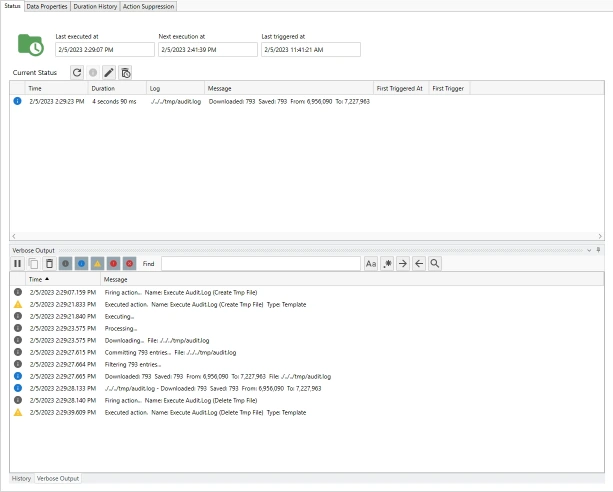 RHEL Audit Log Consolidation
 - Once complete, select the Data Properties Tab.
- From the Data Properties Tab, notice the Data Summary which includes details such as the number of log entries saved to the log database.
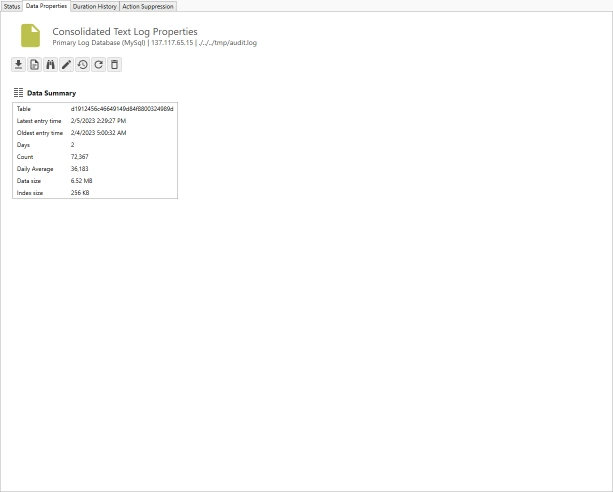 RHEL Consolidated Audit Log Properties
 - To view the saved entries, click the View Consolidated Log
 button.
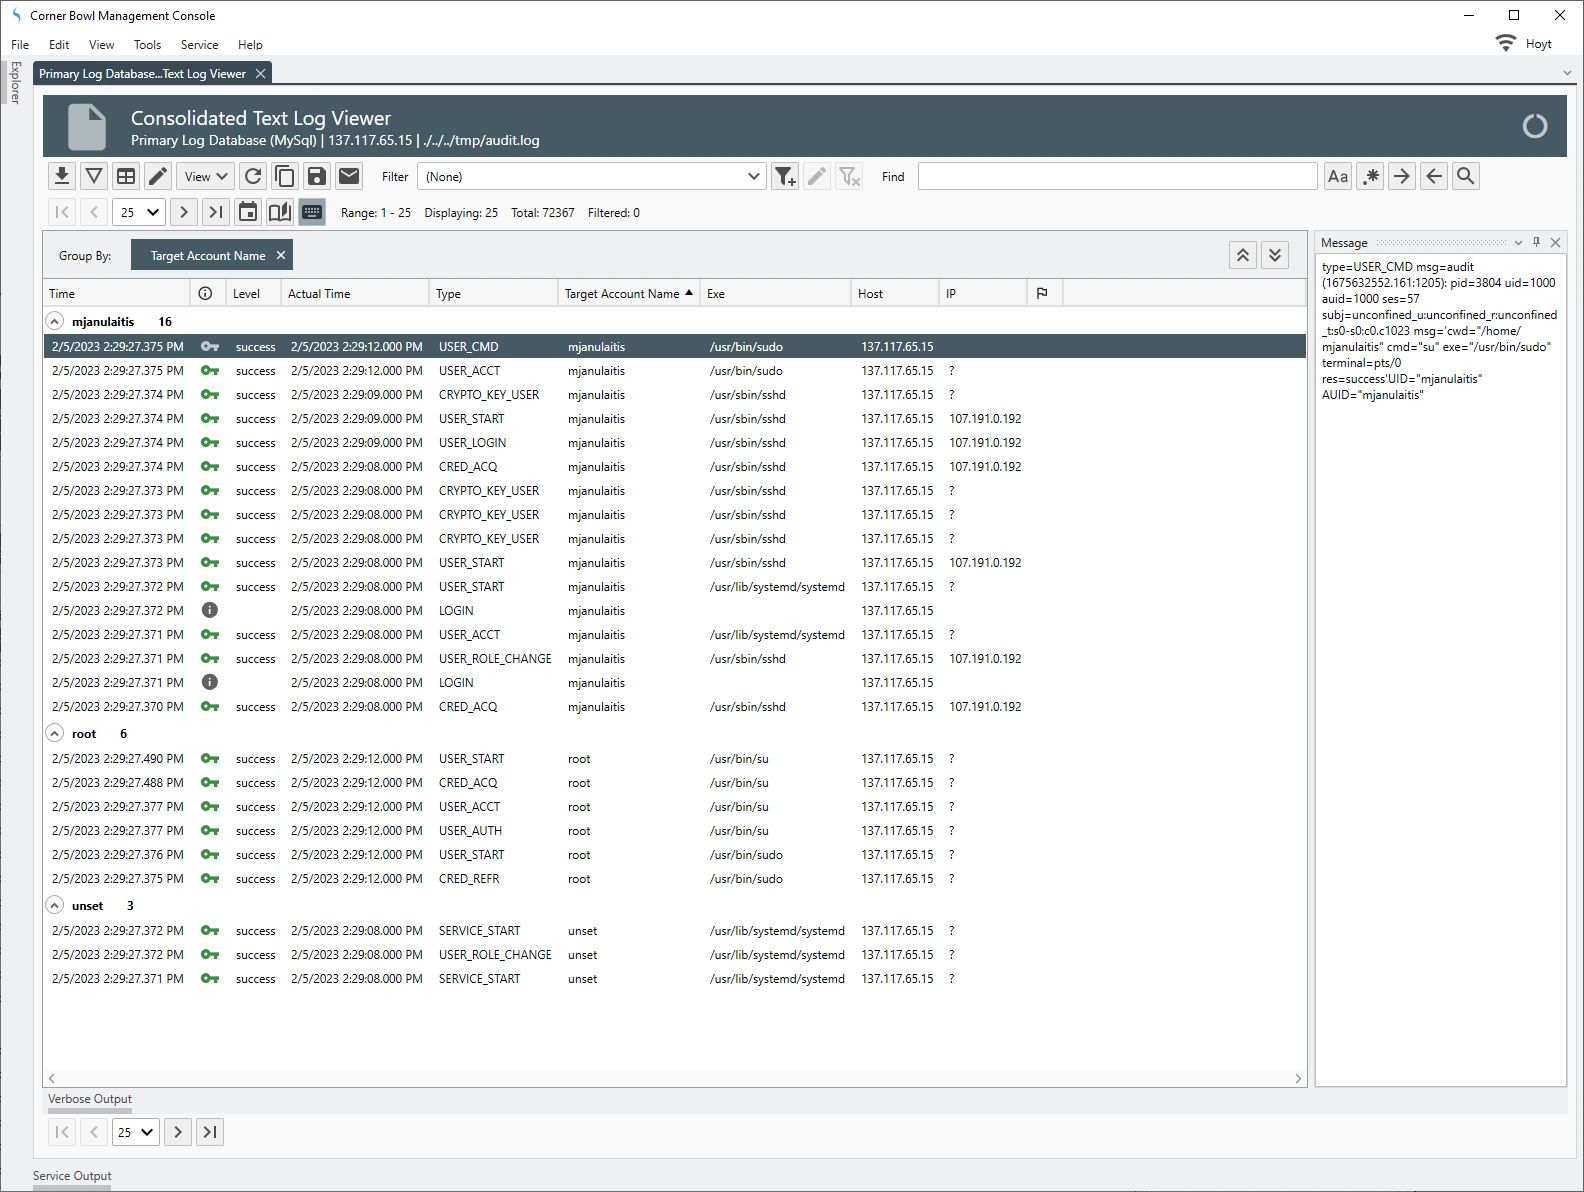
 - The Select Log Viewer Options Dialog displays. Leave the defaults then click OK. The Consolidated Text Log Viewer is displayed and we can see the parsed audit log entries.
 RHEL Consolidated Audit Log Viewer
 - That's part 1 of Red Hat Audit.Log Consolidation with Server Manager 2023.

Last Updated: March, 3rd 2024