Agent-Based Event Log Management with Corner Bowl Server Manager
In this article I am going to show you how use Corner Bowl Server Manager's Agent to:
- Consolidate Event Log Entries to a Log Database.
- Backup Event Log Files to a remote location.
Table of Contents
- How to Configure the Agent Server
- How to Configure our Agent-Based Event Log Management Templates
- How to Install the Agent on Windows Servers
- How to Run the Templates on Demand
- How to Verify Event Log Entries have been Saved to the Log Database
- How to Verify Event Log Files have been Remotely Backed Up
- Troubleshooting
How to Configure the Agent Server
The first step in this process is to configure the Agent Server.
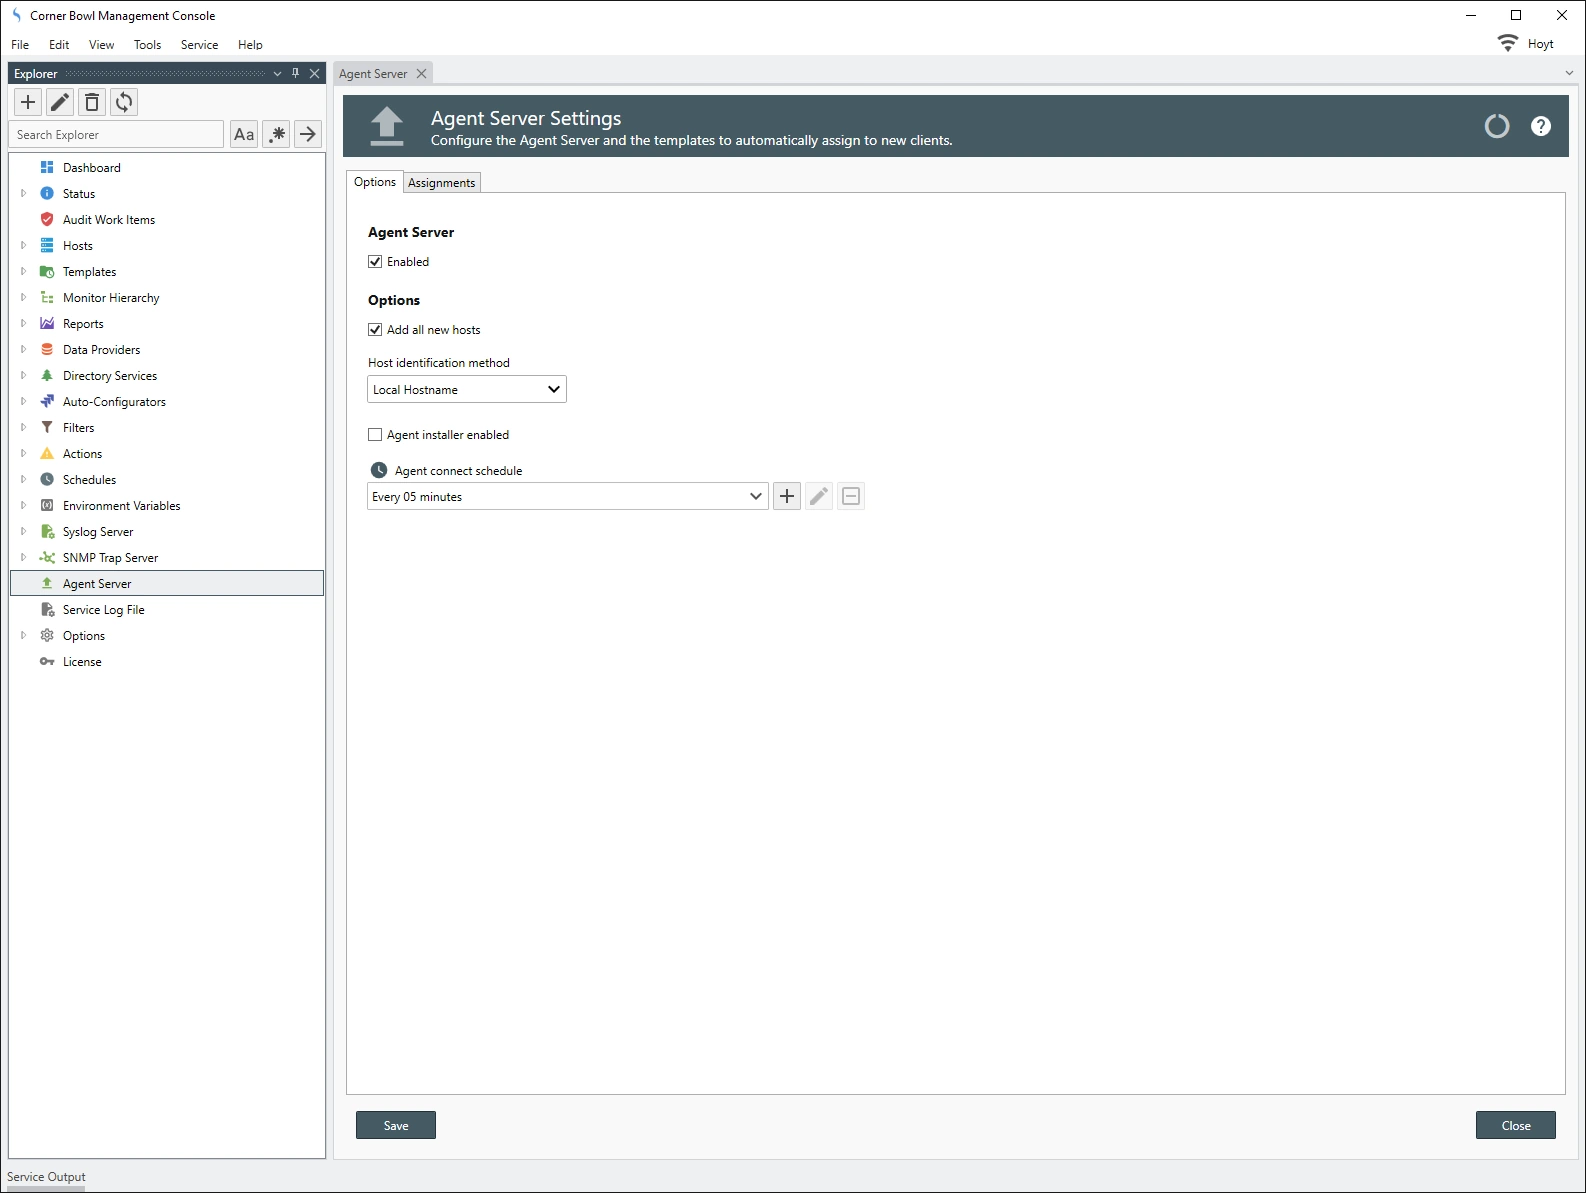
- From the Explorer View, select the Agent Server node. The Agent Server Properties View displays.
-
From the Agent Server Properties View, check the Enabled check box to enable the server.
NoteOnce enabled, the server attempts to install the agent to all configured hosts that have Agent-Based Templates assigned to them.
-
Use the Host identification method drop-down to select how to add new hosts. The following methods are available:
Method Description DNS Lookup The server uses DNS to resolve the hostname. DNS and FQDN Lookup The server uses DNS and Active Directory to resolve the Fully Qualified Domain Name (FQDN). Remote IP Address The server uses the IP address. Local Hostname The client sends its local hostname to server for identification. Local FQDN The client sends its locally resolved FQDN to server for identification. Local IP Address The client sends its local IP address to server for identification. - Use the Assign the following templates to all new clients check box to automatically add new hosts.
- Use the Templates drop-down to automatically assign specific templates when new hosts connect for the first time. By default, the Event Log Consolidation (Application, Security, System) (Agent) and the Event Log File Backup (Agent) templates are pre-assigned. For more information, see below.
- Click the Save button to save your any changes.
How to Configure our Agent-Based Event Log Management Templates
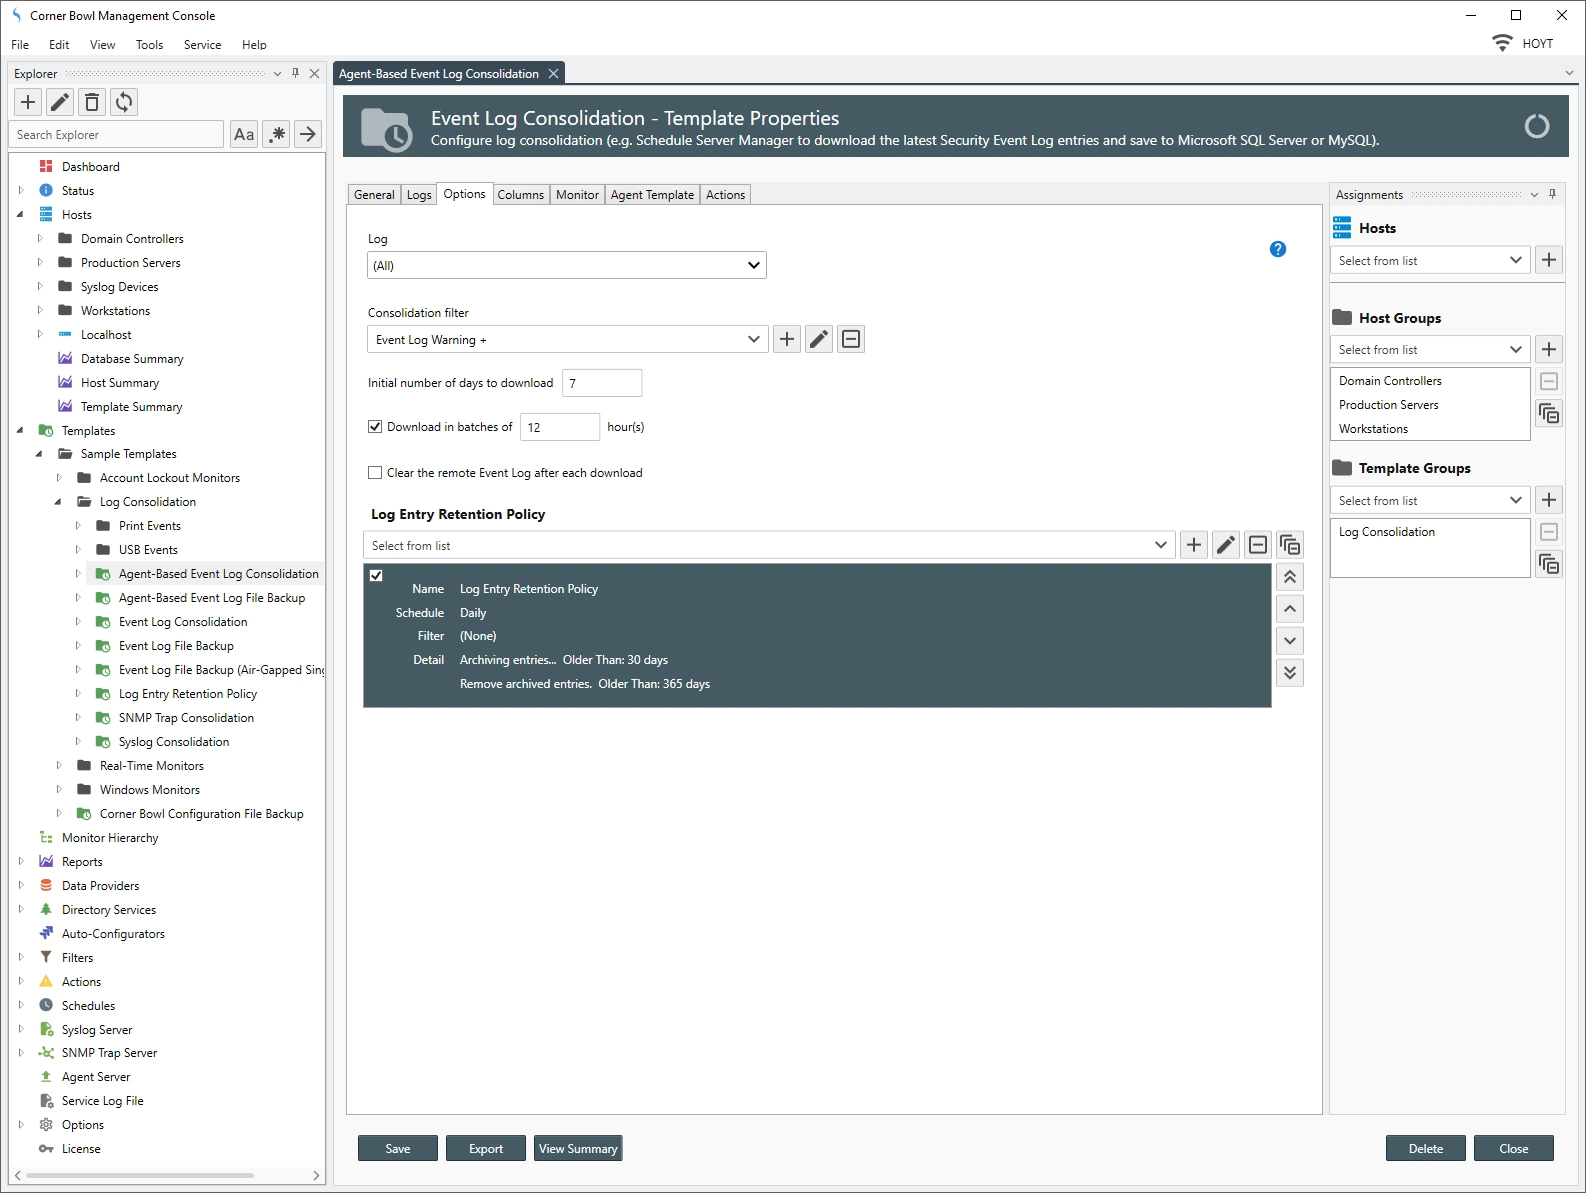
Our Event Log Consolidation (Application, Security, System) (Agent) Template requests Event Log Entries then saves them to the Log Database used by Reports such as Success and Failed Logons.
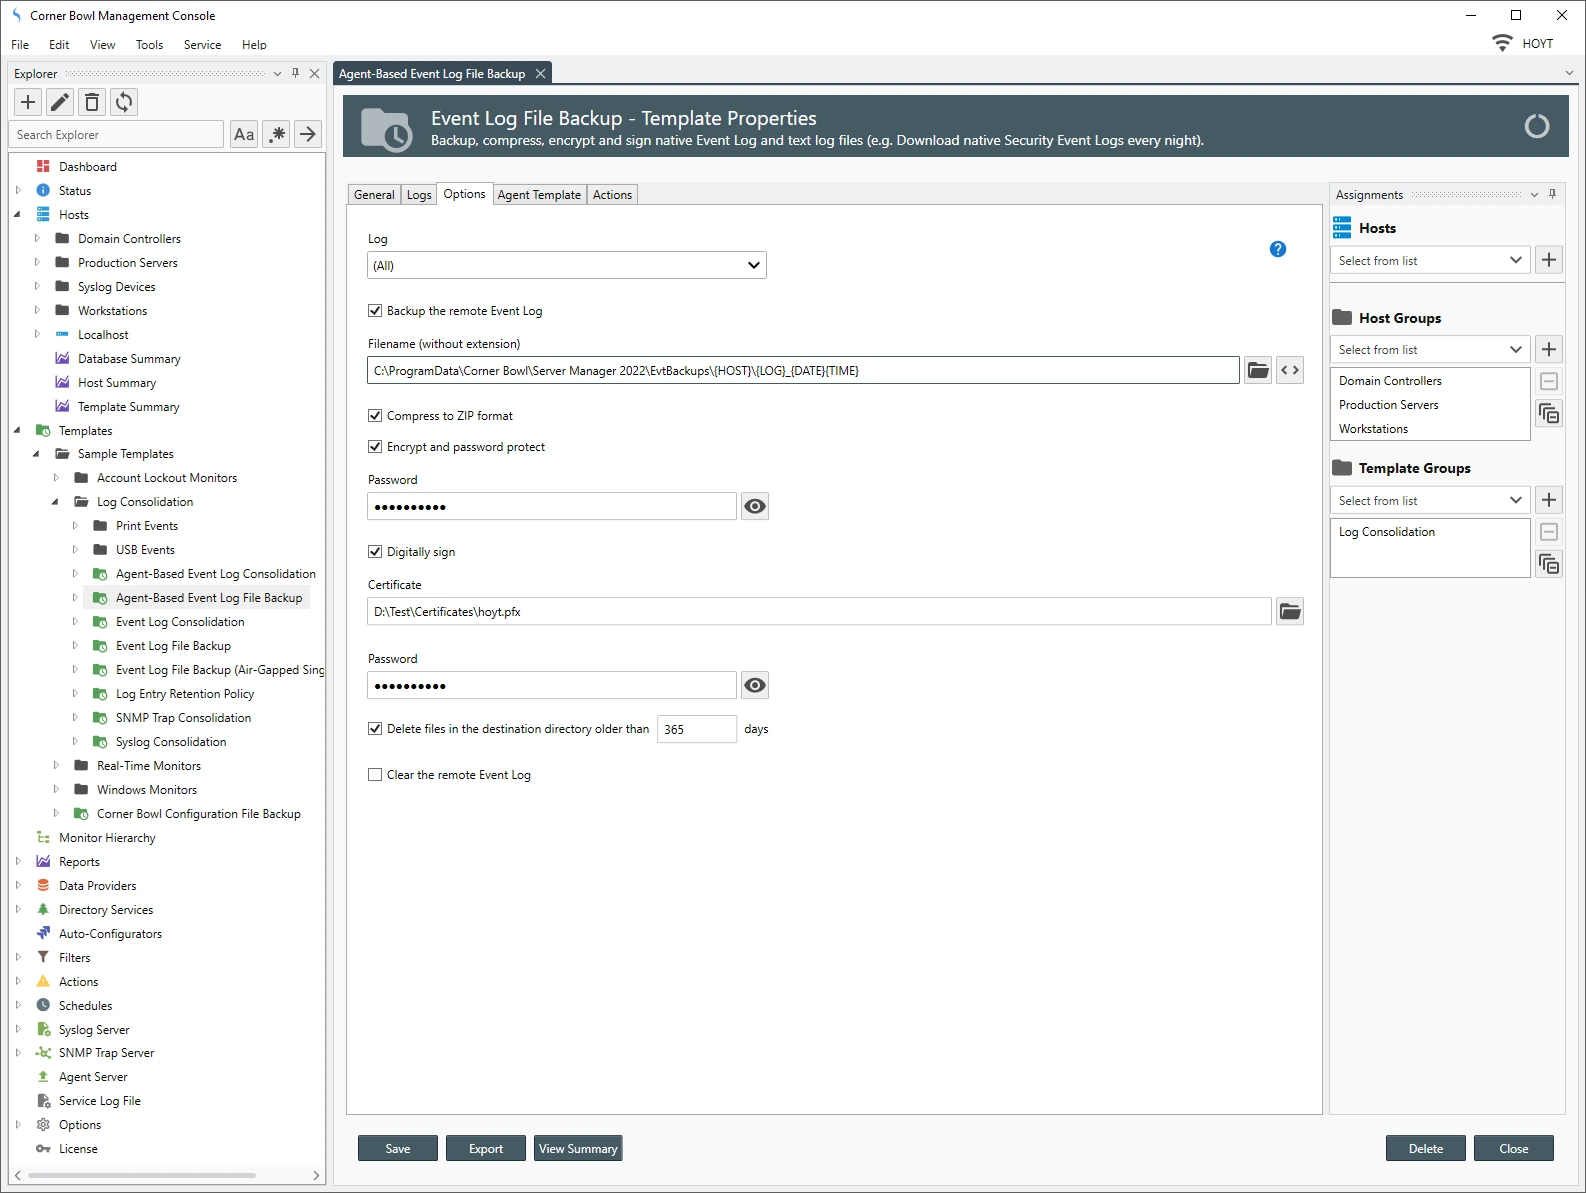
Our Event Log File Backup (Agent) Template requests Event Logs are backed up then uploaded to the Management Server for remote storage. Backed up Event Log Files are compressed then optionally encrypted using FIPS compliant AES.
Both of these templates are flagged within their corresponding properties views as Agent-Based Templates. For detailed information on each template, see the in-application help file.
To configure a template as an Agent-Based Template
- From the Explorer View, right click on a supported template type then click Template Properties. The Template Properties View displays.
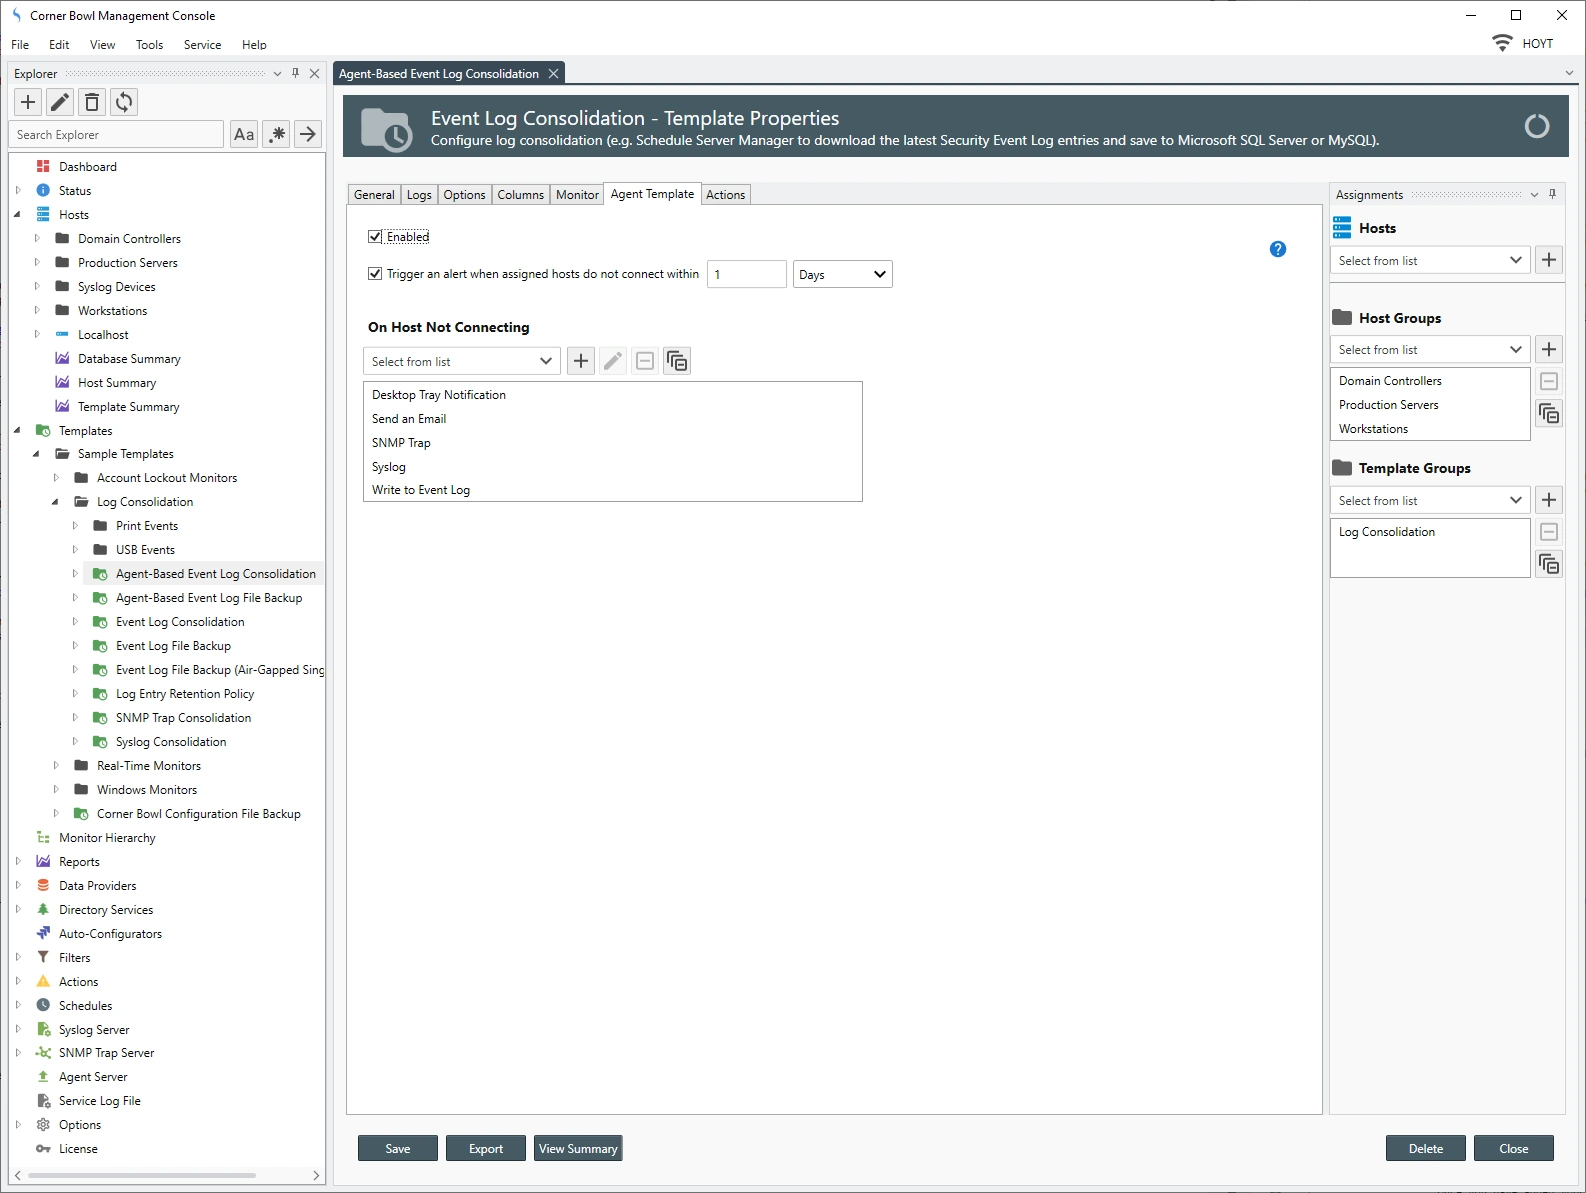
- From the Template Properties View, select the Agent Template Tab
- Use the Enabled check box to flag the template as an Agent-Based Template.
- Use the Trigger check box to trigger actions when assigned hosts do not connect within the configured time span.
- Use the On Host Not Connecting drop-down to assign the actions to fire when assigned hosts do not connect within the configured time span.
How to Install the Agent on Windows Servers
Next, we need to install the agent on each target host. If the service is running with Domain Administrator credentials and both WMI and Windows Shares technologies are available, the installation is automatic, otherwise you can manually install the agent on each machine.
To manually install the client agent
-
From the
Menu Bar, select
Help |
Contents then search for
Agent-Based Monitoring. Review the help file for detailed information.
To automatically install the client agent
The first step in this process is to add our servers to the software.
- From the menu-bar select File | New. The Create New Object View displays.
-
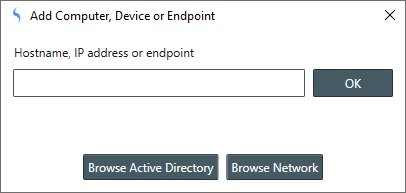
Next, select Computers, Devices and Endpoints. The Add Computers, Devices and Endpoints Dialog displays.
 Add Computers, Devices and Endpoints Dialog
 - Either enter the server name directly or click Browse Active Directory.
-
If we click Browse Active Directory, the Browse Active Directory Dialog displays.
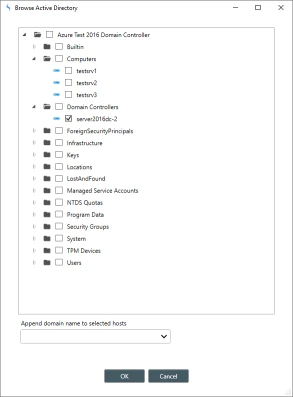 Browse Active Directory Dialog
 - Use this view to select the group of domain controllers or individual servers then click OK.
-
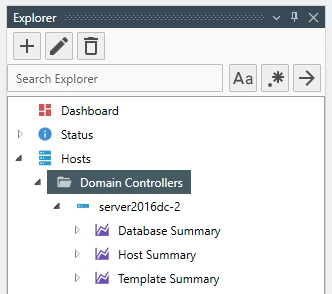
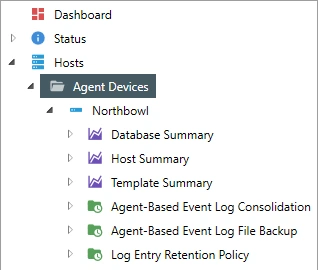
Once added, from the Explorer View, expand Hosts. We now see the servers in a new group with the label of the parent Organizational Unit name. For example, Domain Controllers.
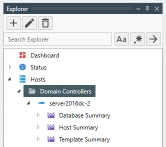 Explorer View with New Server Added

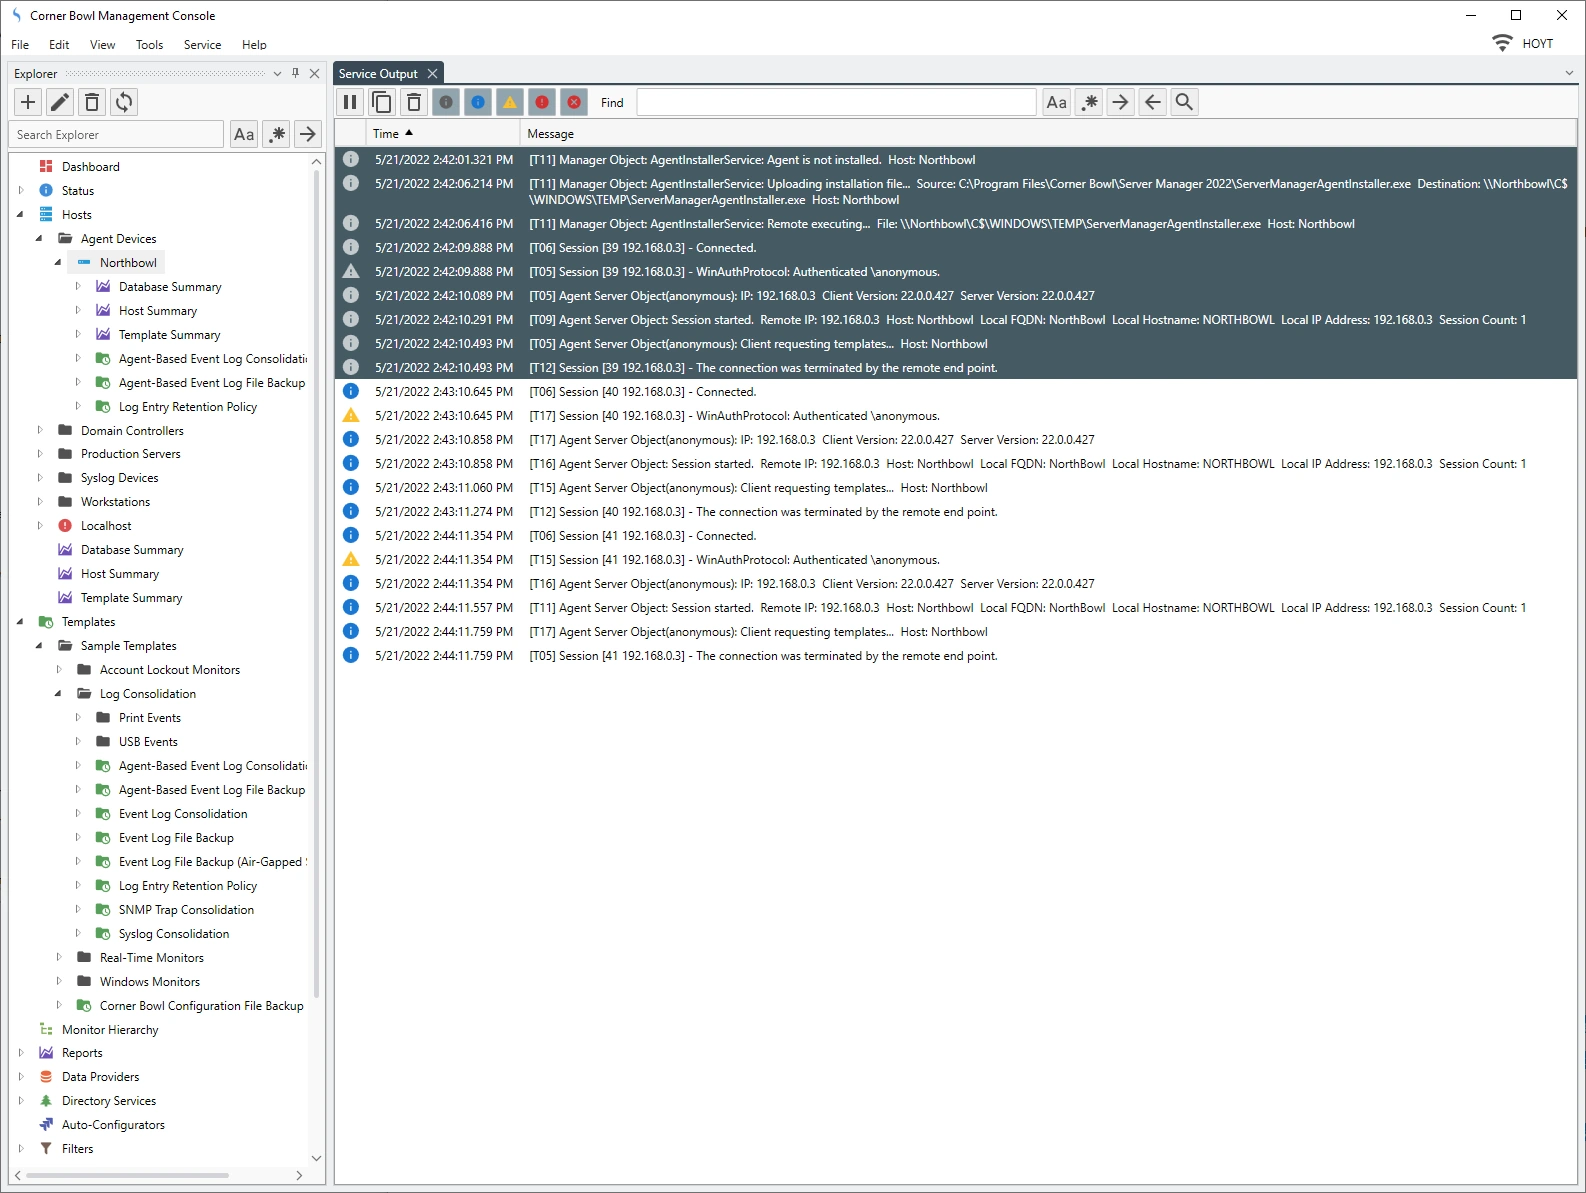
Before we trigger the agent installation, I am going to show you how to monitor the installation within the software. Notice the Service Output Tab in the lower left corner. If we drag and drop this tab to the center of the screen we can see the output in the document view pane. This view displays verbose agent installation output so we can see exactly what is happening.
Now that we have added a host to manage, we need to assign a single agent-based template to the host. Once assigned the software will attempt to install the agent on the remote host within one minute.
To assign a template to a host
- From the Explorer View, use drag-drop to assign the template or
- Right click on a template then select Template Properties. Use the Template Properties View to assign the hosts to the template.
If we watch the Service Output, we see the following messages indicating the agent has been successfully installed:
AgentInstallerService: Agent is not installed.  Host: Northbowl
AgentInstallerService: Uploading installation file...  Source: C:\Program Files\Corner Bowl\Server Manager 2022\ServerManagerAgentInstaller.exe  Destination: \\Northbowl\C$\WINDOWS\TEMP\ServerManagerAgentInstaller.exe  Host: Northbowl
AgentInstallerService: Remote executing...  File: \\Northbowl\C$\WINDOWS\TEMP\ServerManagerAgentInstaller.exe  Host: Northbowl
Once installed, the agent will connect once every minute. Notice, in the screenshot below, we see three different connection sessions defined by the entries below:
Session [39 192.168.0.3] - Connected.
Session [39 192.168.0.3] - WinAuthProtocol: Authenticated \anonymous.
AgentInstallerService: Remote executing...  File: \\Northbowl\C$\WINDOWS\TEMP\ServerManagerAgentInstaller.exe  Host: Northbowl
Agent Server Object(anonymous): IP: 192.168.0.3  Client Version: 22.0.0.427  Server Version: 22.0.0.427
Agent Server Object: Session started.  Remote IP: 192.168.0.3  Host: Northbowl  Local FQDN: NorthBowl  Local Hostname: NORTHBOWL  Local IP Address: 192.168.0.3  Session Count: 1
Agent Server Object(anonymous): Client requesting templates...  Host: Northbowl
Session [39 192.168.0.3] - The connection was terminated by the remote end point.
Once connected, we can see some information about the client in the Dashboard. To view the Dashboard:
- From the Explorer View, click on the Dashboard node. The Dashboard View displays.
- From the Dashboard View, select the Host Summary Tab.
- Notice the new host is listed along with the Client Version and the Last Connection time.

Depending on the options you set for the Host Identification, the host may be added with a different name than the name you previously added. In that scenario the host is added to a group called Agent Devices. To see this in action, delete the host then wait for the agent to re-connect. Once reconnected, you will see a new Agent Server group with the host listed in the group.
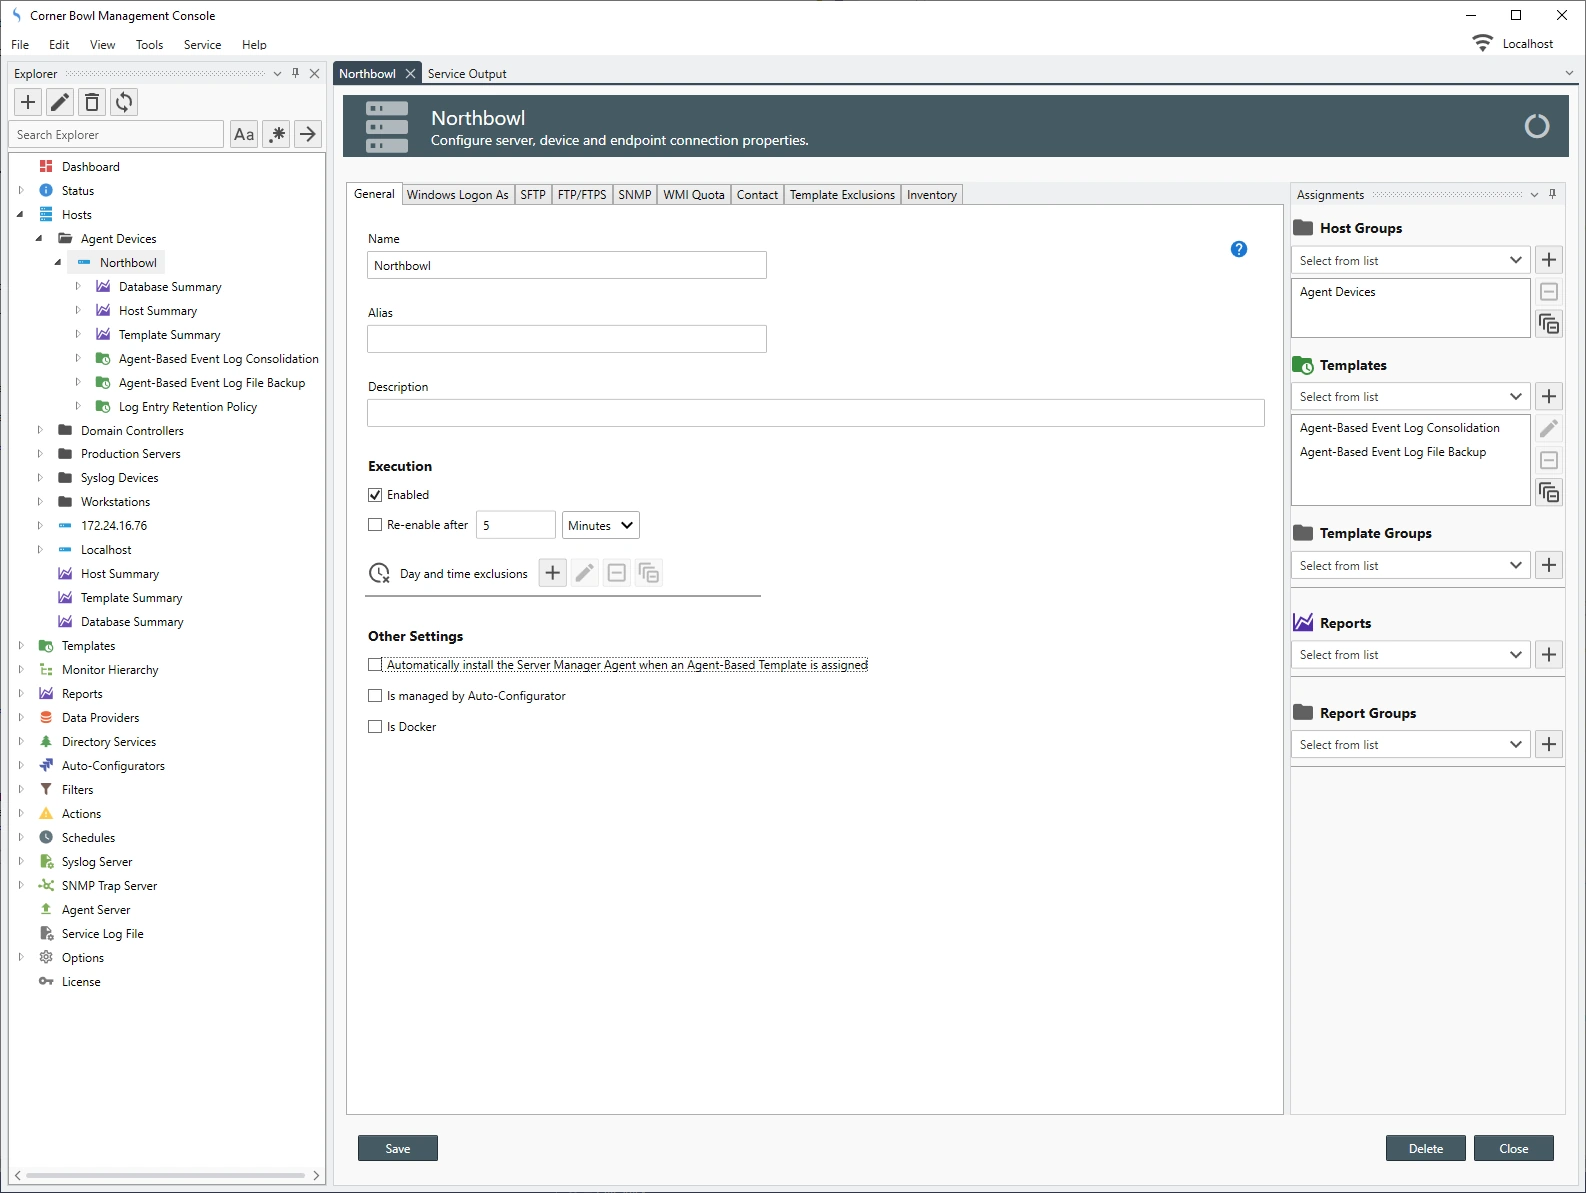
If the agent has internet access, the agent automatically updates when a new version becomes available, otherwise, Server Manager attempts to update the agent when a new update becomes available. If WMI or Windows Shares access is unavailable from the host the agent is installed, we can configure Server Manager to ignore the host when updating agents. To disable the automatic installation and updates of a host's agent, open the Host Properties View then de-select the Automatically install option located on the General Tab.
How to Manually Run the Templates on Demand
The templates we assigned run hourly and daily respectively. To trigger the templates to run the next time the agent connects we need to queue the execution.
- From the Explorer View, expand Hosts then find the target host.
- Right click on the target host then select Execute. The template is queued for execution the next time the agent connects.
How to Verify Event Log Entries have been Saved to the Log Database
Once the Event Log Consolidation template is complete, we can find the consolidated logs under the Data Providers node.
- From the Explorer View, expand the Data Providers node then find the Primary Log Database node.
- Navigate through the tree to find the target host then expand the host.
- Once expanded, we will find all the logs that have been saved to the Log Database.
- Right click on one of the logs then select View. The Log viewer Options View displays.
- From the Log viewer Options View select the view options then click OK. The Log Viewer displays.

How to Verify Event Log Files have been Remotely Backed Up
Once the Event Log File Backup template is complete, we can find the saved logs in output directory.
- From the Explorer View, expand the Hosts node.
- Navigate through the tree to find the target host then expand the host.
- Once expanded, find the Event Log File Backup (Agent) template then right click and select Explore. The Monitor Detail View displays.
-
From the Monitor Detail View, the status shows the location of the backed up files. Take note of the location.
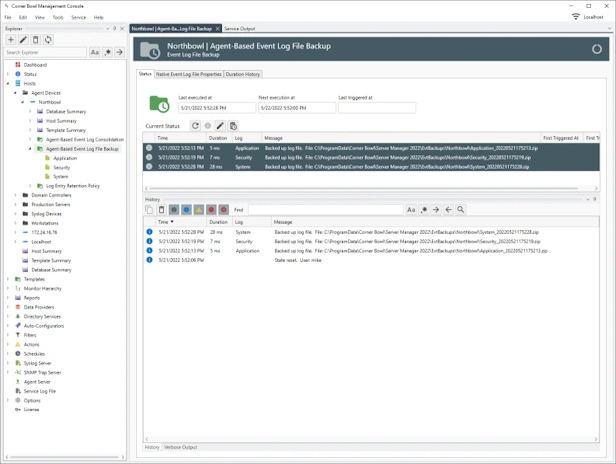 Security Event Log File Backup Monitor Status
 -
From the Menu Bar, select File | Open then select the Zip file to view. The Log Viewer automatically expands the file then displays the contents.
If the file was encrypted and password protected, we are prompted to specify the password to unlock the file.
NoteWhen you have finished reviewing the file, if the expanded file is no longer required, use Windows Explorer to delete the file.

Troubleshooting
If a client is not connecting, you can troubleshoot on the client-side by remoting into the server, then opening the agent.log file:
If there is a problem with the target host or other configuration properties you can modify the parameters by opening the configuration file as an administrator in notepad. By default the file is located in:
Last Updated: August 25th, 2024