Disk Monitoring and Reporting with Corner Bowl Server Manager
November 9th, 2022
In this article I am going to show you how to monitor free disk space on all of your enterprise servers.
Table of Contents
- How to Configure the Disk Monitor Template
- How to Configure Disk Monitor Email Notifications
- How to Assign the Disk Monitor Template to your Enterprise Servers
- Testing the Disk Monitor
- Analyzing Disk Space
- How to Configure Disk Space Summary Reports for all of your Enterprise Servers
- Viewing the Disk Space Summary Report
How to Configure the Disk Monitor Template
- From the Menu Bar, select File | New. The Create New Object View displays.
- From the Create New Object View, expand Template | Windows Monitors then select Disk Space Monitor to monitor logical disks or Disk Space Monitor (Windows Shares) to monitor shares you have created. For this tutorial, I am going to focus on logical disks since Windows Shares are typically only used int one-off scenarios. Once selected, the New Disk Space Monitor Template View displays.
-
Use the General Tab to specify a unique name and execution schedule.
NoteNotice the default schedule is set to an hourly range schedule. When you choose a range based schedule assigned hosts are evenly distributed over each hour. For example, if you assign 60 servers, one server will be scanned each minute until all 60 are scanned then the process starts over.
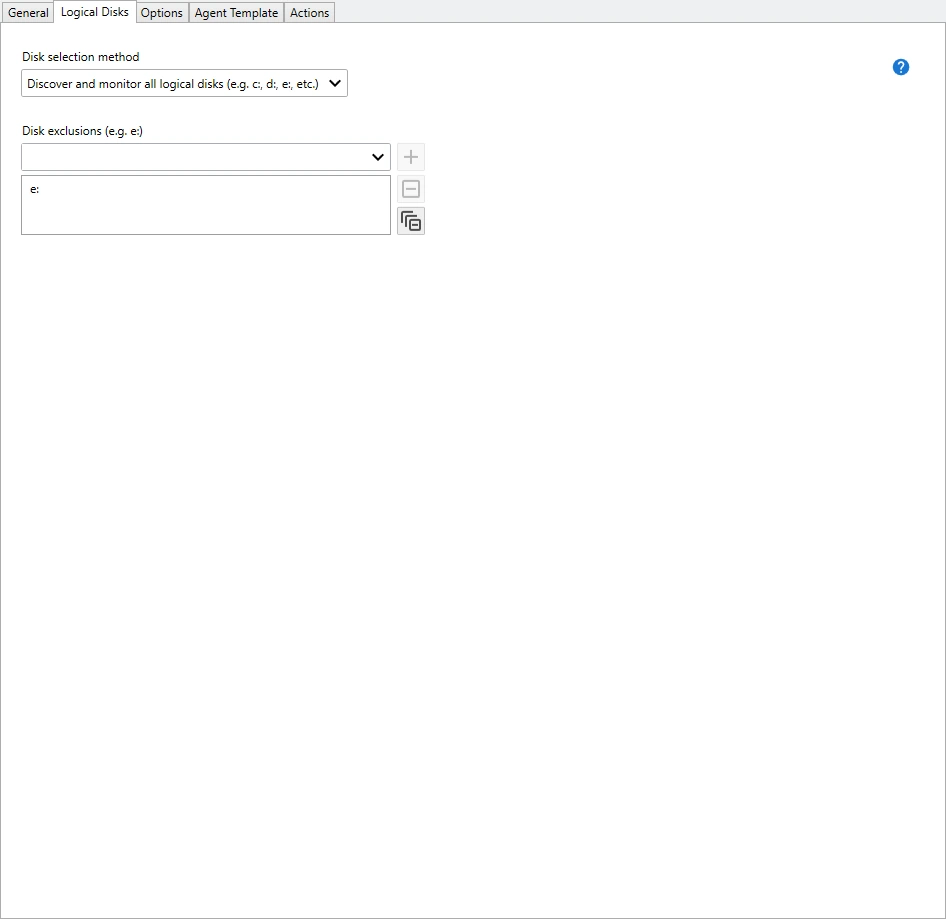
- Use the Logical Disks Tab to configure the software to either discover and monitor all logical disks or explicitly assign and configure each logical disk.
- If you choose to discover all logical disks, use the Disk Exclusions drop-down to exclude specific disks from the monitors, for example, e:.
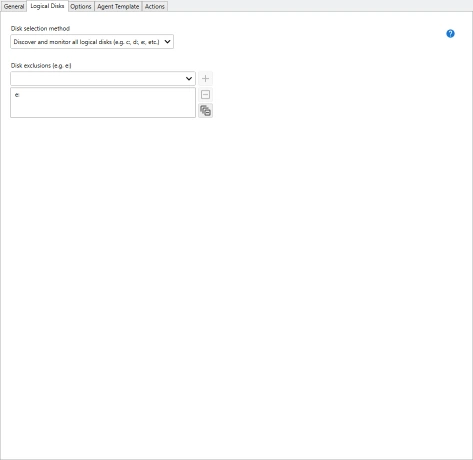 Discover Logical Disks
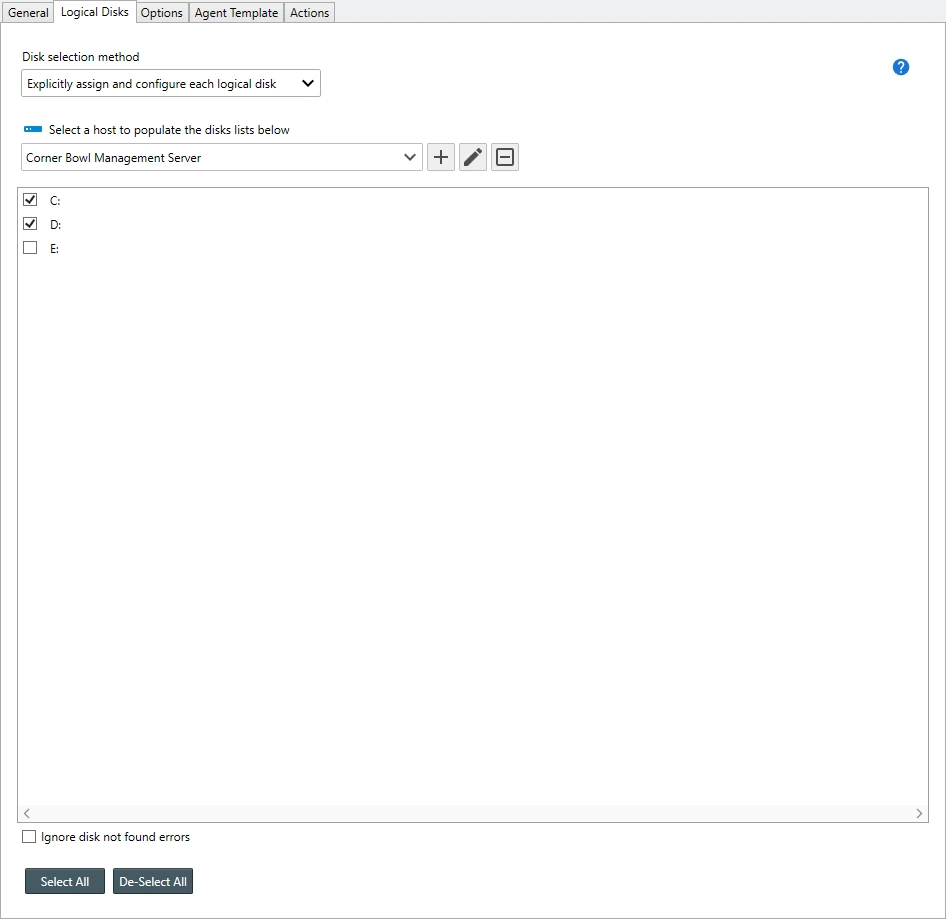
 - If you choose to explicitly assign and configure each logical disk, Use the host drop-down to select the host to model the template from then check each disk you want to monitor.
 Select Logical Disks
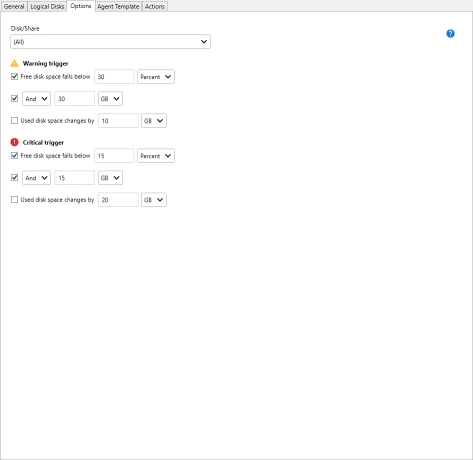
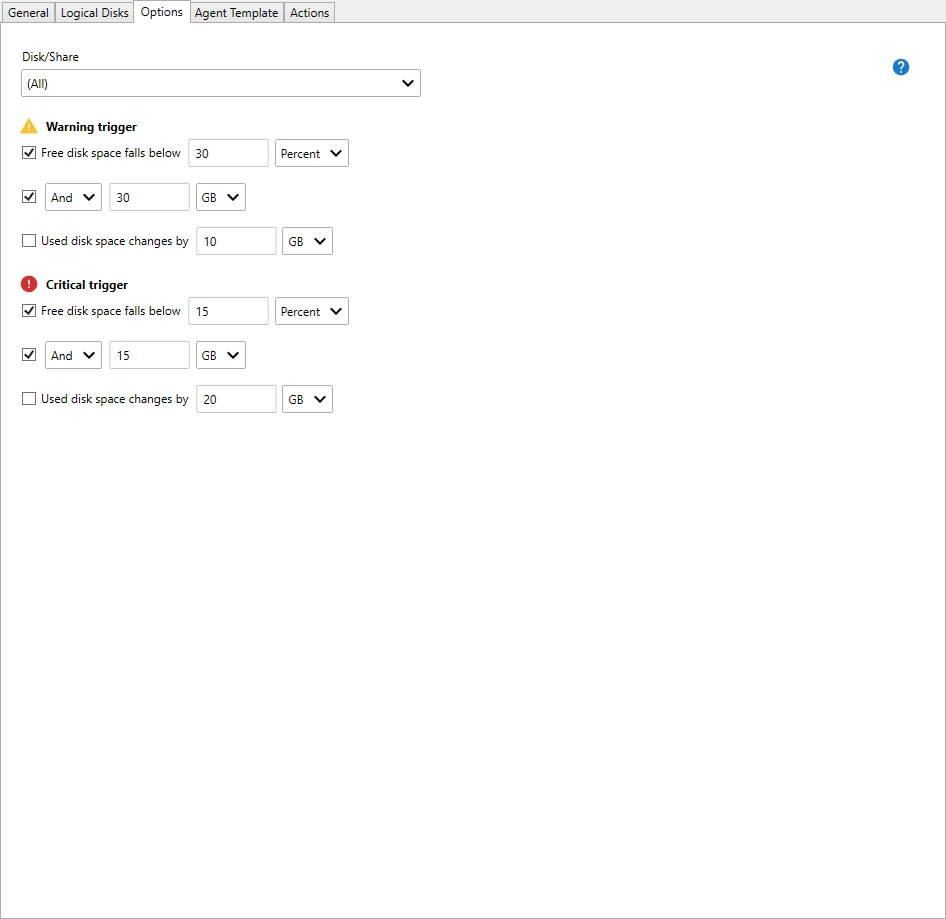
 - Use the Options Tab to configure the warning and critical trigger thresholds.
- Use the Disks/Shares drop-down to select specific disks or shares to configure.
NoteThis option is only available when explicitly assigning logical disks or Windows Shares from either the Logical Disks tab or the Windows Shares tab depending on the type of disk monitor template you are creating.
- Use the Free disk space falls below check box to enable the free disk space monitor then specify the threshold Value and Units. Optionally, if monitoring by percentage of free disk space, check the option to enable an additional And or Or threshold to limit false positives.
- Use the Used disk space changes by check box to monitor changes in disk space between each scan.
NoteThis function uses the absolute value of the change in free disk space size enabling the template to trigger when free disk space increases as well as decreases.
 Disk Monitor Properties View
 - Use the Agent Template Tab to configure the template to run using the Agent instead of using remote WMI or Windows Shares depending on the type of template you are configuring.
How to Configure Disk Monitor Email Notifications
Continuing from the section above:
-
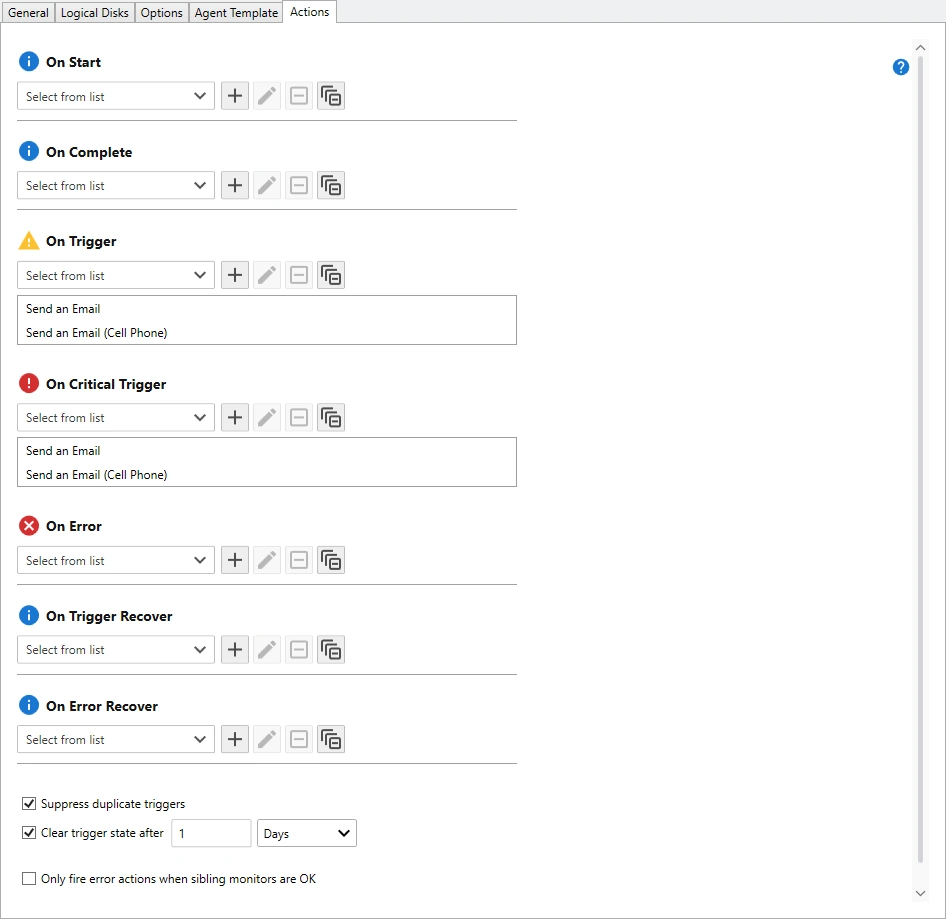
Use the Actions Tab to assign the actions to execute once any of the thresholds are triggered.
For this tutorial, I am going to choose two sample email actions, one for desktop notifications and the other for cell phones notifications:
- Send an Email
- Send an Email (Cell Phone)
ImportantIf this is your first time using these either of these actions, make sure to assign your email address to each action.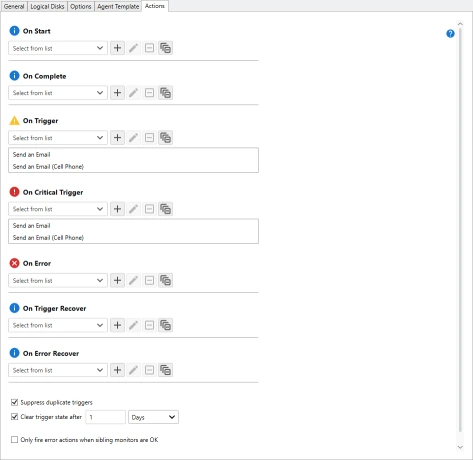 Disk Monitor Email Notification Properties View
How to Assign the Disk Monitor Template to your Enterprise Servers
Continuing from the section above, from the Assignments View:
-
Use the Hosts drop-down to assign specific Enterprise Servers.
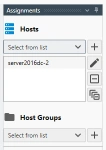 Assign Individual Enterprise Servers
 -
Use the Host Groups drop-down to assign an entire group, for example Domain Controllers.
NoteTemplates are automatically assigned and unassigned from each host when the host is assigned and unassigned from host groups.
 Assign a Group of Enterprise Servers
 - Click Close, then when prompted, save your changes.
ImportantNotice the error stating the name is already in use. Server Manager includes a sample Disk Space Monitor Template with the same default name. To get past this error message, select the General Tab then either click the Auto-Generate Name
 button
or specify a unique name.
button
or specify a unique name.


Testing the Disk Monitor
- From the Explorer View, locate one of the hosts you assigned the template to then expand.
- Find the new template you just created, then right click and select Explore. The Monitor Status View displays.
-
From the Monitor Status View click the Execute Now
 button.
If you are using remote WMI or Windows Shares, the monitor is immediately executed, otherwise, when using the Agent, the monitor is queued to run the next time the server connects.
button.
If you are using remote WMI or Windows Shares, the monitor is immediately executed, otherwise, when using the Agent, the monitor is queued to run the next time the server connects.
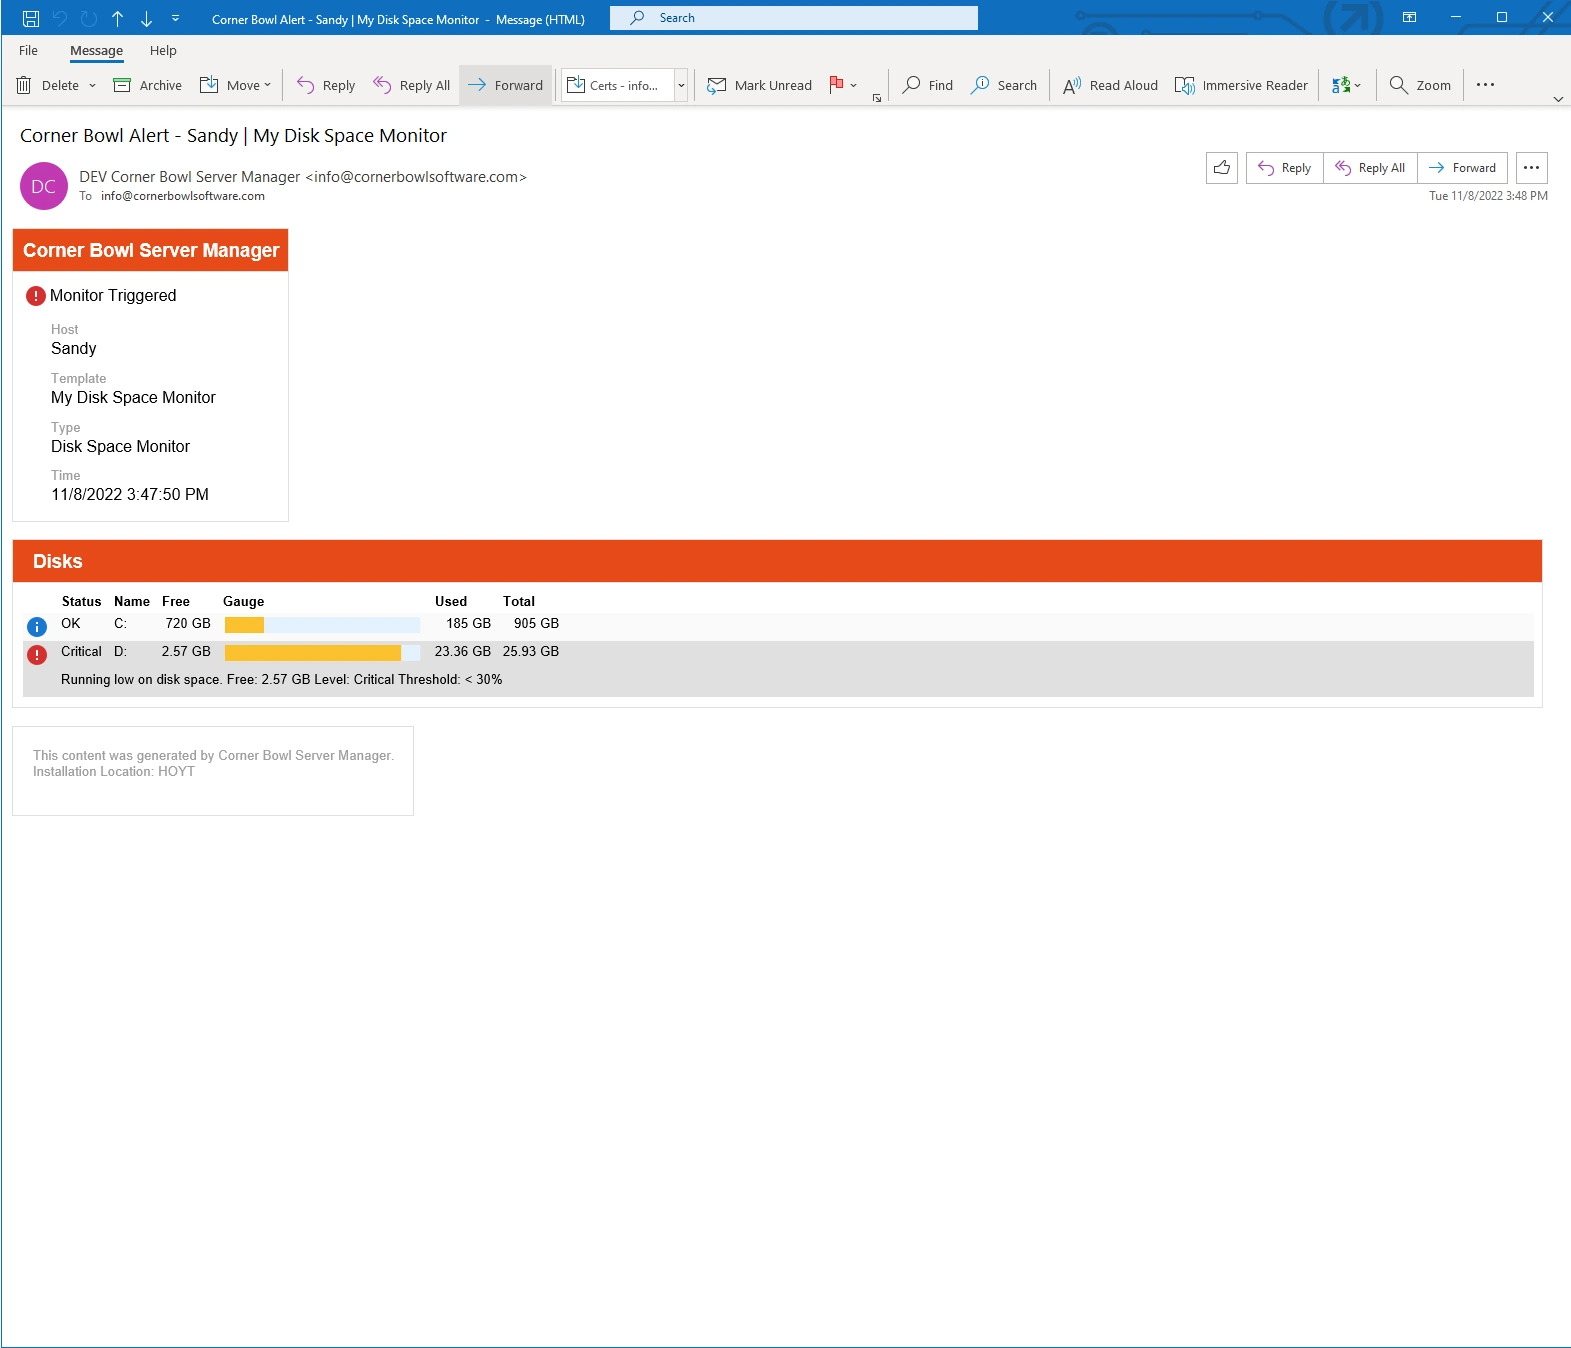
- When triggered, Server Manager sends the email notifications. For example:
 Desktop Email Notification
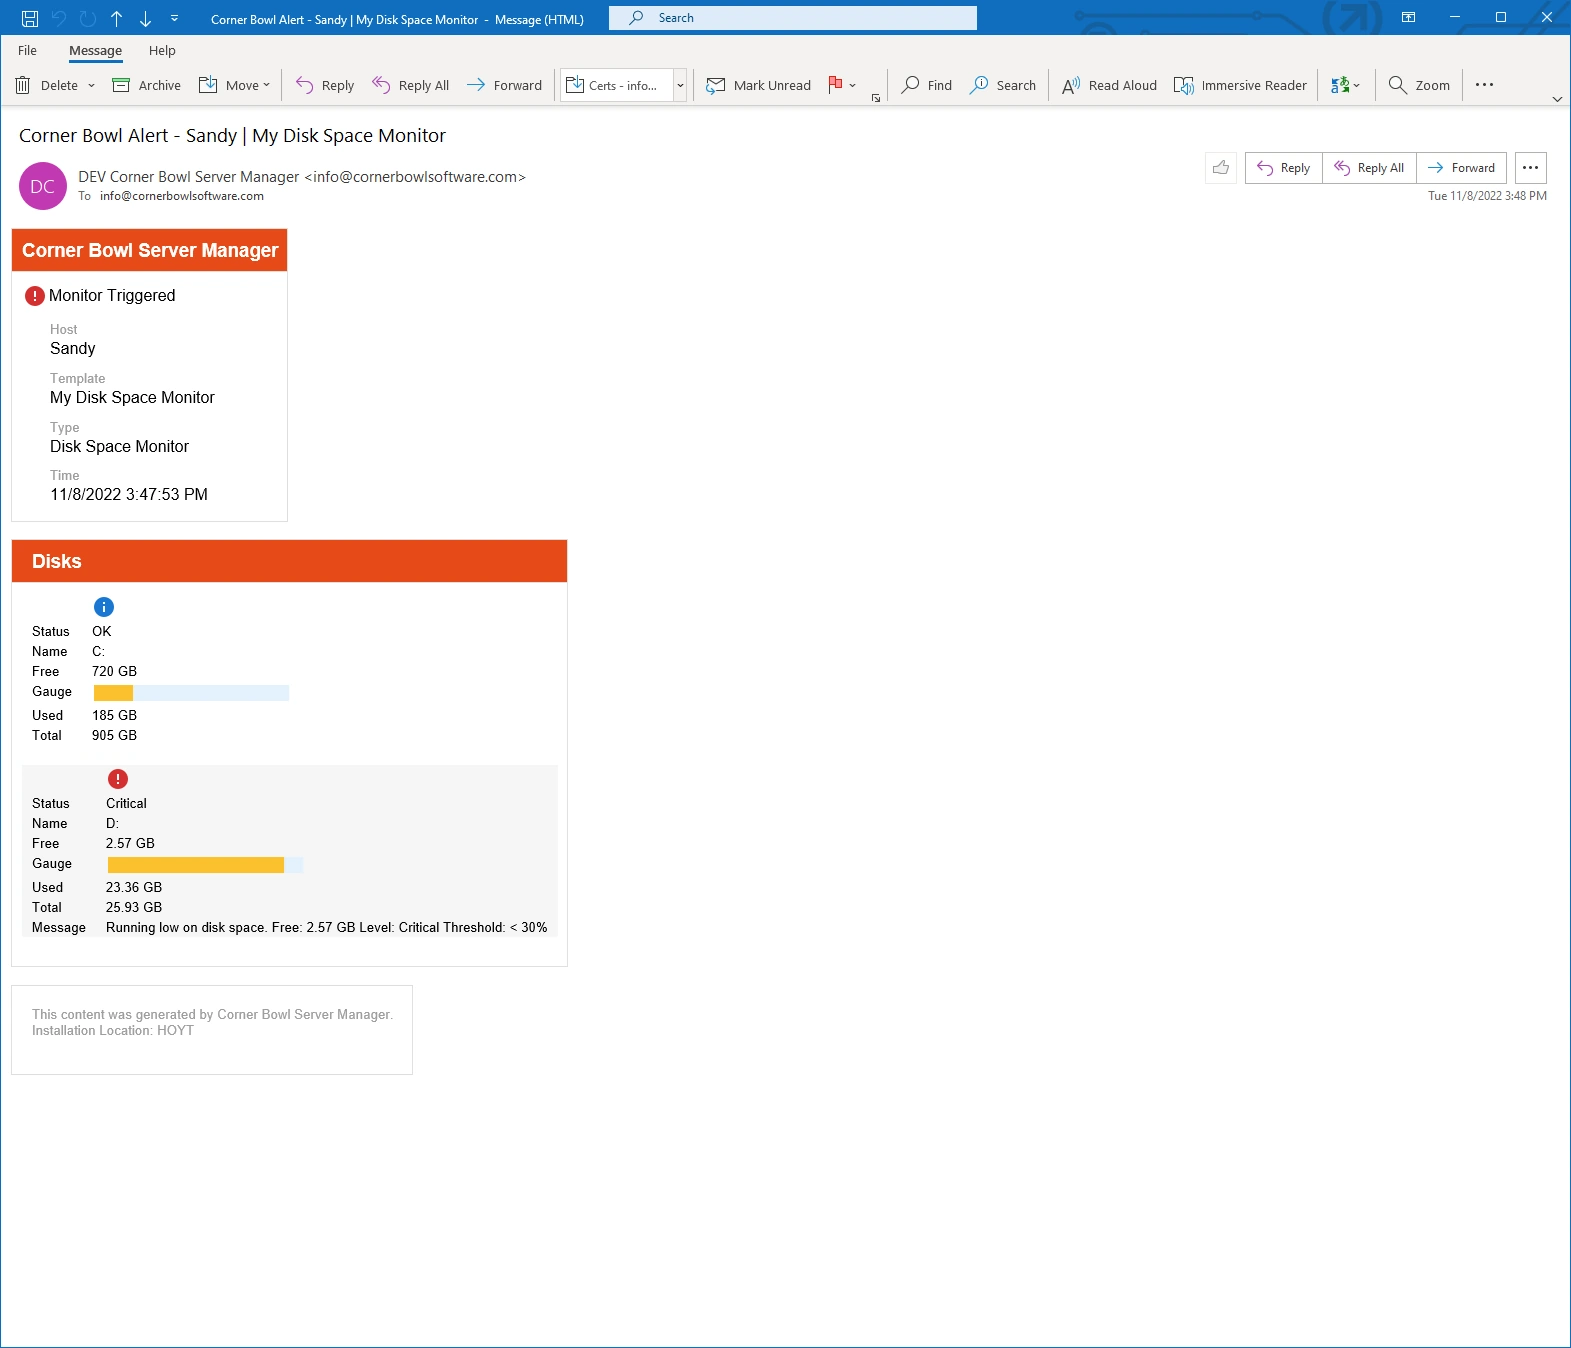
 Cell Phone Email Notification
Analyzing Disk Space
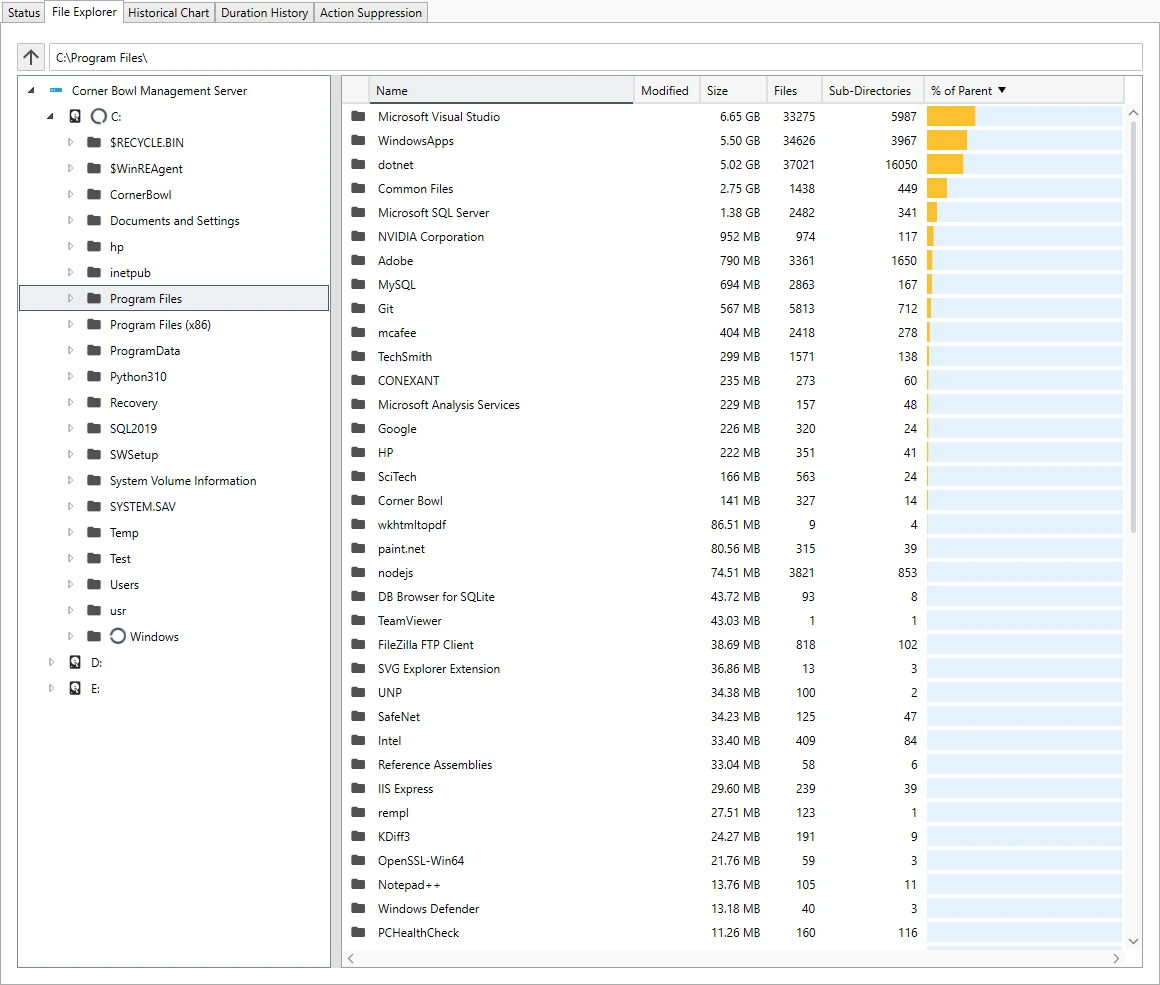
- Back in the Monitor Status View, select the File Explorer Tab. Use this view to recursively scan disks then use the results to track down the largest disk space consuming directories.
-
To recursively scan a disk, right click on the disk then select Calculate Size.
The disk is recursively scanned in the background through the Windows Service then results displayed as then become available.
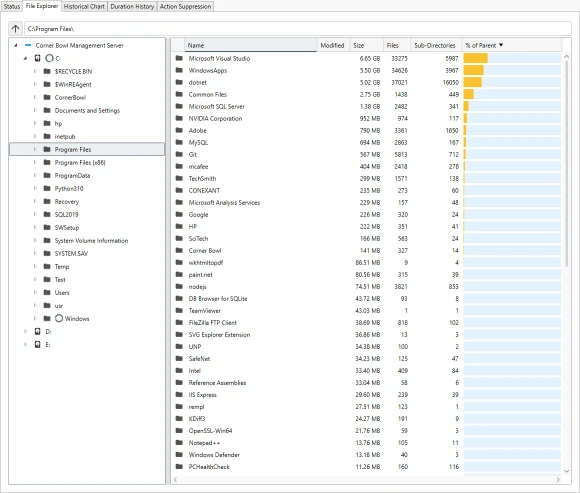 Directory Size Viewer
 - To recursively delete a directory or file, right click on the directory or file then select Delete.
-
Use he Historical Chart to view the free disk space over time along with other metadata such as the estimated date until out of disk space.
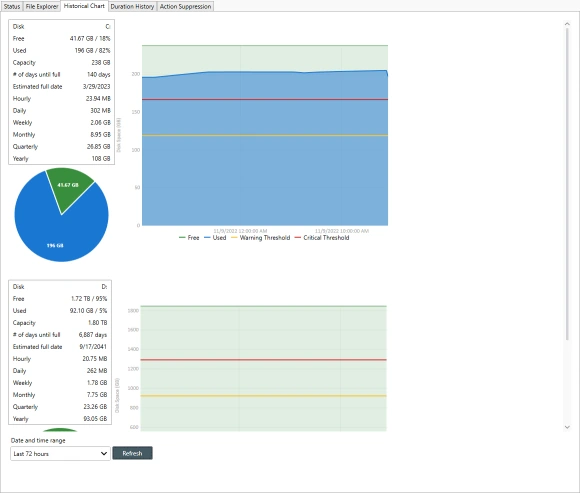 Directory Size History Chart
 - Use the Duration History to view how long each scan took. The Duration History Tab is a generic tab that is most often used for other monitors such as Ping Monitors.
- Use the Action Suppression Tab to temporarily disable duplicate actions triggered each time the monitor runs on this particular server.

How to Configure Disk Space Summary Reports for all of your Enterprise Servers
Once you have assigned your Disk Monitor Template to all of your target hosts or host groups the target hosts reside, you are ready to create a daily Disk Space Summary Report.
- From the Menu Bar, select File | New. The Create New Object View displays.
- From the Create New Object View, expand Report | Summary Reports then select Summary Report. The New Summary Report View displays.
- Use the General Tab to specify a unique name and execution schedule. If you only want to view the report within Server Manager, de-select Enabled, otherwise, specify a schedule to generate the report, for example every day at 6:00 AM.
- Use the Template Assignments Tab to assign the Disk Space Monitor Template we just created.
NoteIf no template groups or templates are specified, all templates are applied to the report.
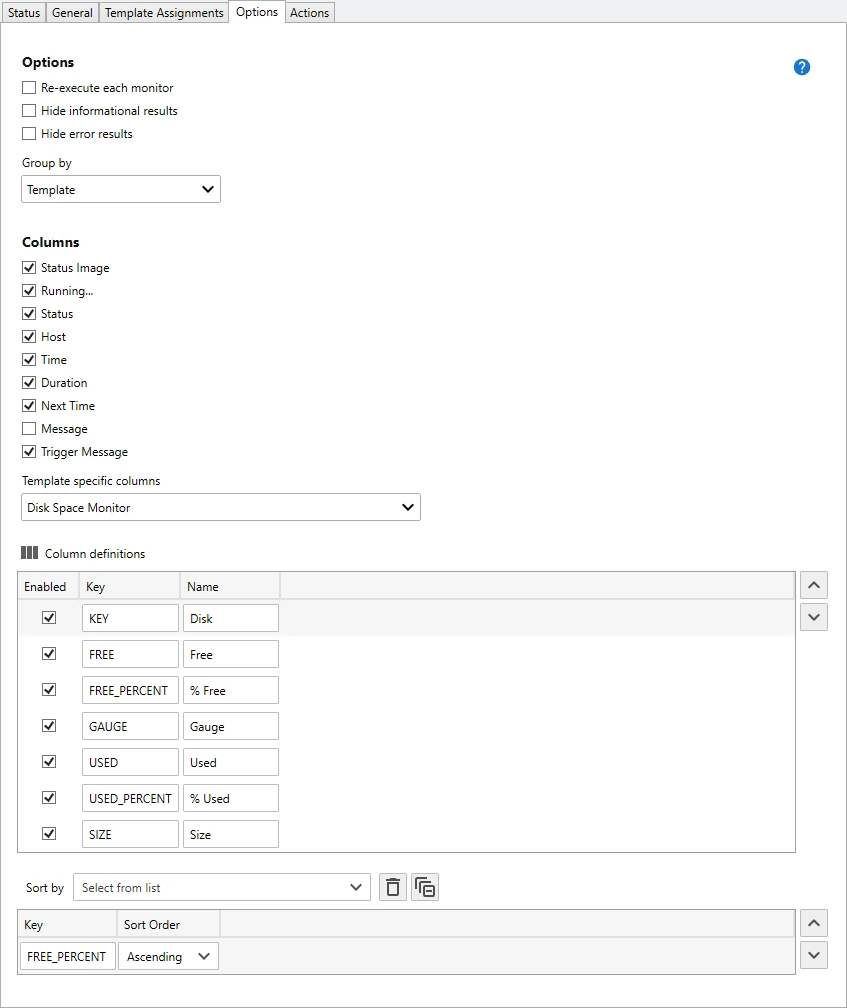
- Use the Options Tab to configure various summary report options. To see detailed information about our Disk Monitors, set the Group by drop-down to either Template or Template Type.
- From the Template specific columns drop-down, select Disk Space Monitor. The Column definitions controls display.
- Use the Enabled column to exclude a column from the report.
- Use the Name column to override the data table header.
- Use the Order By

 buttons to change the order of the columns.
 - Use the Sort by controls to apply a specific sort order, otherwise, the data is sorted by hostname then disk drive, for example Free Percent, Ascending.
 Free Disk Space Summary Report Properties
 - Use the Actions Tab to assign actions. To receive an email when the report is complete, use the On Complete controls to select the email action you would like to trigger.
- Use the Assignments View to select the specific hosts or group of hosts to include in the report. Since I have already specified the specific template to include, I am going to select all of the hosts. The result report will only include the hosts that have been assigned to the templates that have been also been assigned to this report.
- Finally, click Save.
ImportantNotice the error stating the name is already in use. Server Manager includes a sample Summary Report with the same default name. To get past this error message, select the General Tab then specify a unique name.
Viewing the Disk Space Summary Report
Continuing from the section above:
-
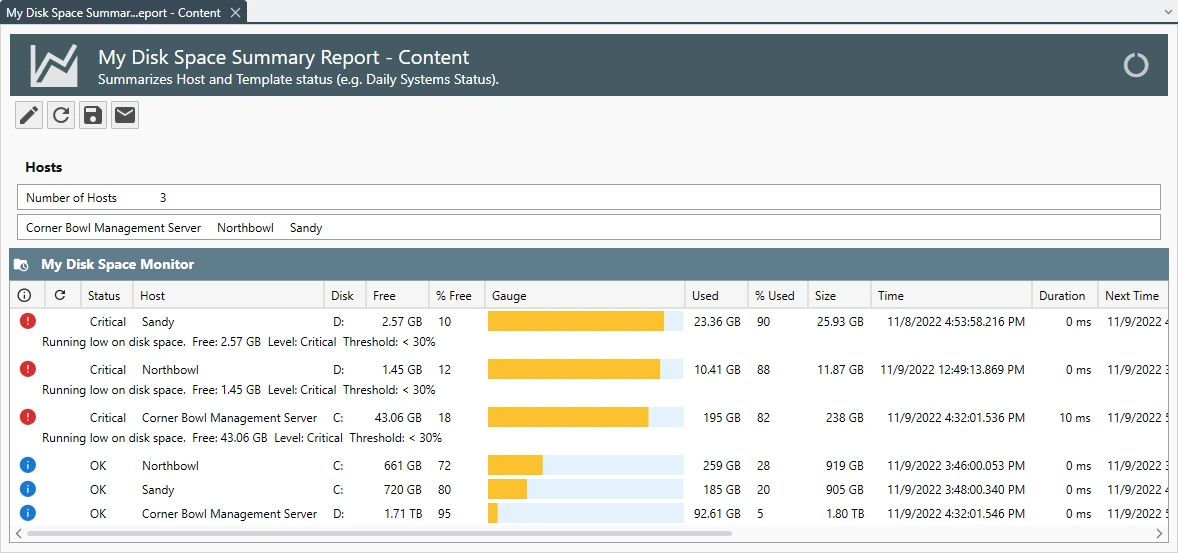
Click View Report. The Disk Space Summary Report is displayed.
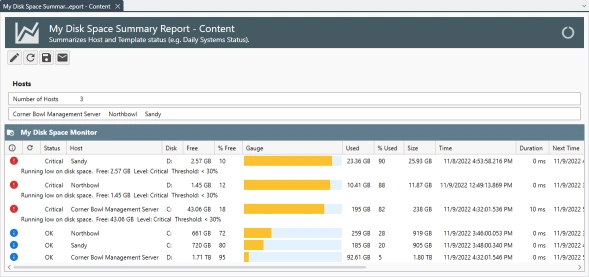 Disk Space Summary Report
Last Updated: August 25th, 2024