Event Log Consolidation to SQL Server
In this article I am going to show you how to configure Corner Bowl Log Manager to consolidate Event Log entries from various servers to a central SQL Server database.
Table of Contents
- How to Configure Microsoft SQL Server
- How to Verify Event Log Entries were Saved to Microsoft SQL Server
- How to Configure Active Directory
- How to Import Hosts from Active Directory
- How to Configure the Event Log Consolidation
- How to Test Event Log Consolidation
- How to View Consolidated Event Log Entries
How to Configure Microsoft SQL Server
The software includes an onboarding wizard which is what I am going to use to configure Microsoft SQL Server.
- To open the wizard select Tools -> Onboarding Wizard.
- Once you skip past the introduction page you are prompted to assign Logon as Credentials. In order to pull Security Event Log Entries from remote sources we need to assign the service with Domain Administrator credentials. If the server the service is running is not on a domain then local admin credentials will suffice. In the later case, you will need to configure impersonation for each remote host you want to download Event Logs from. I am not on a domain so I'm going to setup local administrator credentials.
- Once entered, click Update and Restart.
- If you look in the upper right corner you will notice the connection icon briefly displays the disconnect icon while the service restarts and the console re-connects.
- Now that the service credentials are set we can continue.
- The next tab is the Email Settings tab which for this video is out of scope so let's just skip past this step.
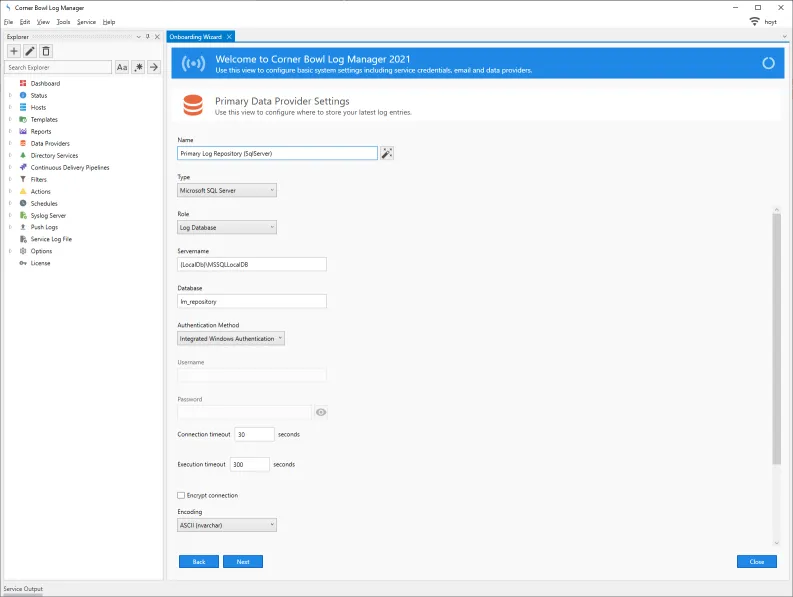
- The next tab is the Primary Data Provider Settings tab which is where we need to change the default File System configuration to Microsoft SQL Server.
- Under the Type drop-down select Microsoft SQL Server.
- Notice the name references the file system. If we click on the Generate Name button the name is updated and now references SQL Server.
- Notice the role is set to Log Database. There are three roles. Log Database, Archive Log Database and Auxiliary Log Database. The Log Database contains all of the latest consolidated log entries. The Archive Log Database contains older entries, for example entries older than 14 days. Finally, Auxiliary Log Databases can be used to load older database backups for auditing and analysis purposes.
- Specify the hostname your SQL Server is installed.
- The database name, lm_repository, listed will be automatically created in a moment.
- Specify the authentication method to use, either Integrated Windows Authentication or SQL Server.
- I am going to use Integrated Windows Authentication which means the account the service is running under is used.
-
If at a later time you find queries are timing out you can increase the execution timeout here.
 Configure SQL Server
 - Finally, click the Next button.
- Once the database and control tables are created the wizard will advance to the Archive Data Provider Settings tab.
- Notice now the Role is set to Archive Log Database.
- Under the Type drop-down select Microsoft SQL Server.
- Update the name.
- Notice the database name is now set to lm_archive.
- Specify the authentication method.
- Finally, click the Next button.
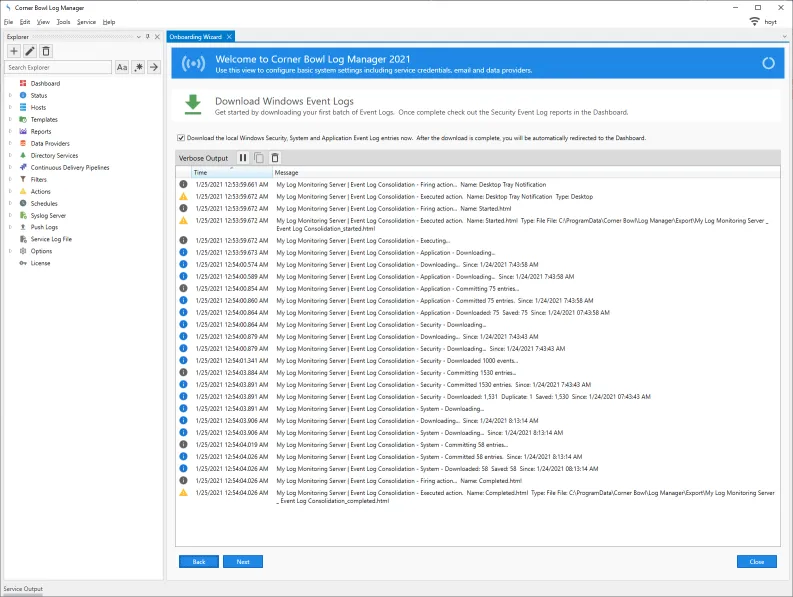
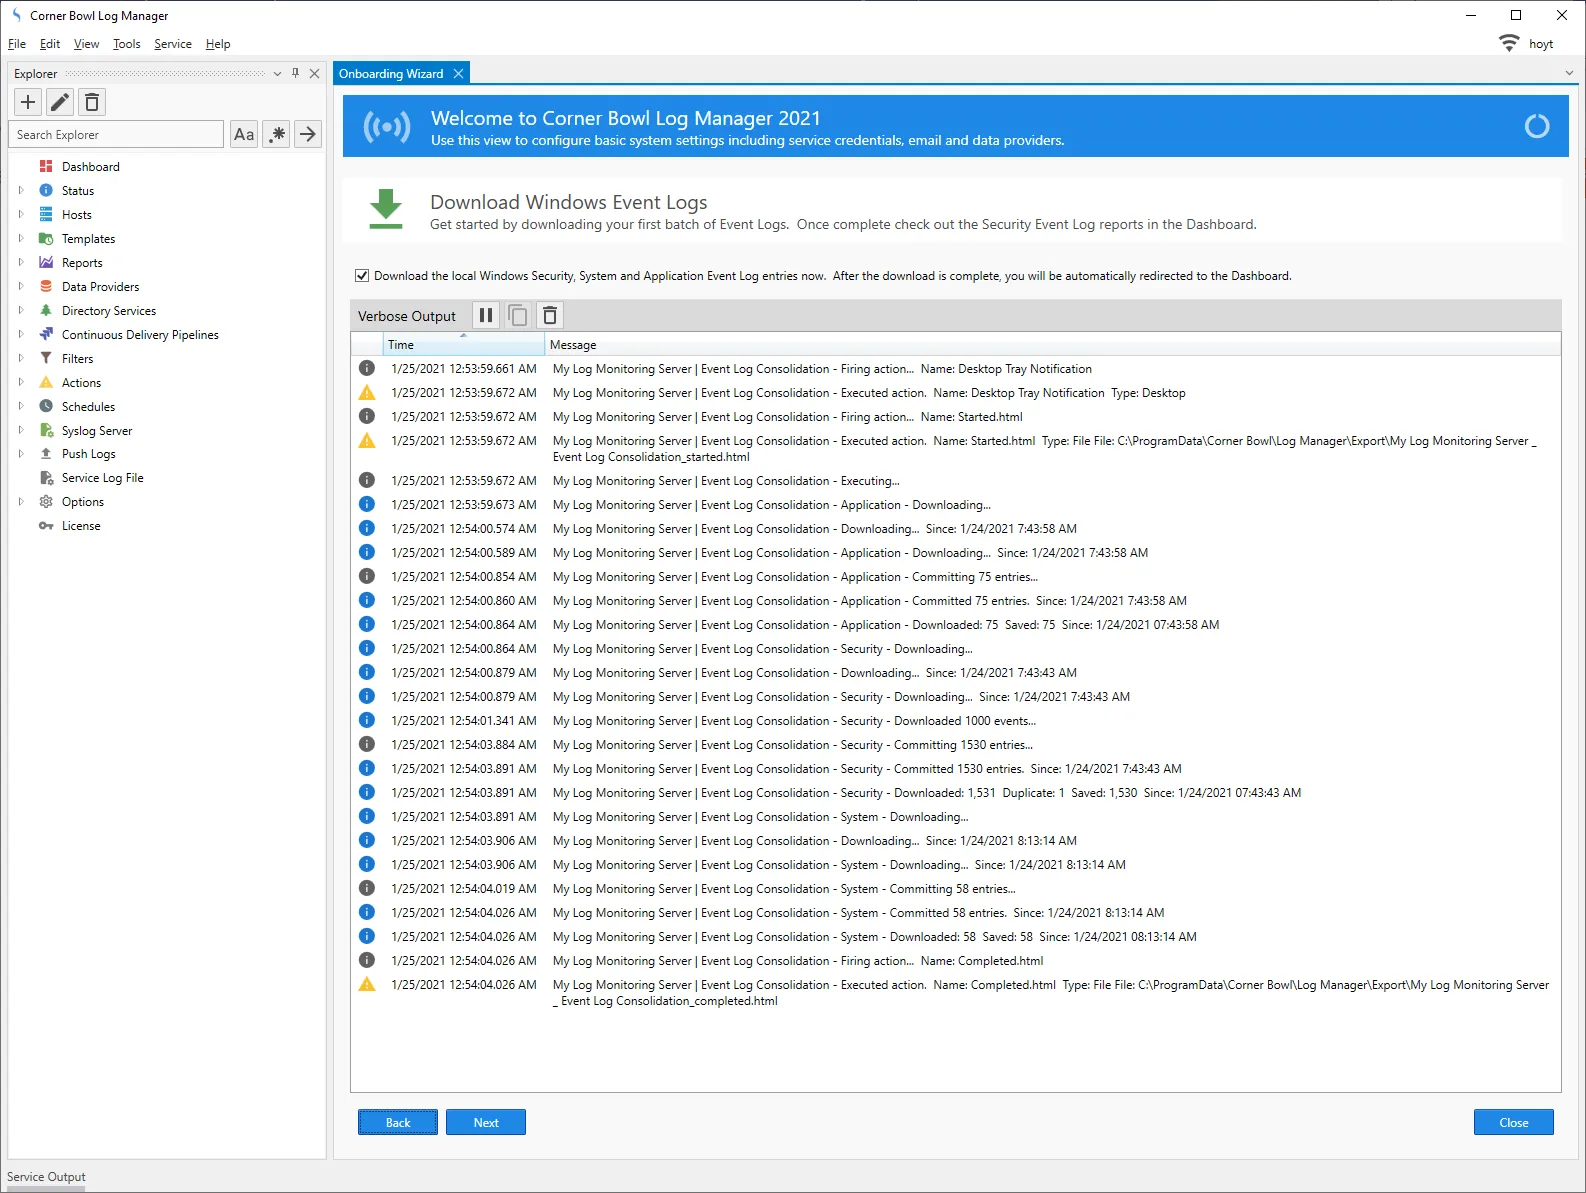
- The last step consolidates the Application, System and Security logs from system the service is installed to the log repository database we just configured.
-
Click Next and you can verify the software is able to populate the database we just configured.
 Centralized Event Log Consolidation
 - We have now configured the databases.

How to Verify Event Log Entries were Saved to Microsoft SQL Server
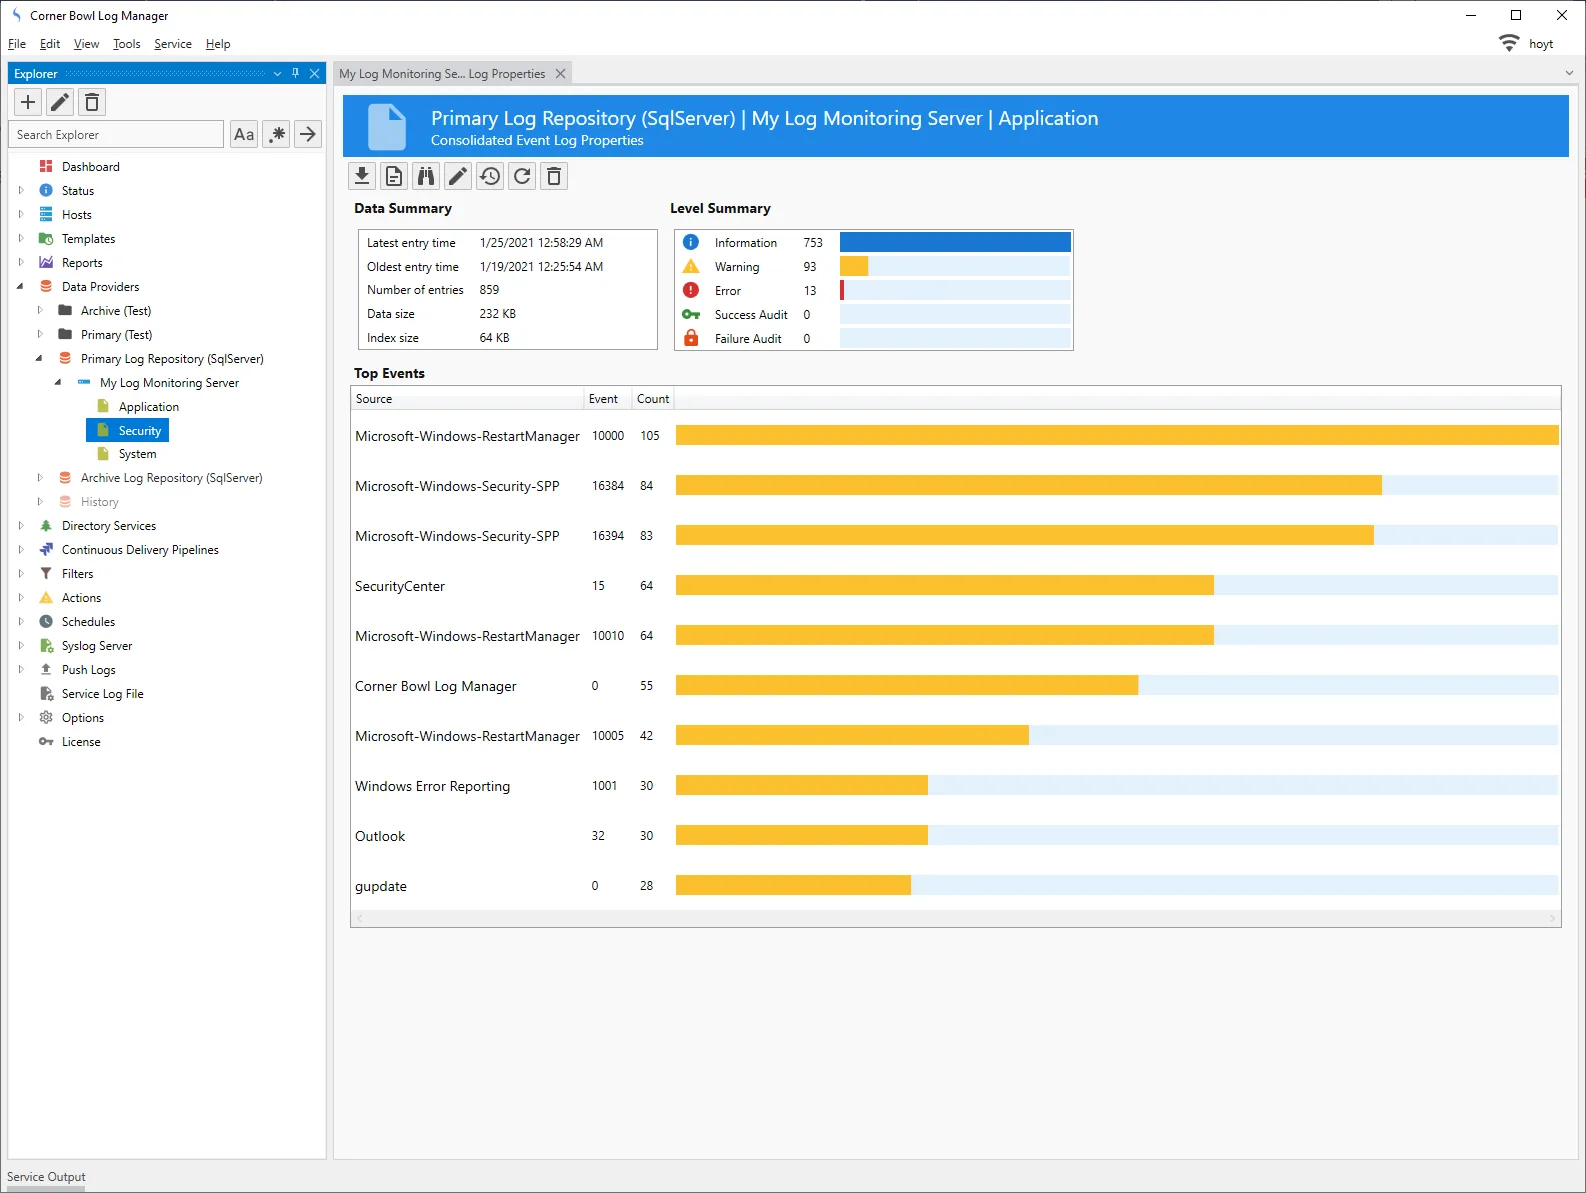
- The Explorer view contains a node called Data Providers. If I expand the node we can see the Primary and Archive Log Repositories. Expanding the Primary Log Repository reveals all the hosts which logs have been downloaded. Further expanding a host exposes the various logs that have been downloaded.
-
If I right click on a log and select Data Properties we can see the table statistics such as the saved date range, number of entries and data size.
There are also Level and Source/Event ID metrics.
 Centralized Event Log Consolidation Data Properties
How to Configure Active Directory
Ok so let's take this to the next step and configure the software to download Event Logs from servers listed in Active Directory.
- Back in the Explorer view, just below the Data Providers node we can see a Directory Services node.
- If you are on a domain, your Active Directory Server should be automatically listed.
- If not, right click on Directory Services and click New.
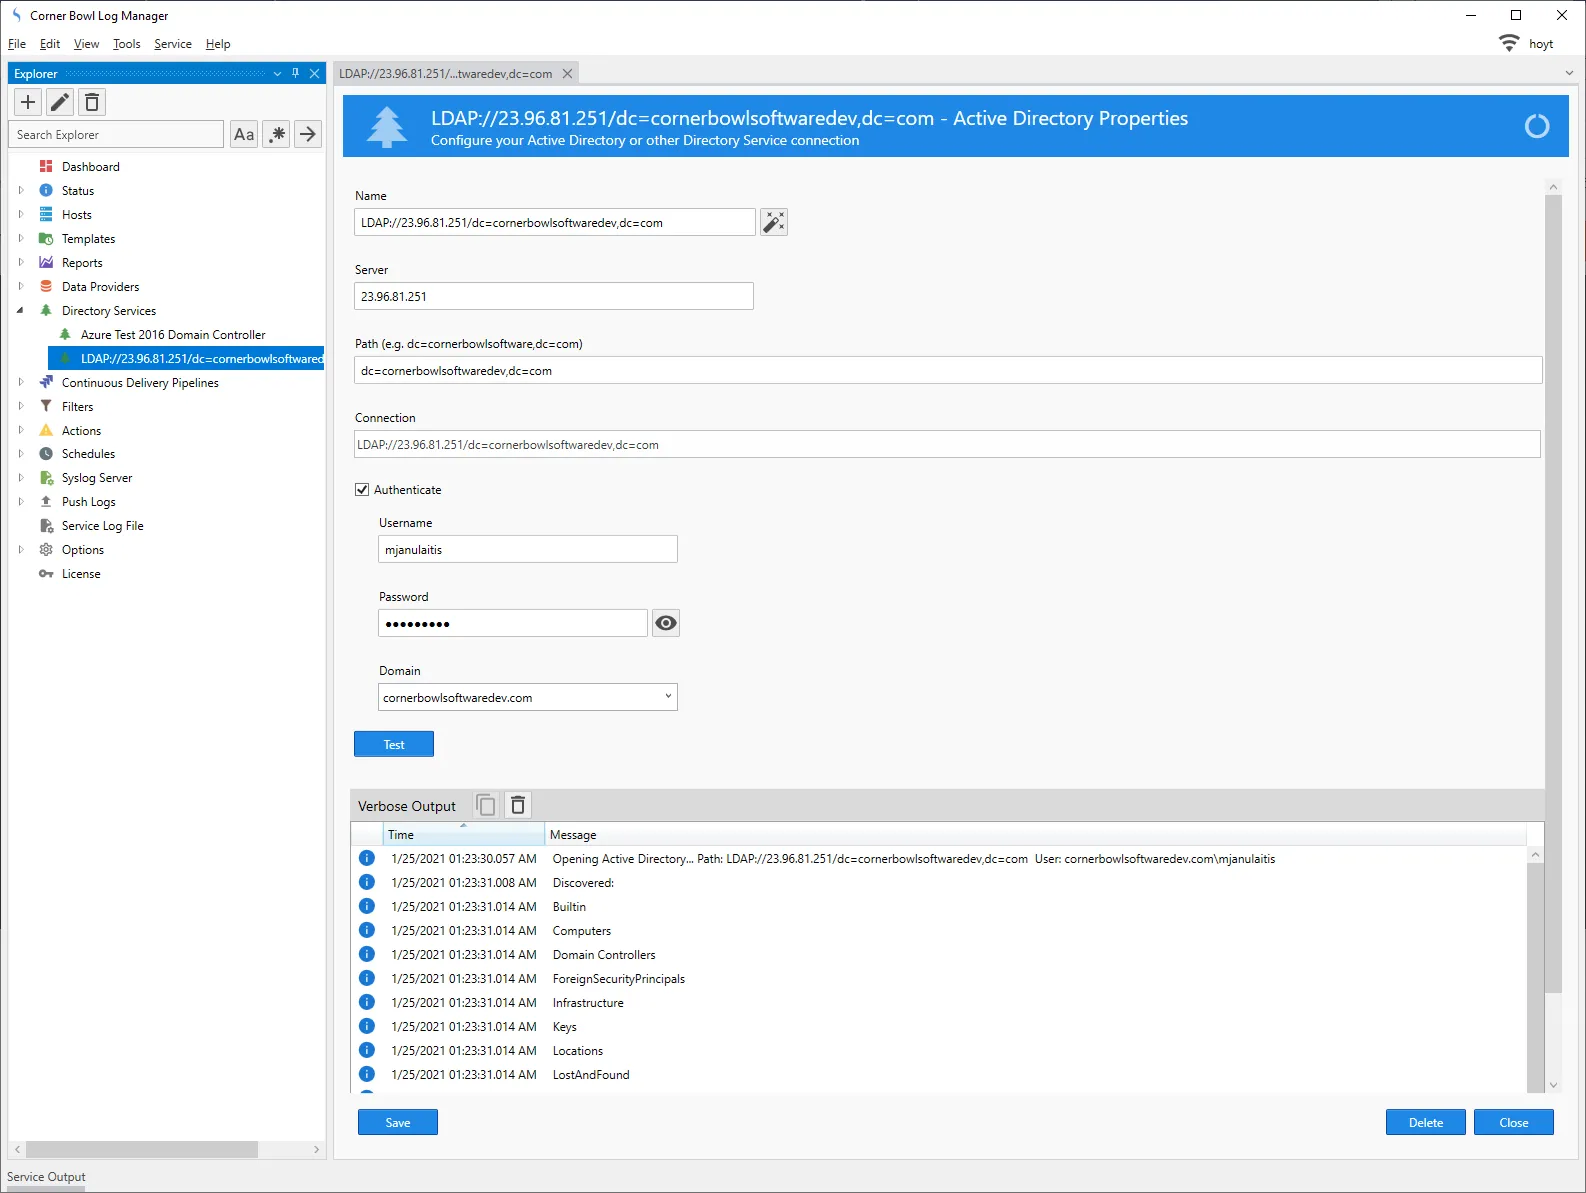
- Specify your server and path.
- Click the Generate Name button.
- Even though the service may be running with Domain Admin credentials you likely will still need to provide login credentials.
- Specify your domain administrator credentials again then click the test button.
- If the software is able to connect you should see a high level list of Organization Units.
-
Once you have successfully configured the connection, click Save then Close to close the Window.
 Configure Active Directory
How to Import Hosts from Active Directory
We are now ready to import the hosts listed in Active Directory.
- Select File -> New -> Computers, Devices and Endpoints.
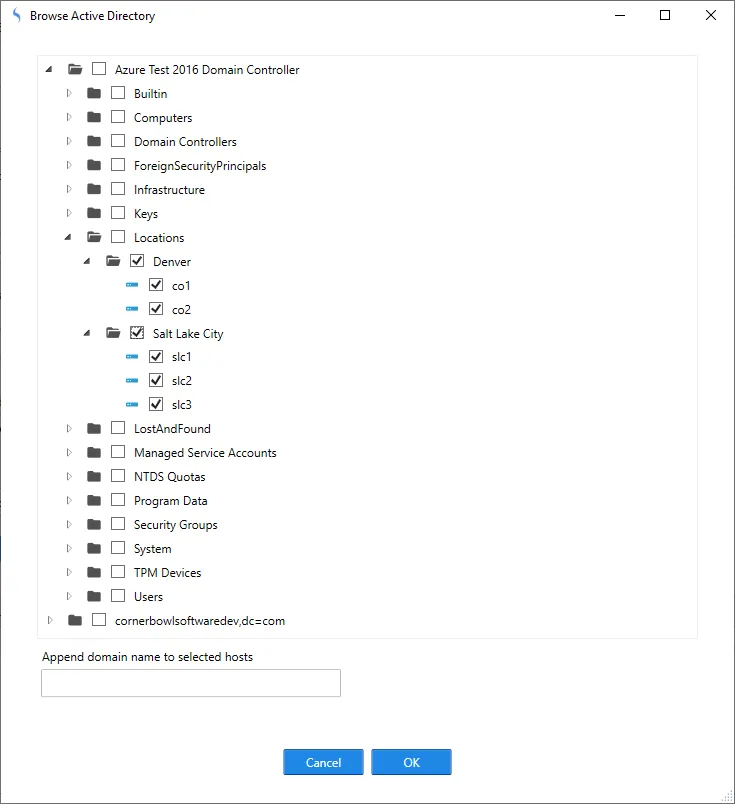
- From the Add Host dialog click Browse Active Directory.
- I already had a directory service configuration added so the dialog automatically expanded the first connection in the list.
- Navigate to the OUs you would like to import hosts from. You can check as many groups as you like. Hosts will be imported in the same structure you select in AD enabling the software to replicate the same structure you are used to seeing in AD.
- If necessary you have the option to append the domain name to each hostname.
-
Once you have selected all the hosts you would like to import click OK.
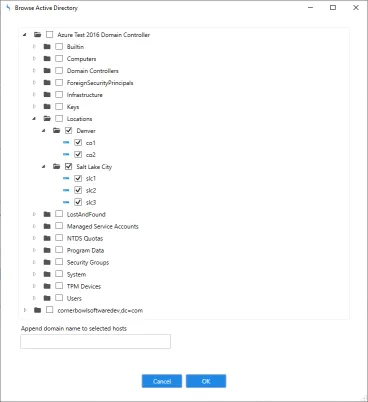 Import Servers From Active Directory
 - Back in the Explorer view you can now see the hosts you just added.
How to Configure the Event Log Consolidation
Now that we have added the hosts the next step is to assign an Event Log Consolidation Template to the hosts.
Templates contain configuration parameters such as the number of days to download and the frequency to download. The software comes pre-installed with an Event Log Consolidation Template that consolidates the Application, System and Security Event logs. I am going to show you the pre-installed template then assign it to the lot of new computers.
- Below the Hosts node you will find the Templates node. Expand Templates, Sample Templates then Log Consolidation. Right click on Event Log Consolidation and select Template Properties.
- Once loaded we can see the General tab is used to assign a name, enable and disable execution and the Schedule of execution.
- By default this template downloads entries every hour and evenly distributes each download over the hour among the assigned hosts. For example, if you assign 60 hosts to this template the software will download entries form a single and different server every minute. After 60 minutes the first server will be downloaded again.
- The Logs tab is pretty self-explanatory. Use it to select the logs to consolidate.
- The Options tab enables you to assign a Consolidation Filter which enables you to dump entries you are not interested in. You have several options here.
- If you have a heavily loaded domain controller you may need to limit the initial download of the Security Event Log to one day then build the database from that point on, otherwise you may receive a Quota Violation.
- The batch download option is provided in an attempt to allow large Security Event Logs to be initially downloaded. Again this is an attempt to work around the Quota Violation.
- Finally, we want to select a Retention Policy. The retention policy is another template that defines the number of days to retain in the Primary and Archive Log Repositories.
- If we double click on the assigned template, we can see the template properties.
- The schedule is set to Daily.
- If I select the Options tab we can see the policy is set to Archive entries older than 30 days and retain entries for 120 days for a total of 150 days.
- Back in the Event Log Consolidation Template if I click the Monitor tab, we have the option to add filters and actions to apply immediately after downloading. Event Log Monitoring is out of scope for this tutorial so let's just skip past this step.
- The Push Template tab enables you to configure the software to install an agent on the remote machine or if inaccessible you can manually install the agent. Once installed Templates with this option selected are sent to the remote agents when they connect and entries downloaded using a proprietary binary protocol that is approximately 12 times faster than WMI. This feature is also out of scope of this tutorial so let's just skip past this step.
- The Actions tab enables you to get notified when there is a problem downloading entries such as a firewall blocking WMI which manifests itself as an RPC Server Unavailable error.
-
Now we are finally ready to assign the hosts to the template.
You have the option of manually assigning each host or assigning groups.
You can even assign the entire tree to the template.
I am going to select the imported group then click Save and Close.
 Centralized Event Log Consolidation Template

How to Test Event Log Consolidation
- Back in the Explorer view, if we expand one of the new hosts we can now see two templates assigned, Event Log Consolidation and Log Entry Retention Policy. The Log Entry Retention Policy is automatically assigned because the Event Log Consolidation template has a dependency on the Log Entry Retention Policy.
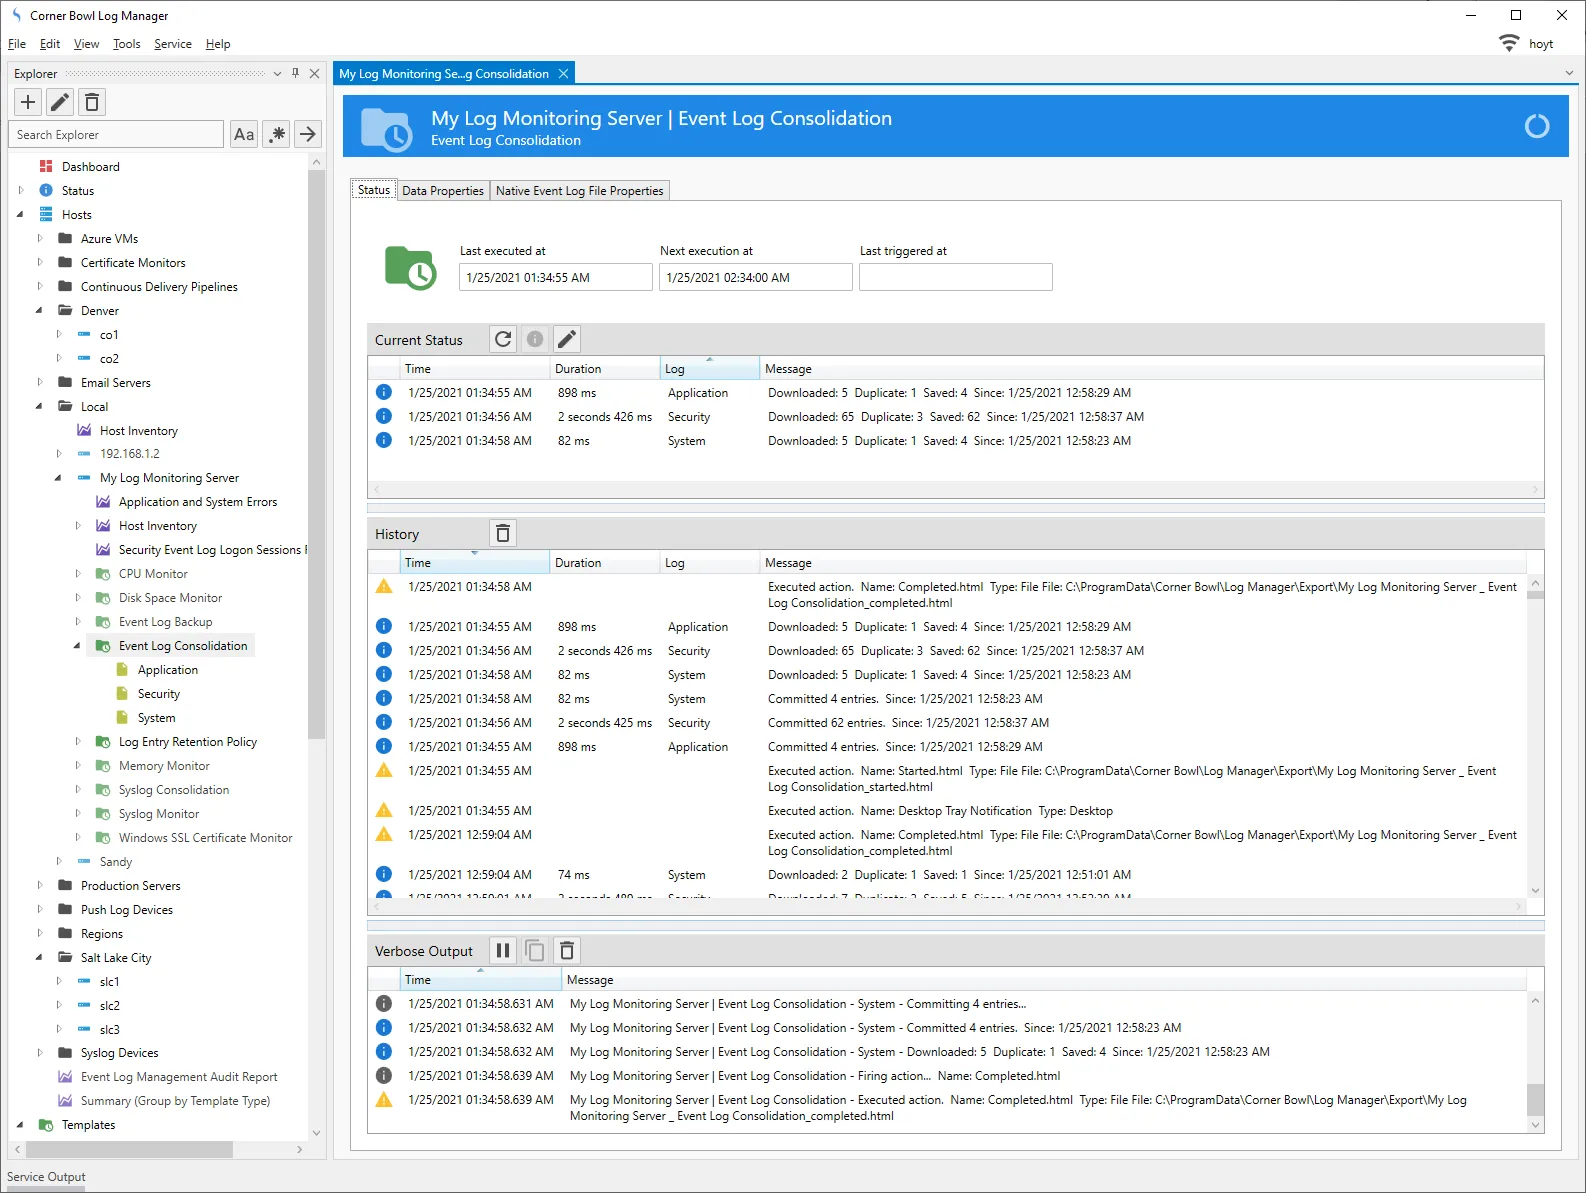
- To see the Event Log Consolidation in action, right click on the assigned template then select Execute Verbose.
- Since the imported host is bogus I am going to select the server the service is installed on.
-
Once complete, we can see status information about the download.
 Centralized Event Log Consolidation in Action
How to View Consolidated Event Log Entries
Finally, let's verify the log entries were actually downloaded.
- Back in the Explorer view, under the host we just downloaded log entries from expand the template then right click on a log and select View.
- You are prompted with some view options which are fairly straight forward.
- You can choose level options, a filter to apply, paging options, either page by number of entries or number of days then finally the date to auto advance to.
-
Once I click OK I can see the log entries in the viewer.
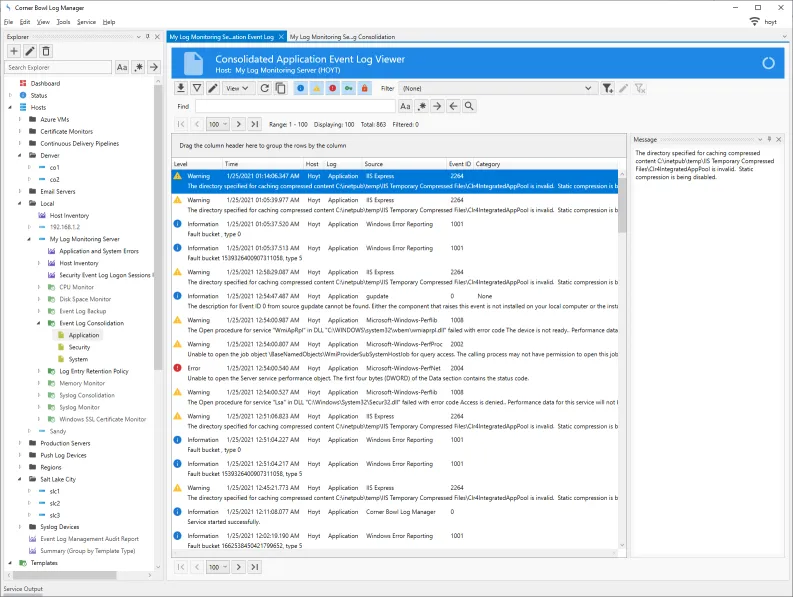 Centralized Event Log Consolidation Log Viewer
