File Integrity Monitoring Tutorial
Overview
For those of you that are unfamiliar with File Integrity Monitoring or FIM, FIM is the process of validating file contents remain unchanged and if changed or deleted, who made the changes and from what IP did they make the changes. Corner Bowl offers two different methods to implement File Integrity Monitoring, baseline scanning and Object Access Auditing. Baseline scanning is supported on both Windows and Linux/Unix while Object Access Auditing is only available on Windows.
Licensing
To access the File Integrity Monitoring functionality within Corner Bowl Event Log Manager you will need a Corner Bowl Server Manager license.
Object Access Auditing
Object Access Auditing enables you to know in real-time the instant a user accesses, modifies or deletes a file. First, we need to configure Object Access Auditing on the target server.
Configuring Object Access Auditing
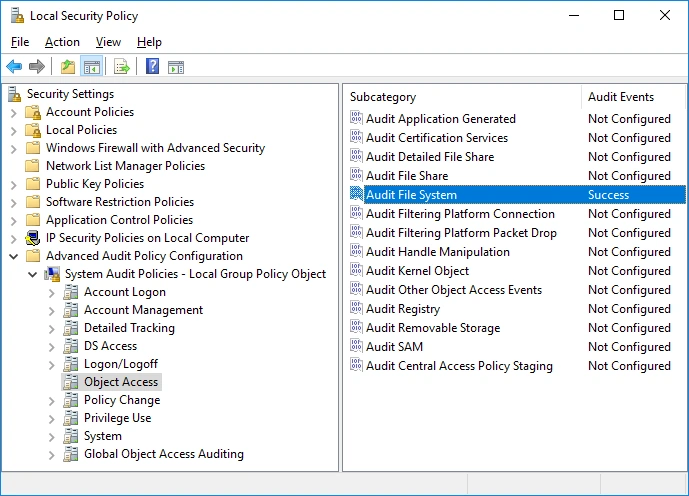
- If monitoring a non-domain computer, from Administrative Tools select Local Security Policy.
- Expand Advanced Audit Policy Configuration then expand Object Access.
-
From the detail view double-click Audit File System.
 Advanced Audit Policy Configuration
 -
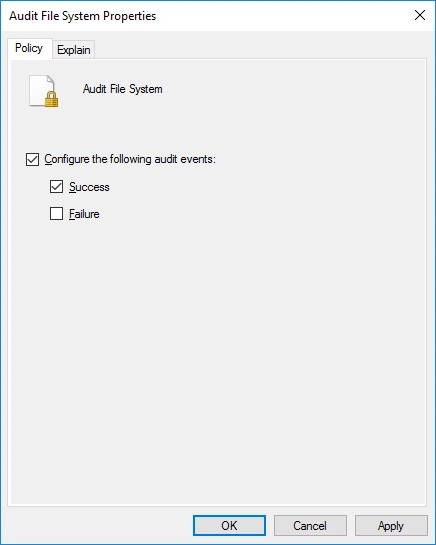
From the Audit File System Properties dialog check Success then OK.
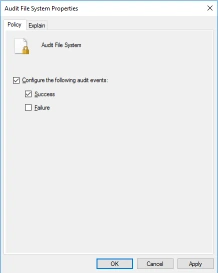 Audit File System Properties
 - For more information see Microsoft's documentation.
Next, we need to configure the target folder.
- Open Explorer then navigate to the target folder, right click and select Properties.
-
From the File Properties dialog select the Security tab then click the Advanced button.
 File Properties
 -
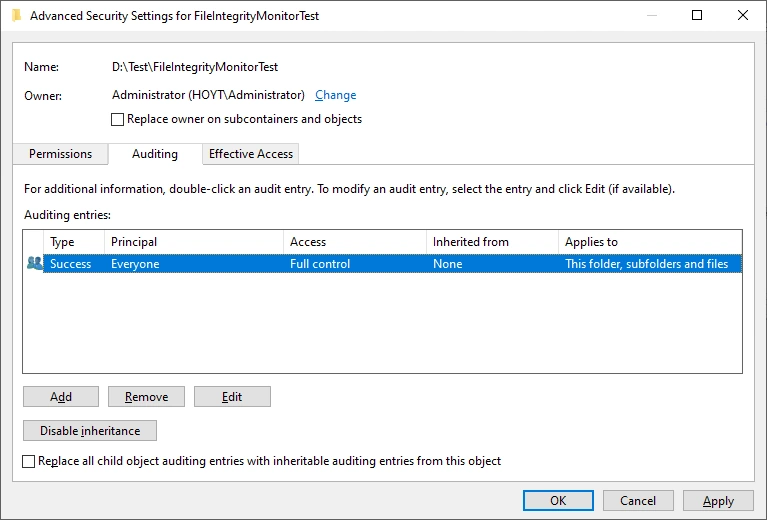
From the Advanced Security Settings dialog select the Auditing tab. If you are prompted to continue, click the Continue button. Next click the Add button.
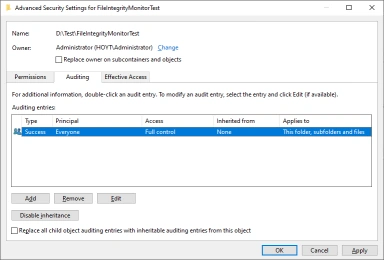 Advanced Security Settings
 -
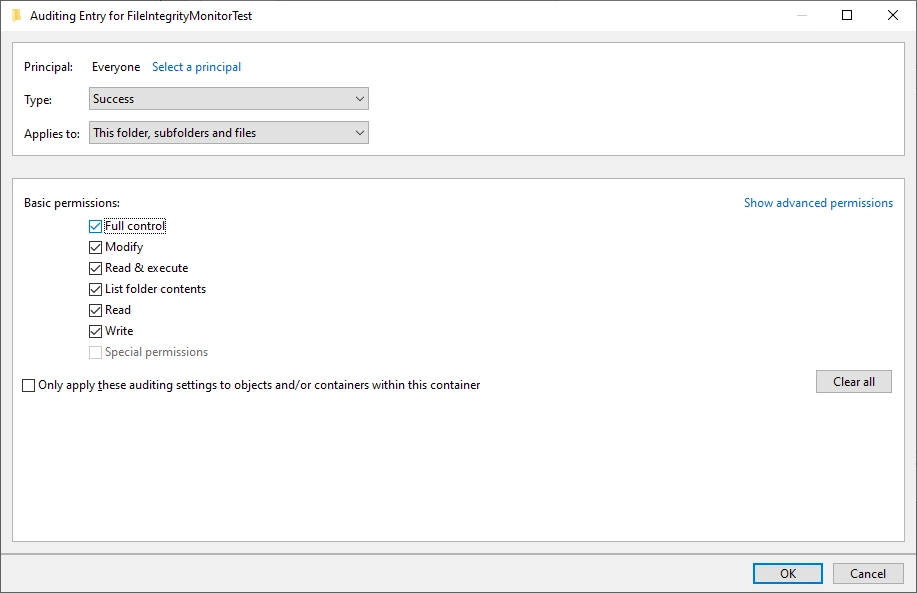
From the Auditing Entry dialog click the Select a principal link.
 Auditing Entry
 -
From the Select User or Group dialog type EVERYONE then click OK.
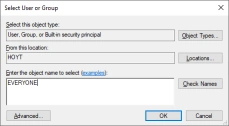 Select User
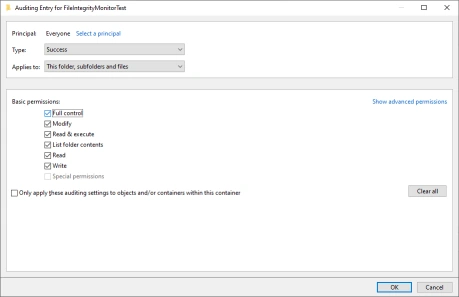
 - Back in the Auding Entry dialog check all of the options then click OK.
- Back in the Advanced Security Settings dialog verify the new entry was added then click OK.
- Finally, back in the File Properties dialog click OK.
- For more information see Microsoft's documentation.


Configuring Real-Time File System Auditing
By default, a Real-Time Audit File System template is pre-installed in the following location:
Templates/Sample Templates/Real-Time Monitors/Real-Time Audit File System
If the template cannot be found it is most likely because you already installed the software prior to the release of this template.
- Right click on the Real-Time Audit File System template then select Template Properties. The Template Properties view displays.
-
If you select the Rules tab you can see three filters and actions pre-assigned. These filters are assigned to track Create, Write and Delete Audit File System events.
Make sure to assign an email address to the pre-installed Send an Email action otherwise you won't receive notifications.
-
Finally, from the Hosts drop-down select the target host to monitor then click Save.
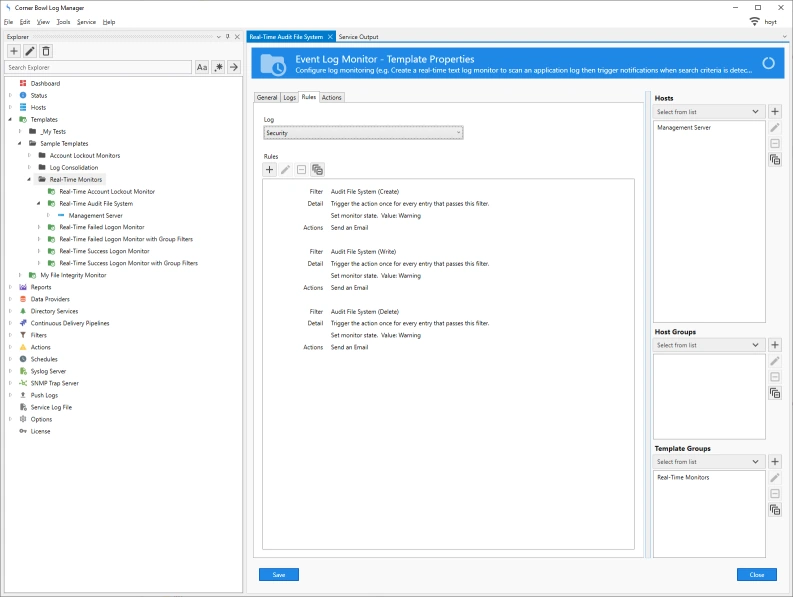 Real-Time Audit File System Rules
Testing Real-Time File System Auditing
To test we can simply create a new text file in the target directory, open the file in a text editor, modify and save it, then finally delete the file. Once complete, you will see 4 messages in your email. One for the creation of the file, one for the update of the file contents and then Microsoft fires two absolutely identical Events for the delete operation which is unfortunate however the end result is the same, a notification is received.
Baseline Scanning
Baseline scanning enables you to create a snapshot of a file including metadata such as the last date accessed, last modified date, creation date, file attributes, permissions, contents hash and file size. Future scans check the current file against the baseline then trigger an alert is any of the metadata has changed.
Configuring Baseline Scanning
Next let's configure the baseline scanning File Integrity Monitor template. The File Integrity Monitor template can be used to track changes to the actual file. The software creates a baseline then polls the file system on either Windows, Linux or other Unix operating system. Once a change is detected the monitor triggers and an alert is sent.
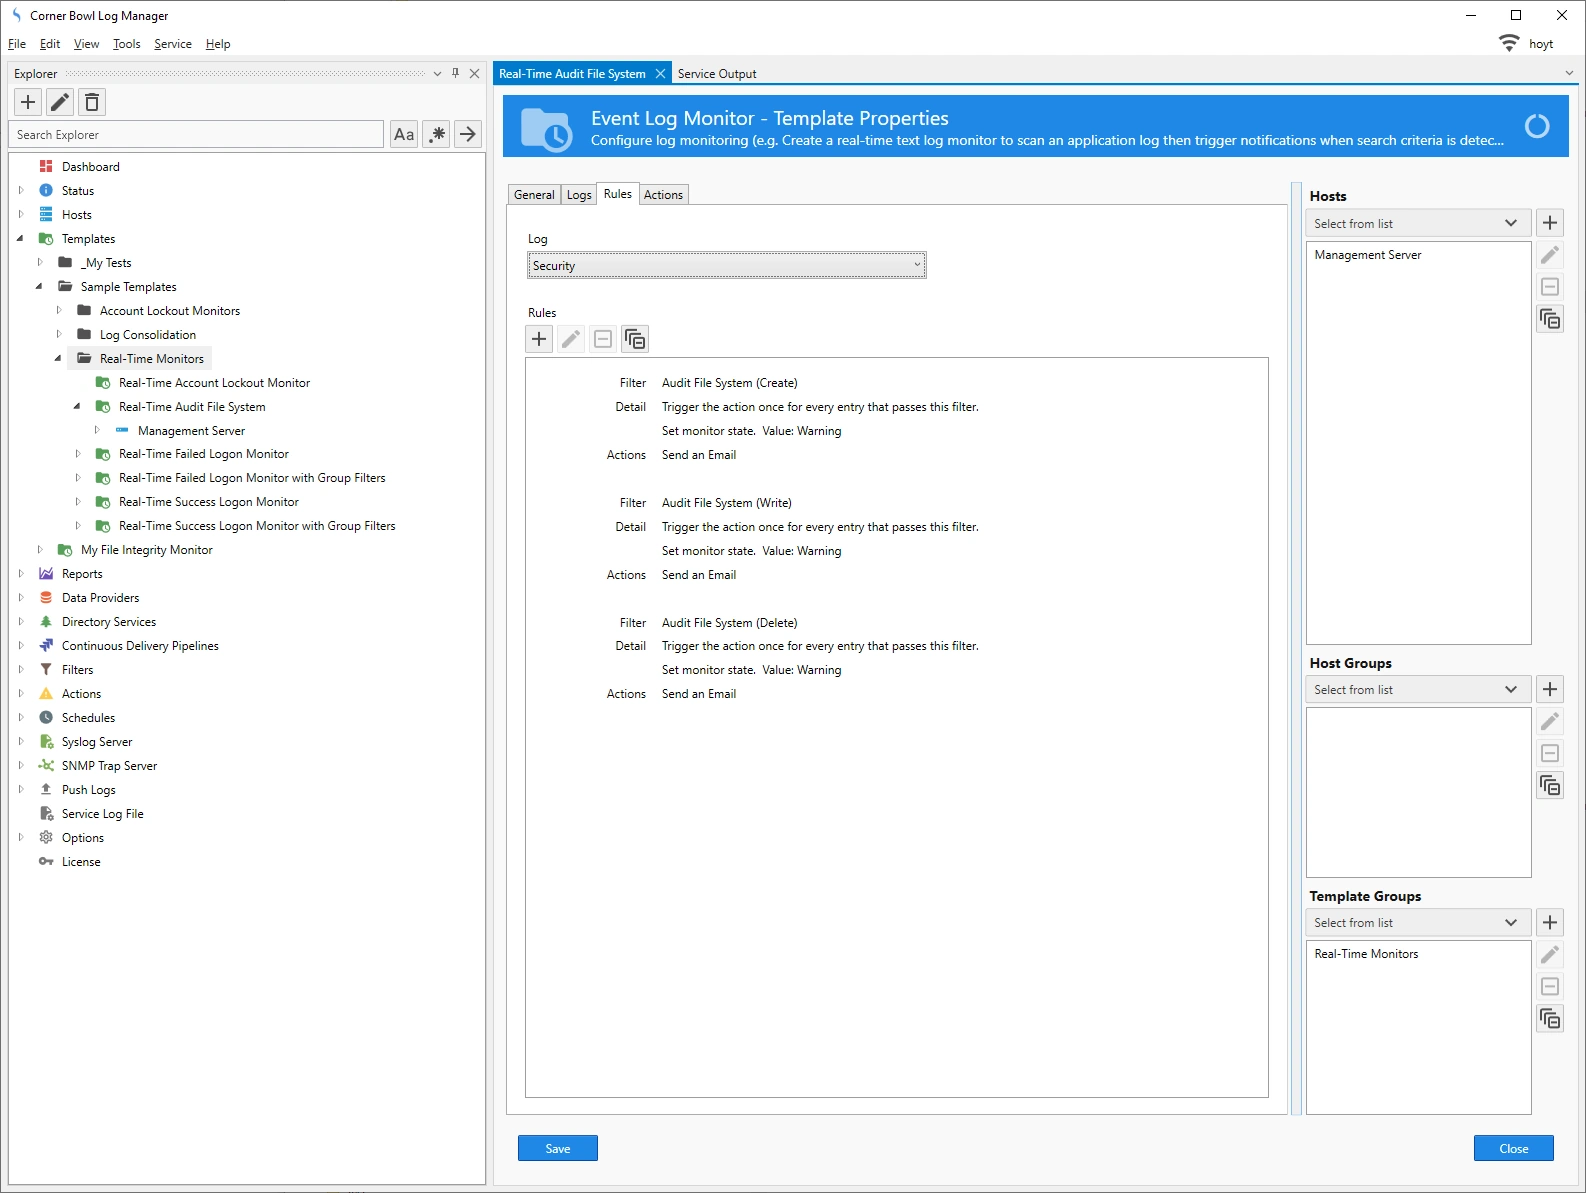
- To create a new Template, from the menu bar select File | New | Template | File and Directory Monitors | File Integrity Monitor. The New File Integrity Monitor view displays.
- Specify a friendly name.
- Specify the frequency to poll the file for changes. You have the option to poll as fast as every second or as slow as weekly.
-
Select the Directories tab, select the target host, then navigate to the target directory and click the Add
 button.
 Select Directories
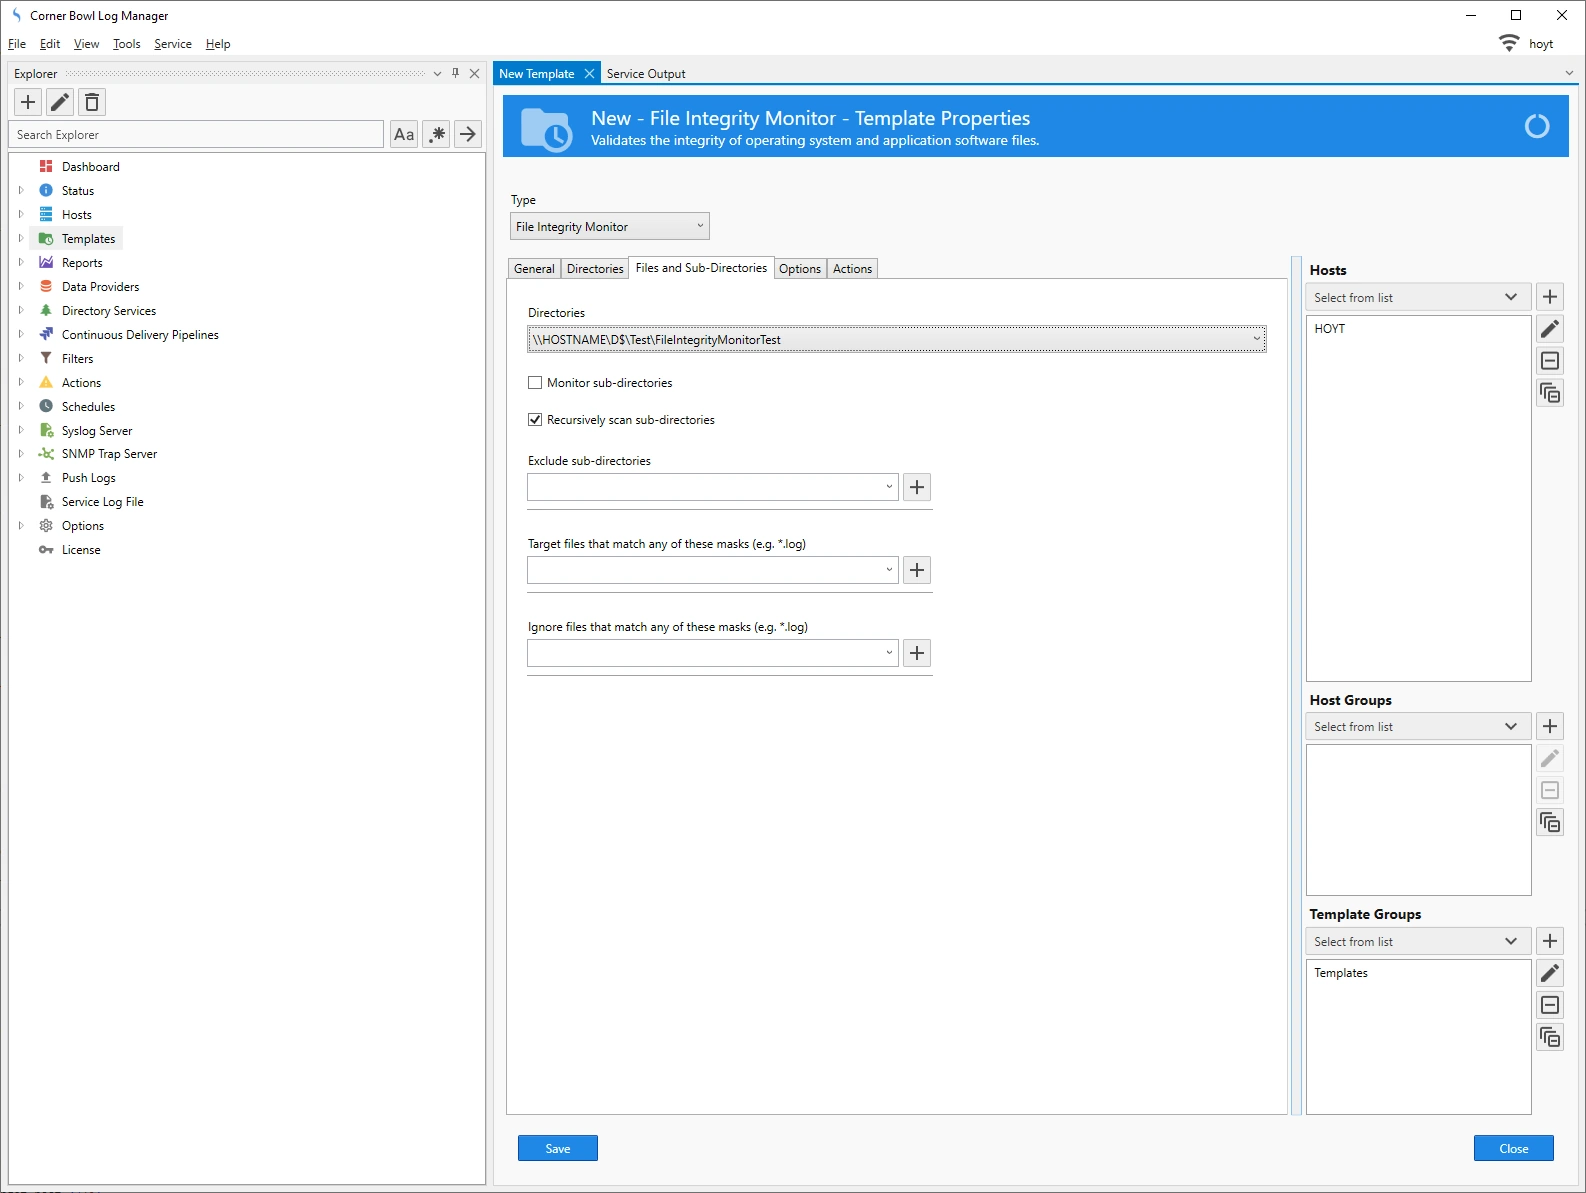
 - Next select the Files and Sub-Directories tab.
- You have option to Monitor Sub-directories which sets the trigger status on each sub-directory rather than the target directory.
- You have the option to Recursively scan sub-directories.
-
Then finally you can Exclude sub-directories, Target files that match masks and Ignore files that match masks.
 Select Files and Sub-Directories
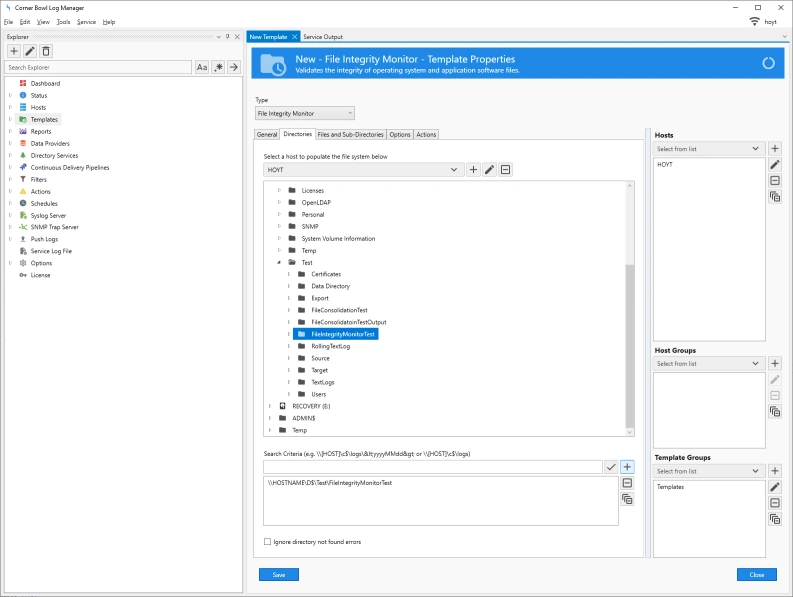
 - Next select the Options tab.
-
Use this tab to choose the options to check.
 OptionsPlease note the file attributes Read Only and Hidden along with Permissions are only supported when running against Windows Shares. All other options are supported by both Windows and Linux/Unix.
 - Next select the Actions tab
- Under the On Trigger drop down select the email action.
-
Finally, use the Hosts drop down to assign the target host then click Save.
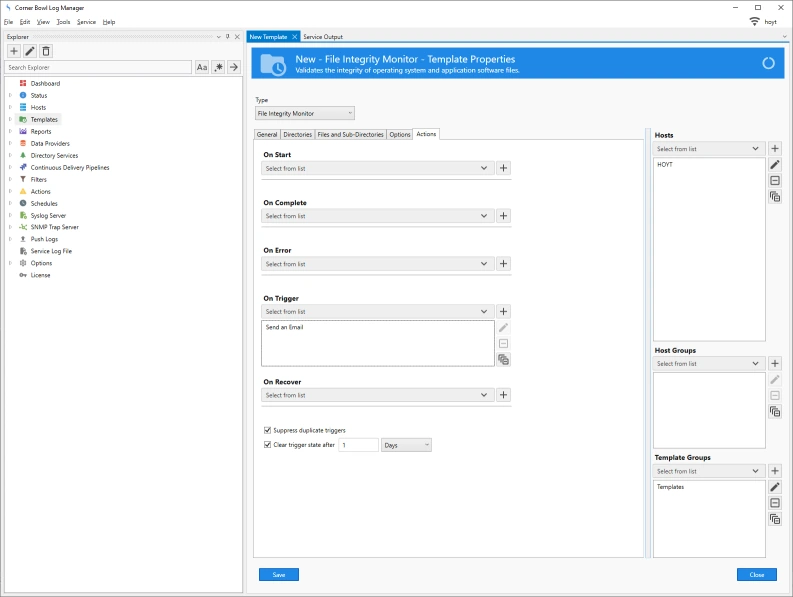 Actions and Host Assignment


Testing Baseline Scanning
- Now back in the Explorer view locate the template you just created, expand, right click on the target host then select Explore.
- In order to show this off I am going to manually run the template. This will create the baseline.
- To test the monitor is working, I am going to open notepad then make a change to my text file. Now if I run the monitor again, we can see the monitor triggers and we receive our email alert.
-
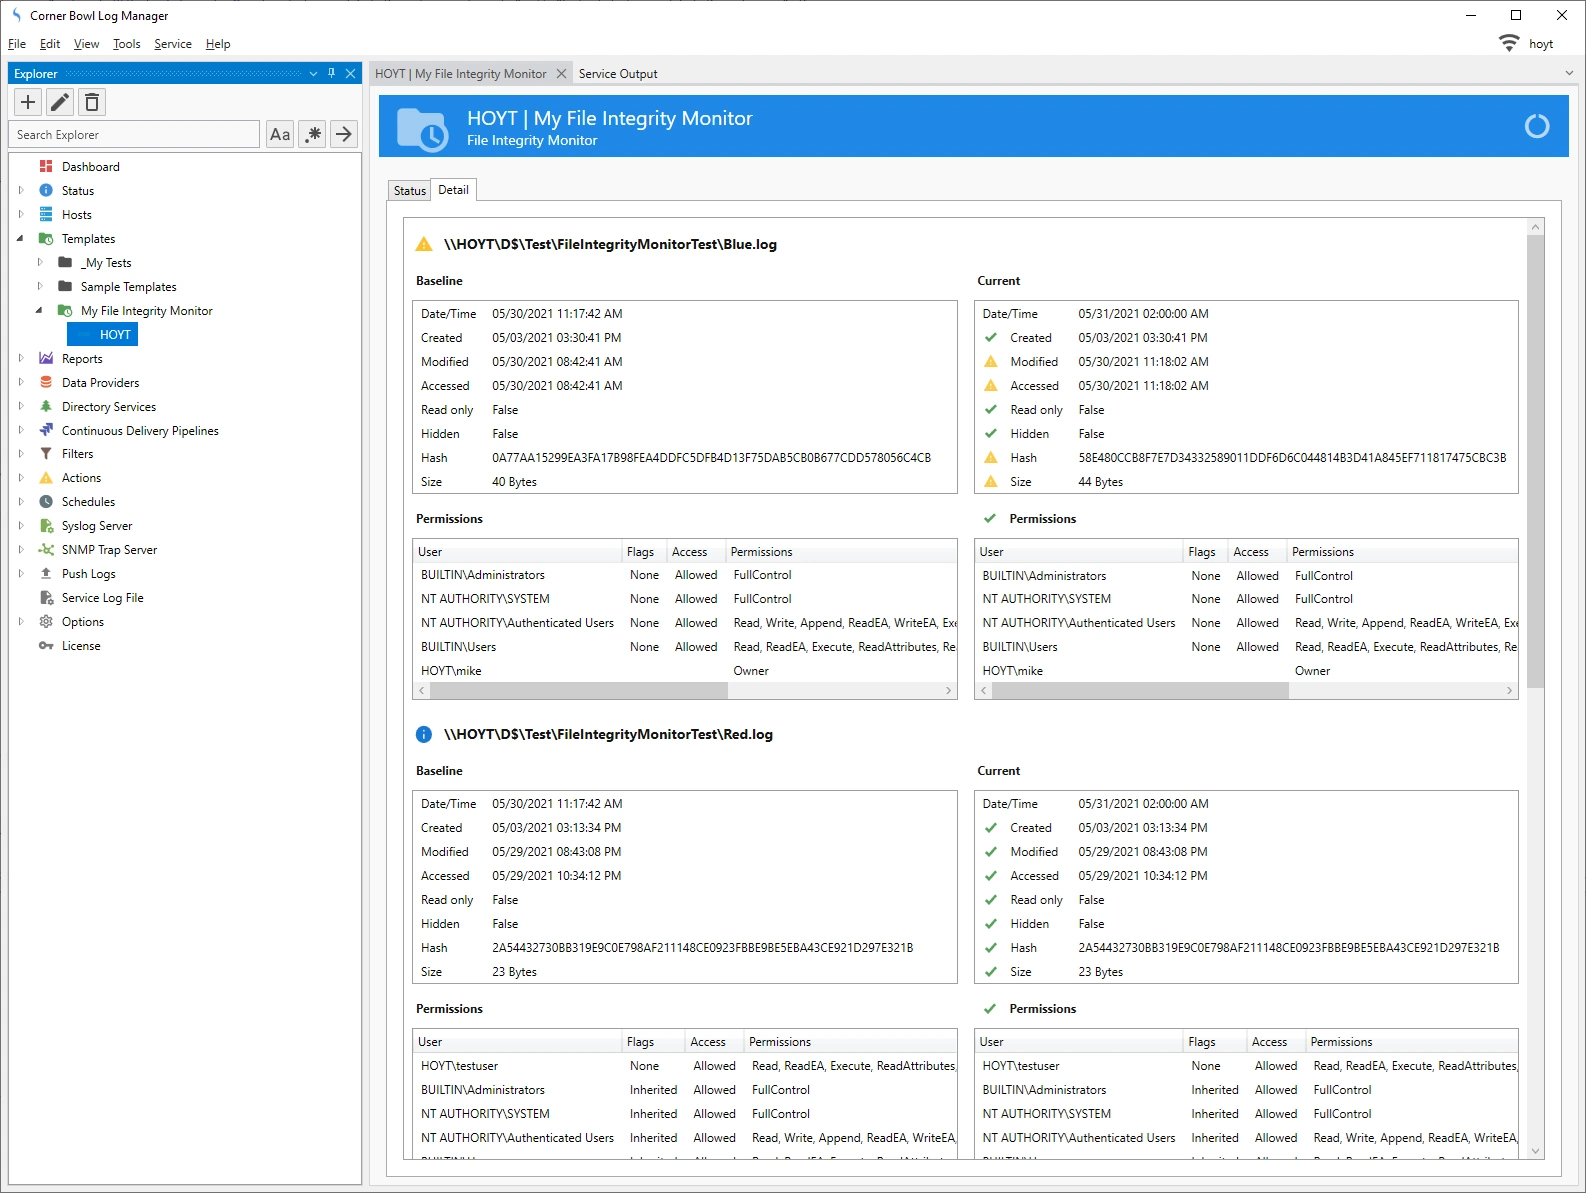
Back in the monitor status view, if I select the Detail tab we can see a
list of the files being monitored and the triggered items. In this case we can
see the accessed and modified date have been updated. The hash and file size has
also changed.
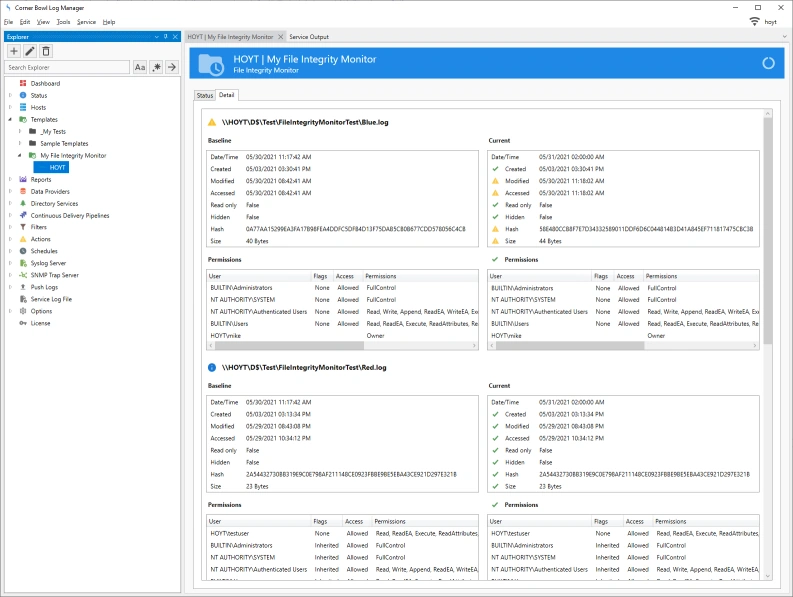 File Integrity Monitor Detail
Wrap-up
That's File Integrity Monitoring with Corner Bowl Software. Thank you for reading. I hope this has helped you better understand the File Integrity Monitoring capabilities of Corner Bowl Software.
Last Updated: March, 3rd 2024