IIS Log Consolidation, Monitoring and Reporting (Part 1)
June 17th, 2022
This is part 1 of a 3 part article set in which I will show you how to save IIS log entries to a SQL Server database with table columns for each field.
- In Part 2 I will show you how to monitor IIS logs in real-time to get notified when there is a 500 error.
- In Part 3 I will show you how to generate a daily report of 404 not found errors.
Important
This tutorial assumes you have already setup Corner Bowl Server Manager to save
all log entries to SQL Server and IIS is using the out-of-the-box configuration
which saves log entries to a daily rolling W3C file that contains the current
date within the filename.
Table of Contents
- How to Create the IIS Log Consolidation Template
- How to Run the Template on Demand
- How to Verify IIS Log Entries have been Saved to the Log Database
How to Create the IIS Log Consolidation Template
- From the Menu Bar, select File | New. The Create New Object View displays.
- From the Create New Object View, expand Template | Log Management then select Log Consolidation. The New Log Consolidation Template Properties View displays.
- From the New Log Consolidation Template Properties View, use the Sub type drop-down to select W3C. The Template Properties View now contains 7 tabs.
- Use the General Tab to specify a schedule. The default schedule is set to once a minute.
- Use the Files Tab to specify the file search criteria.
- Navigate to the directory that contains your IIS log files then select one of the files.
- Use the Search criteria text box to specify the date mask to search with. For IIS log files this is: <yyMMdd>. Replace the date with the date mask then click the Check Box button. The software displays a message showing today's file.
- Click the Add button to add the search criteria to the template.
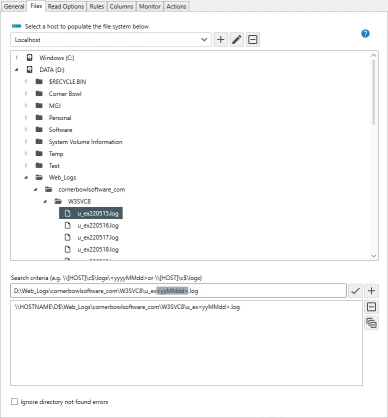 Selecting the IIS Log File
-
The Read Options Tab enables you to configure how to read the log file.
Use the Logical filename text box to specify the display name you
would like to use for this log. For example, MyIISWebSiteLog.
NoteSetting this value also configures the software to save each daily discovered IIS log file to the same database table, otherwise, a table is generated each day for the corresponding IIS log file.
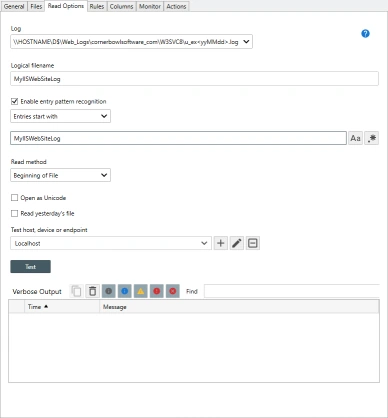 IIS Log File Read Options
 -
The Rules Tab enables you to configure the consolidation rules.
Use the Log Entry Retention Policy drop-down to select the retention policy.
NoteThe retention policy is another template that defines the number of days to retain in the Primary and Archive Log Databases, for example, archive entries older than 30 days and retain entries for 150 days for a total of 180 days.
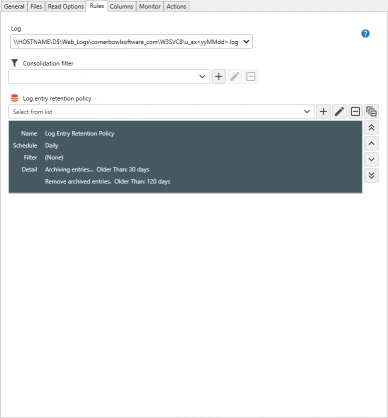 IIS Entry Retention Policy
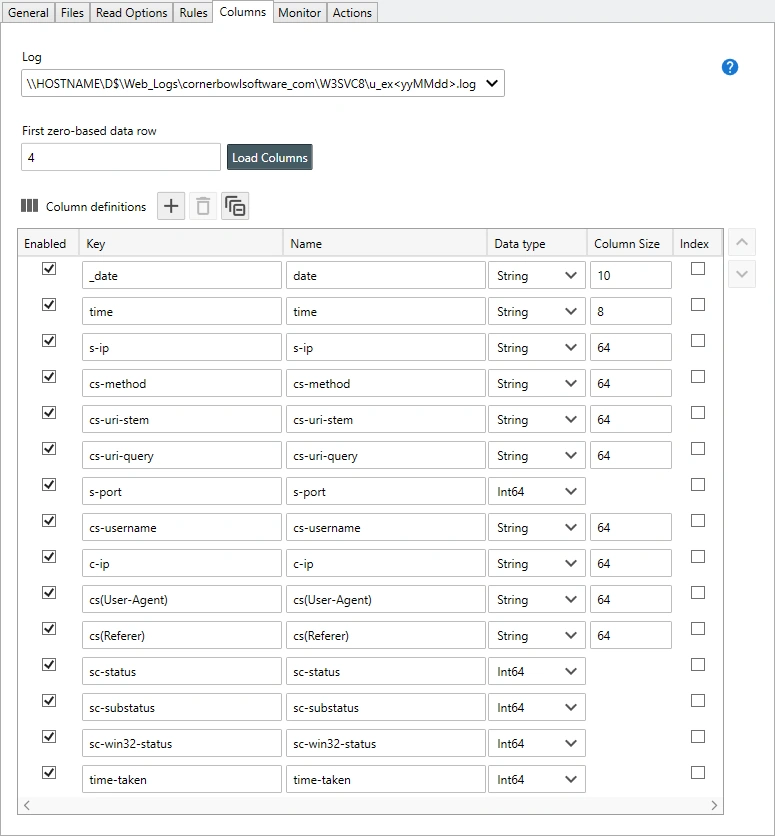
 - Use the Columns Tab to define the IIS log file database table columns.
- Click Load Columns. The Load Separated Values Columns Dialog displays and automatically loads the current IIS log file into the viewer.
- From the Viewer, click on the line that contains the column headers. The Column definitions view is populated with each data column.
NoteNotice the first column is labeled _date. Any discovered column name that is a reserved column name is pre-pended with an underscore.
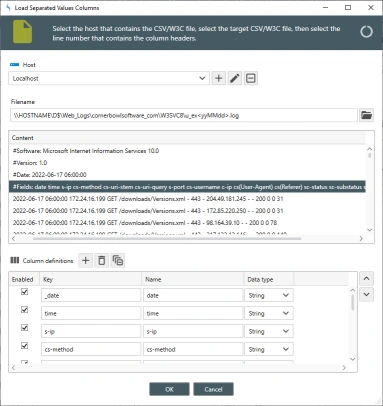 IIS Log Discovery
 - Click OK to apply the definitions to the template.
 IIS Log Column Definitions
- Select the General Tab, then click the Auto-Generate button to create a unique name.
- Click Save to save your changes.


How to Run the Templates on Demand
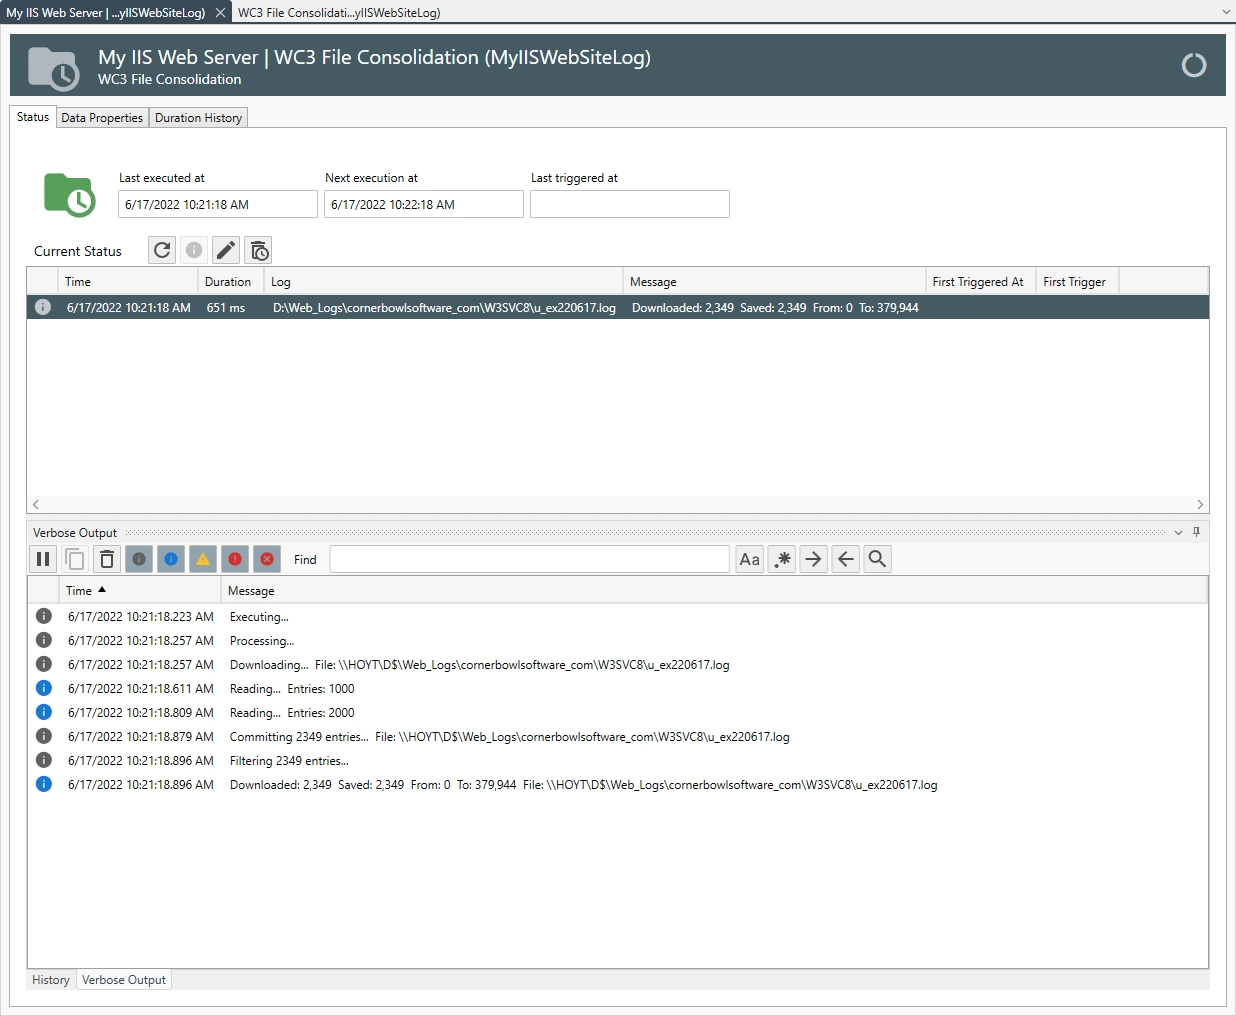
- From the Explorer View, expand Hosts then navigate to the target host, expand, right click on the new WC3 File Consolidation (u_ex<yyMMdd>.log) template then select Execute Verbose. The monitor is immediately queued for execution then the Monitor Status View displays.
- From the Monitor Status View you can see the status of the monitor.
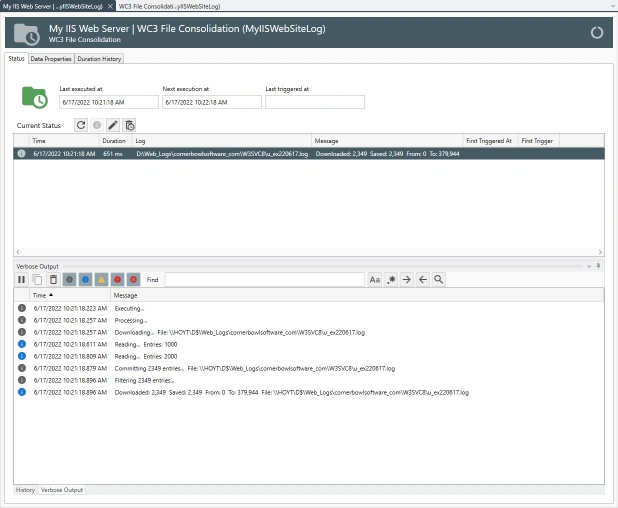 IIS Log Consolidation Status
How to Verify IIS Log Entries have been Saved to the Log Database
- From the Explorer View, expand Hosts then navigate to the target host, expand, right click on the WC3 File Consolidation (u_ex<yyMMdd>.log) template then select Explore. The Monitor Status View displays.
-
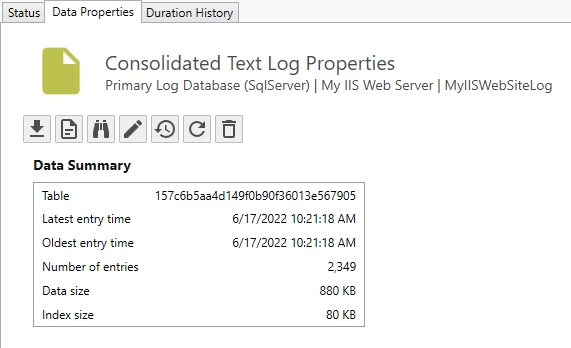
Select the Data Properties Tab. The Data Properties Tab displays
the name of the table, the date range, number of IIS log file entries saved to
the database and the size of the data in the database.
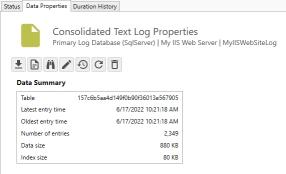 IIS Log Consolidation Data Properties
 - To view the saved IIS log files entries from the database, click the View Consolidated Log button. The Select Log Viewer Options Dialog displays.
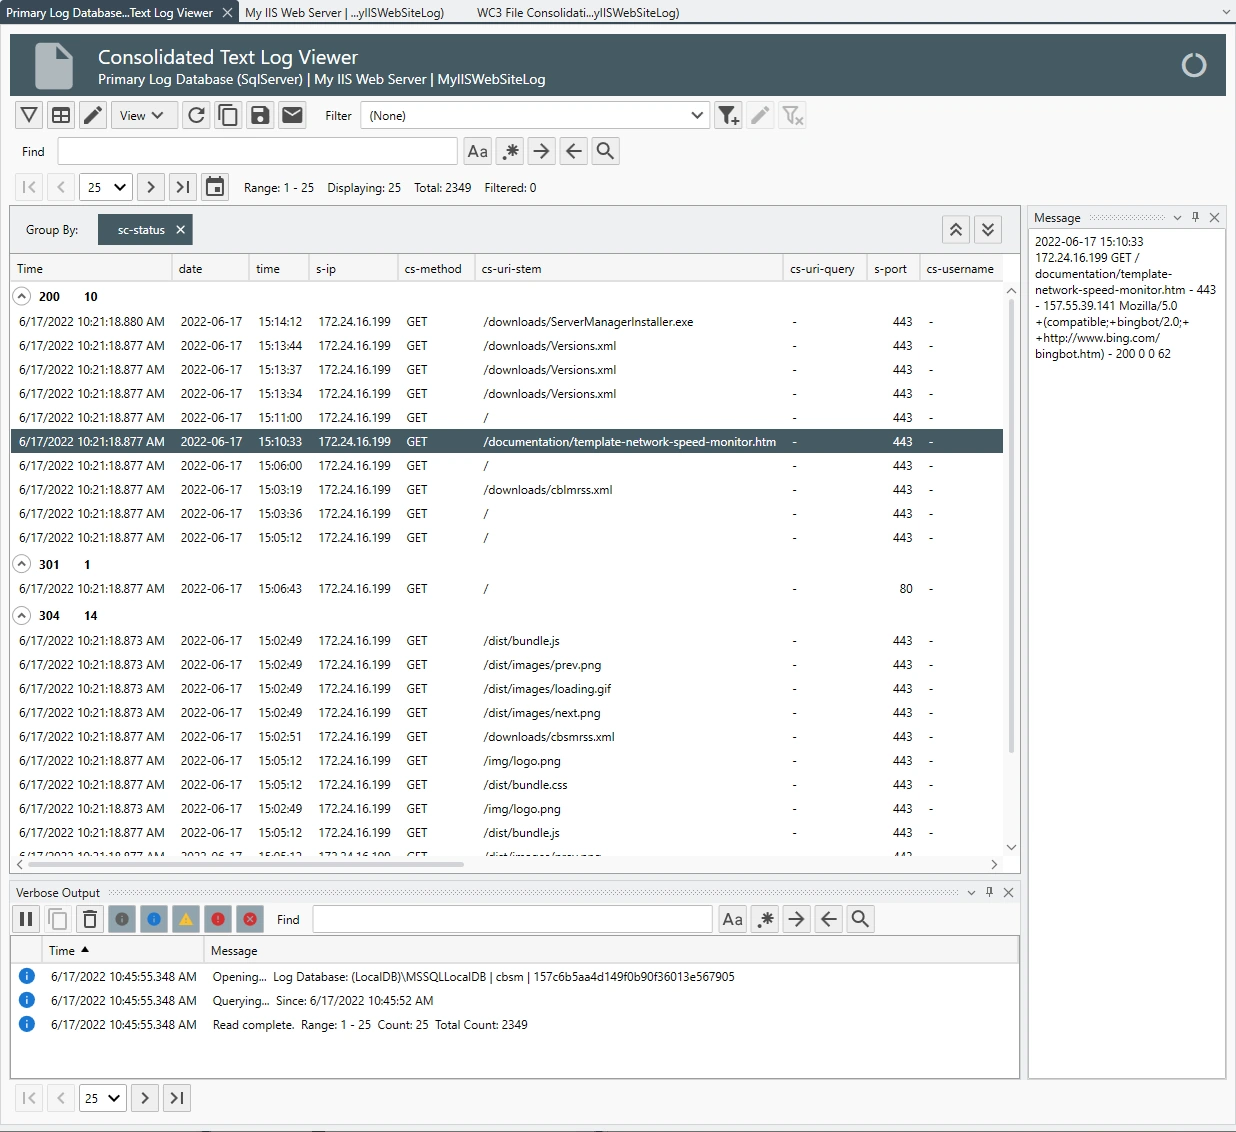
- Since IIS log files can be very large, select the Display 25 entries per page option then click OK. The Consolidated Text Log Viewer displays.
- From the Consolidated Text Log Viewer, notice we can see each of the columns previously defined.
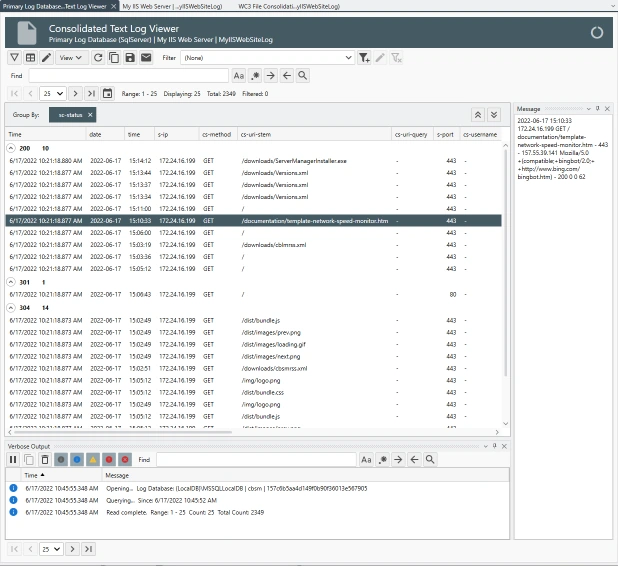 IIS Log Consolidation Viewer
 -
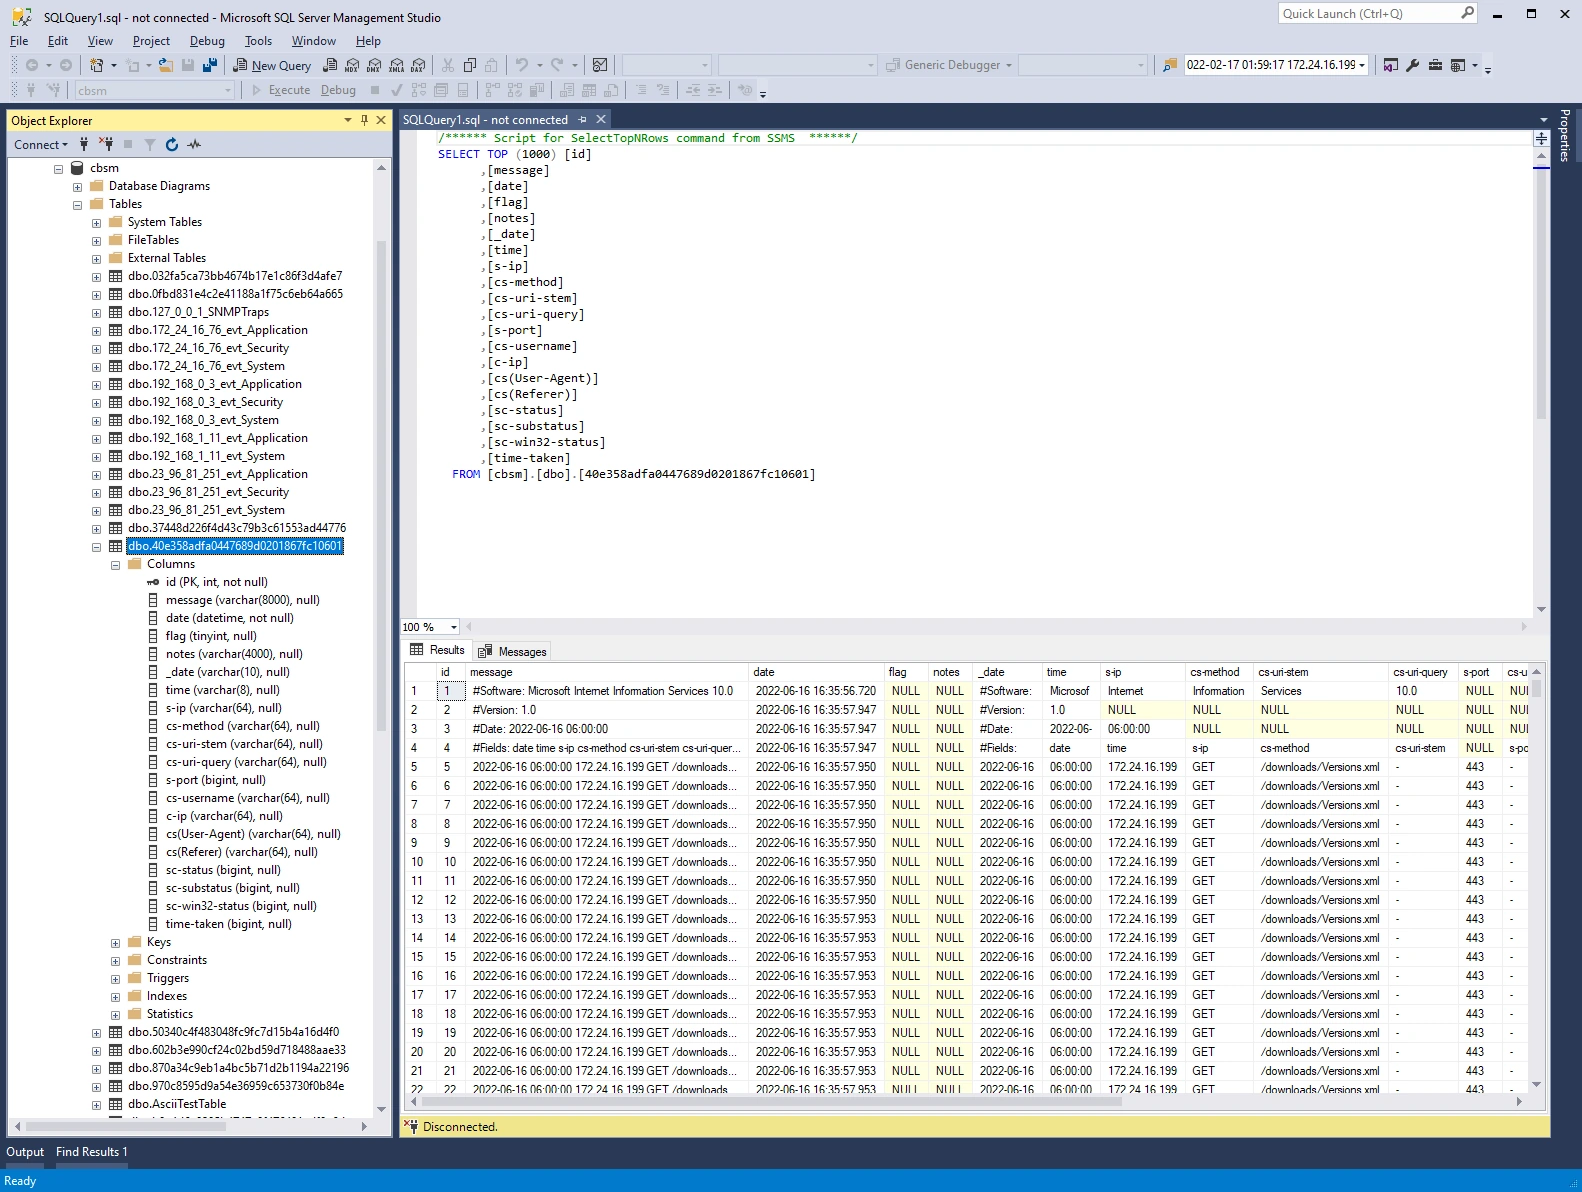
Open SQL Server Management Studio then find the table referenced in the Data
Properties Tab, right click then select Select Top 1000 Rows. The
Query Viewer is displayed and you can see each column previously defined
as well as the saved IIS log entries.
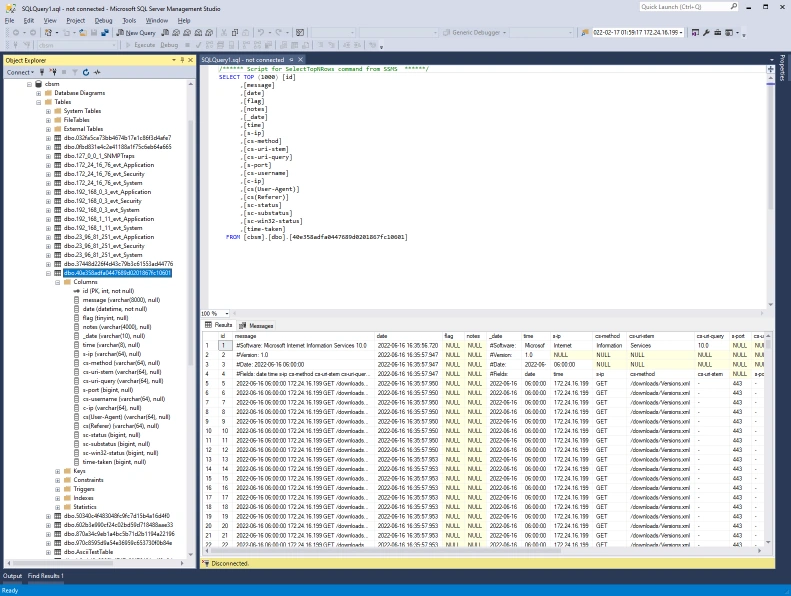 SQL Server Management Studio | IIS Log Entries
 - That's Part 1 of IIS Log Consolidation, Monitoring and Report. Please check back later for Part 2.
Last Updated: March, 3rd 2024