How to Monitor IIS Web Servers for Phishing Attacks
In this article I am going to show you how to get notified when there is an ongoing Phishing attack against an IIS webserver. Then, when a phishing attack is detected, how to include the client's IP address the attack is being executed from within the email notification subject.
This tutorial builds on-top of Parts 1, 2, and 3 of IIS Log Consolidation, Monitoring and Reporting. If you haven't already read or watched these tutorials, I suggest you read or watch them first.
Table of Contents
- Background
- How to Configure IIS Phishing Attack monitoring
- How to Configure an Email to Include an Attacker's IP Address
- How to Test the Phishing Attack Monitor
Background
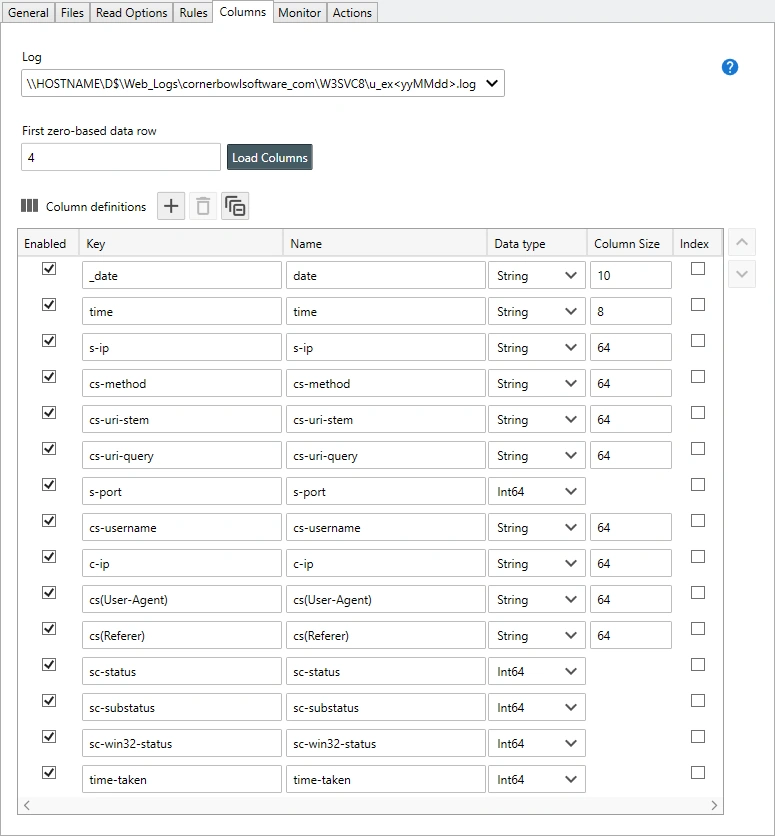
In Parts 1 of the tutorial series, we discovered the W3C IIS web server log file then loaded the definition of the file into Corner Bowl Server Manager. In this tutorial we will monitor the c-ip column, however any column can be monitored. Here's screenshot of the previous configuration we created:
How to Configure IIS Phishing Attack monitoring
- Find the W3C IIS Log File Consolidation Template created in the article and video series, then select Template Properties. The Template Properties View displays.
- From the Template Properties View, select the Monitor Tab.
- From the Rules control, click the Add
 button. A new line item is added to the Rules Table.
 - Use the Name text box to specify an informational name for the new rule, for example Phishing Attack.
- From the Rule drop-down, select Column Frequency. This tells the software to group entries by a specific column which we will configure in just a moment.
- Phishing attacks are typically exposed with 404 not found errors. Assign a filter to limit the entries to 404 not found errors. Once assigned, Server Manager only saves 404 log entries to memory. If you do not already have a 404 filter created, see Part 2 of IIS Log Consolidation Monitoring and Reporting.
- Set the Column Key to 'c-ip', which is the IIS log column that contains the client's IP address. Setting this value configures the software to group each unique client IP into a dictionary for frequency monitoring.
- Use the Frequency column to specify the frequency trigger, for example, >= 5 times in one minute. Adjust this value later to adjust for false positives.
- Use the State drop-down to configure the monitor to display a warning or critical state when triggered.
- Use the Actions drop-down to select the action to fire. Since we want to include the IP address in the subject, we need to create a new email Action (see below). Once you have created your new action, assign the action to your rule.
- Use the Trigger Limiter controls to limit the number of notifications over a period of time, for example 10 email notifications every hour.
-
Finally click Close, then when prompted click Yes to save your changes.
 Log Monitor Phishing Attack Rule

How to Configure an Email to Include an Attacker's IP Address
- To create a new email action that includes the IP address the attack is coming from, click the Add button. The New Action View displays.
- From the New Action View, use the Name text box to specify a unique name, for example Email - Phishing Attack.
- From the Type drop-down, select Email.
- Use the Recipients drop-down to select the various email addresses to send the notification.
-
Change the subject line to include the name of the log monitor rule and the IP address. To do that specify the following variable tags, for example:
{MONITOR_RULE_NAME} IP: {c-ip}
-
Click Close, then when prompted click Yes to save your changes.
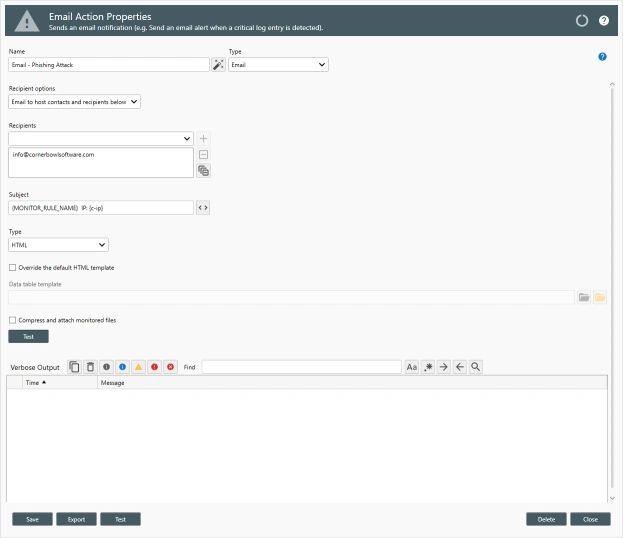 Phishing Attack Email Properties

How to Test the Phishing Attack Monitor
- To see the monitor in action, open an Internet Browser then manually trigger 5 404 not found errors by requesting a bogus page.
-
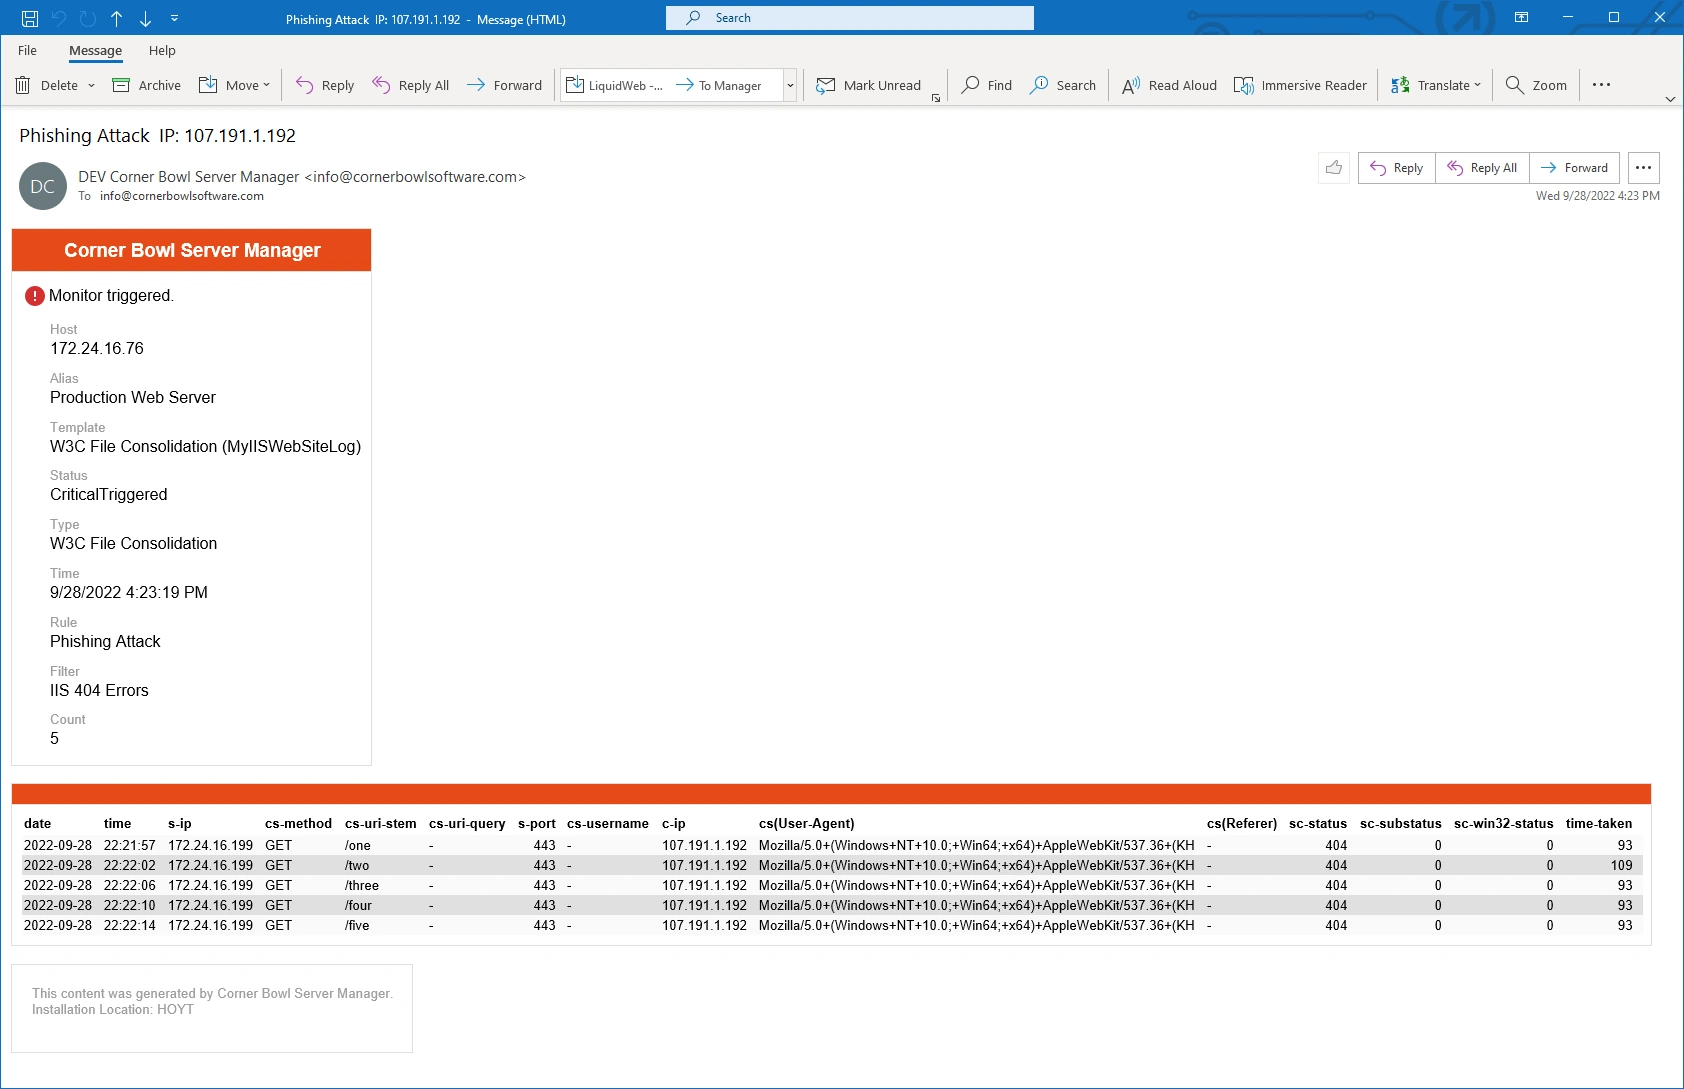
Once triggered, we see an email with the log monitor rule and attacking IP address in the email subject along with the HTTP requests the attacker requested.
 IIS Web Server Phishing Attack Email Notification
 - That's IIS Phishing Attack Monitoring with Corner Bowl Server Manager.